Description:
In this project we are building a Line Follower and Obstacle Avoiding Robot using Arduino. It is an automatic small car which follows a black line while avoiding obstacles. Here, the line detection is done by IR Sensors and Ultrasonic Sensor is attached to the servo motor which detects obstacles. All the sensors and motors are controlled by Arduino UNO and L293D Motor Driver Bridge. Note: This project is based on motor control along with detection. So it will take few to many many trial and errors until the car works good.
Circuit Diagram:

Components:
| SR. NO. | COMPONENT | PINOUT DIAGRAM | BUY |
|---|---|---|---|
| 1 | Arduino UNO (Other Arduinos can be used too) | Arduino UNO Pinout Diagram⇗ | |
| 2 | L293D Motor Driver Shield for Arduino UNO | ||
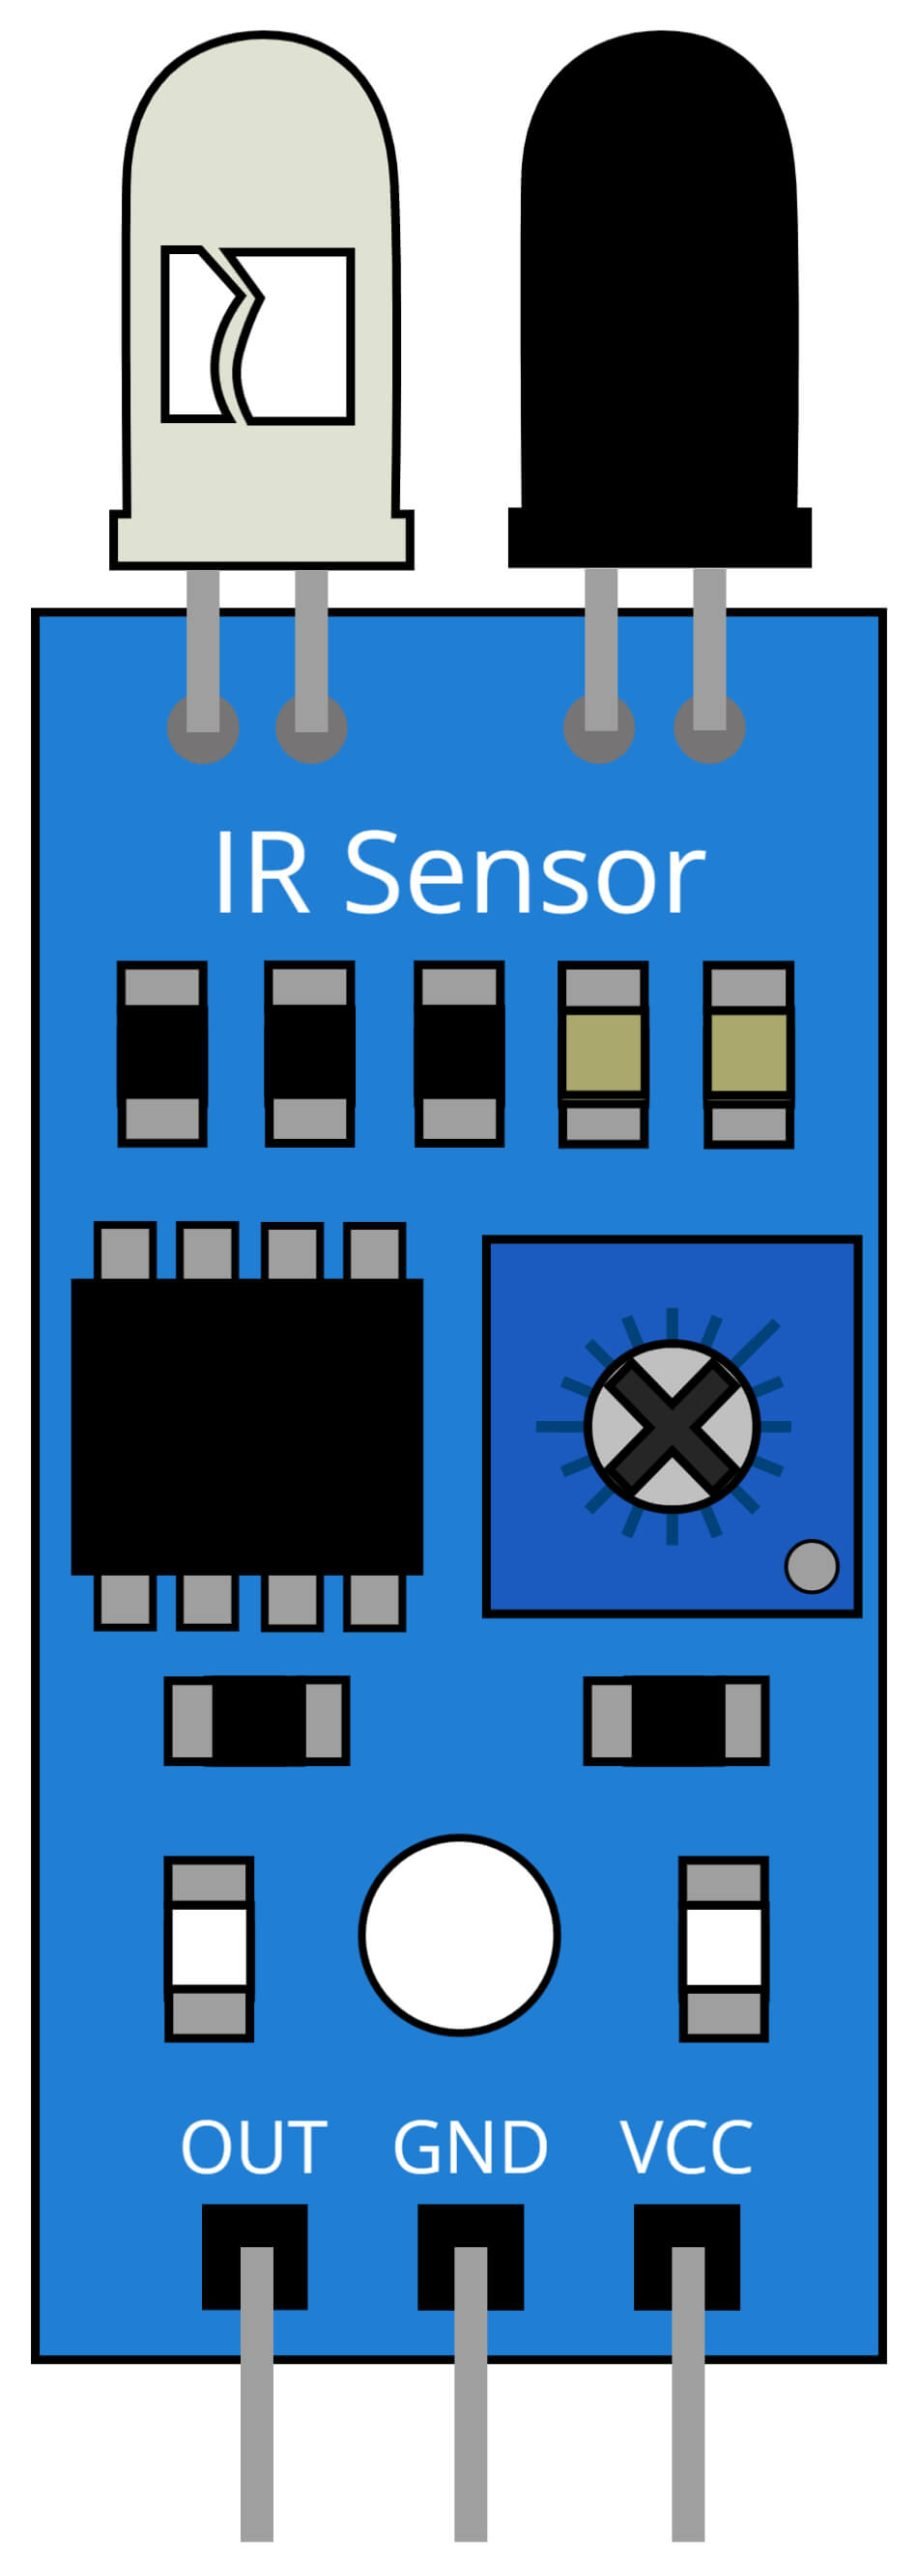
| 3 | IR Sensor x 2 | ||
| 4 | HC-SR04 Ultrasonic Sensor | ||
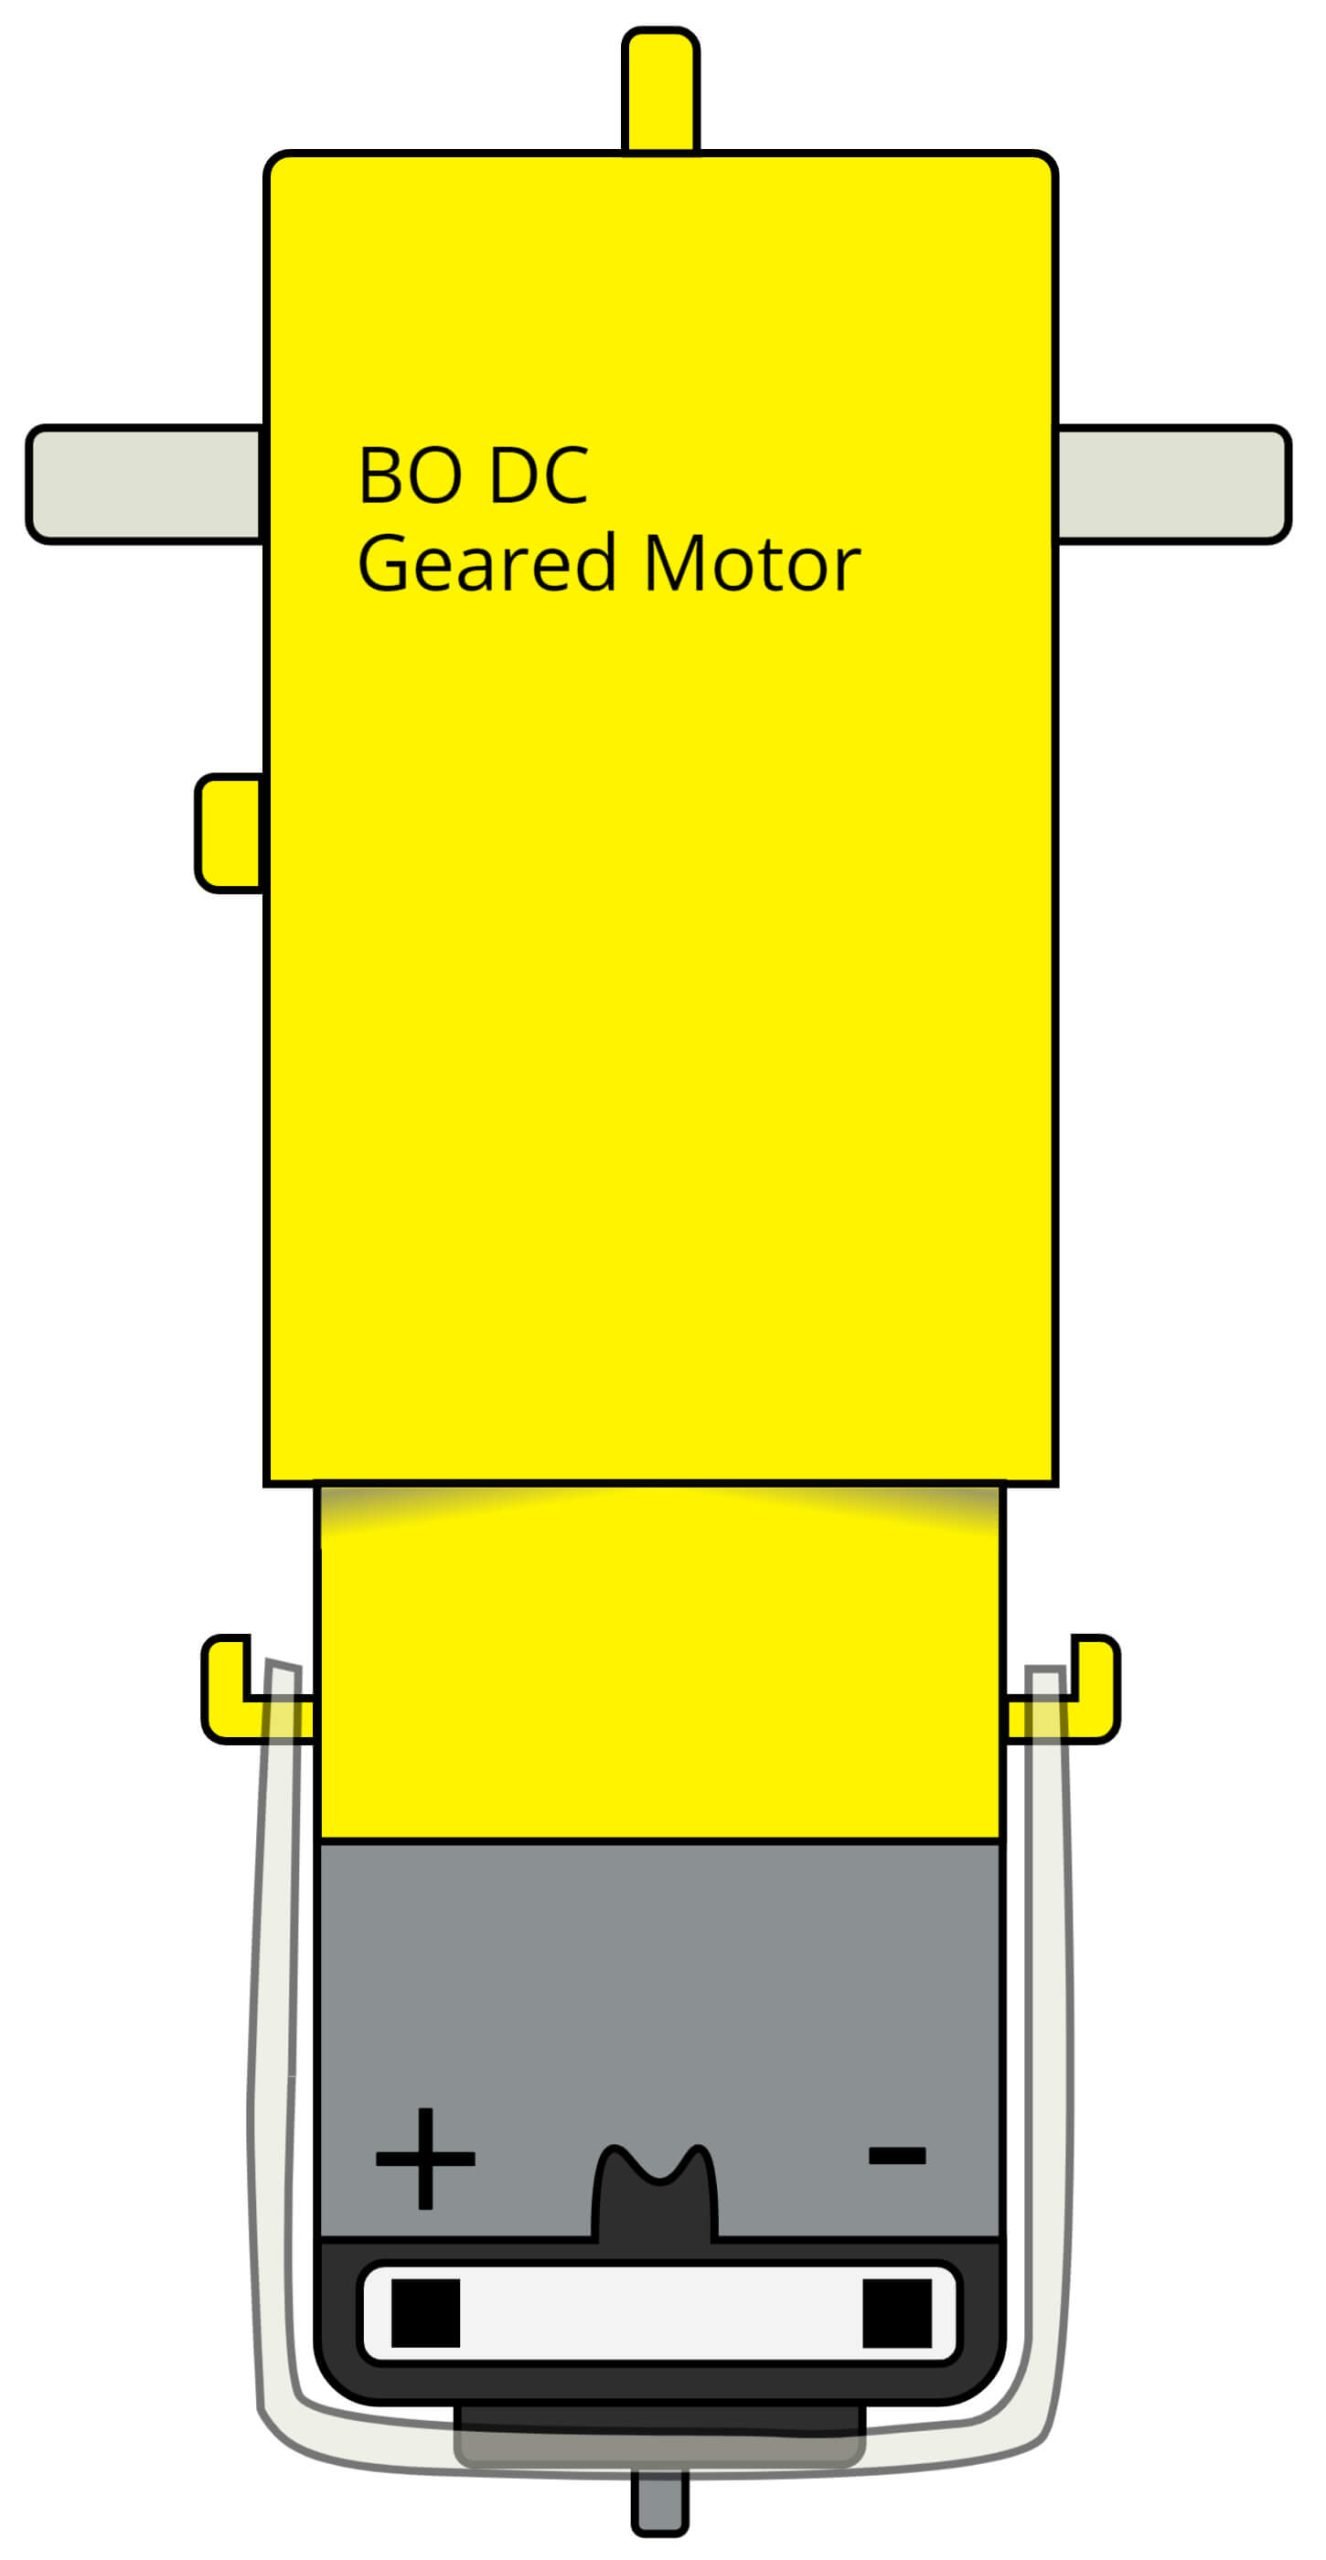
| 5 | 4 x BO DC Motors with gear box (OR) 4 x 12V DC Gear Motor | ||
| 6 | 12V Battery (OR) 12V 1 amp Adapter/Charger | ||
| 7 | SG90 Servo Motor |
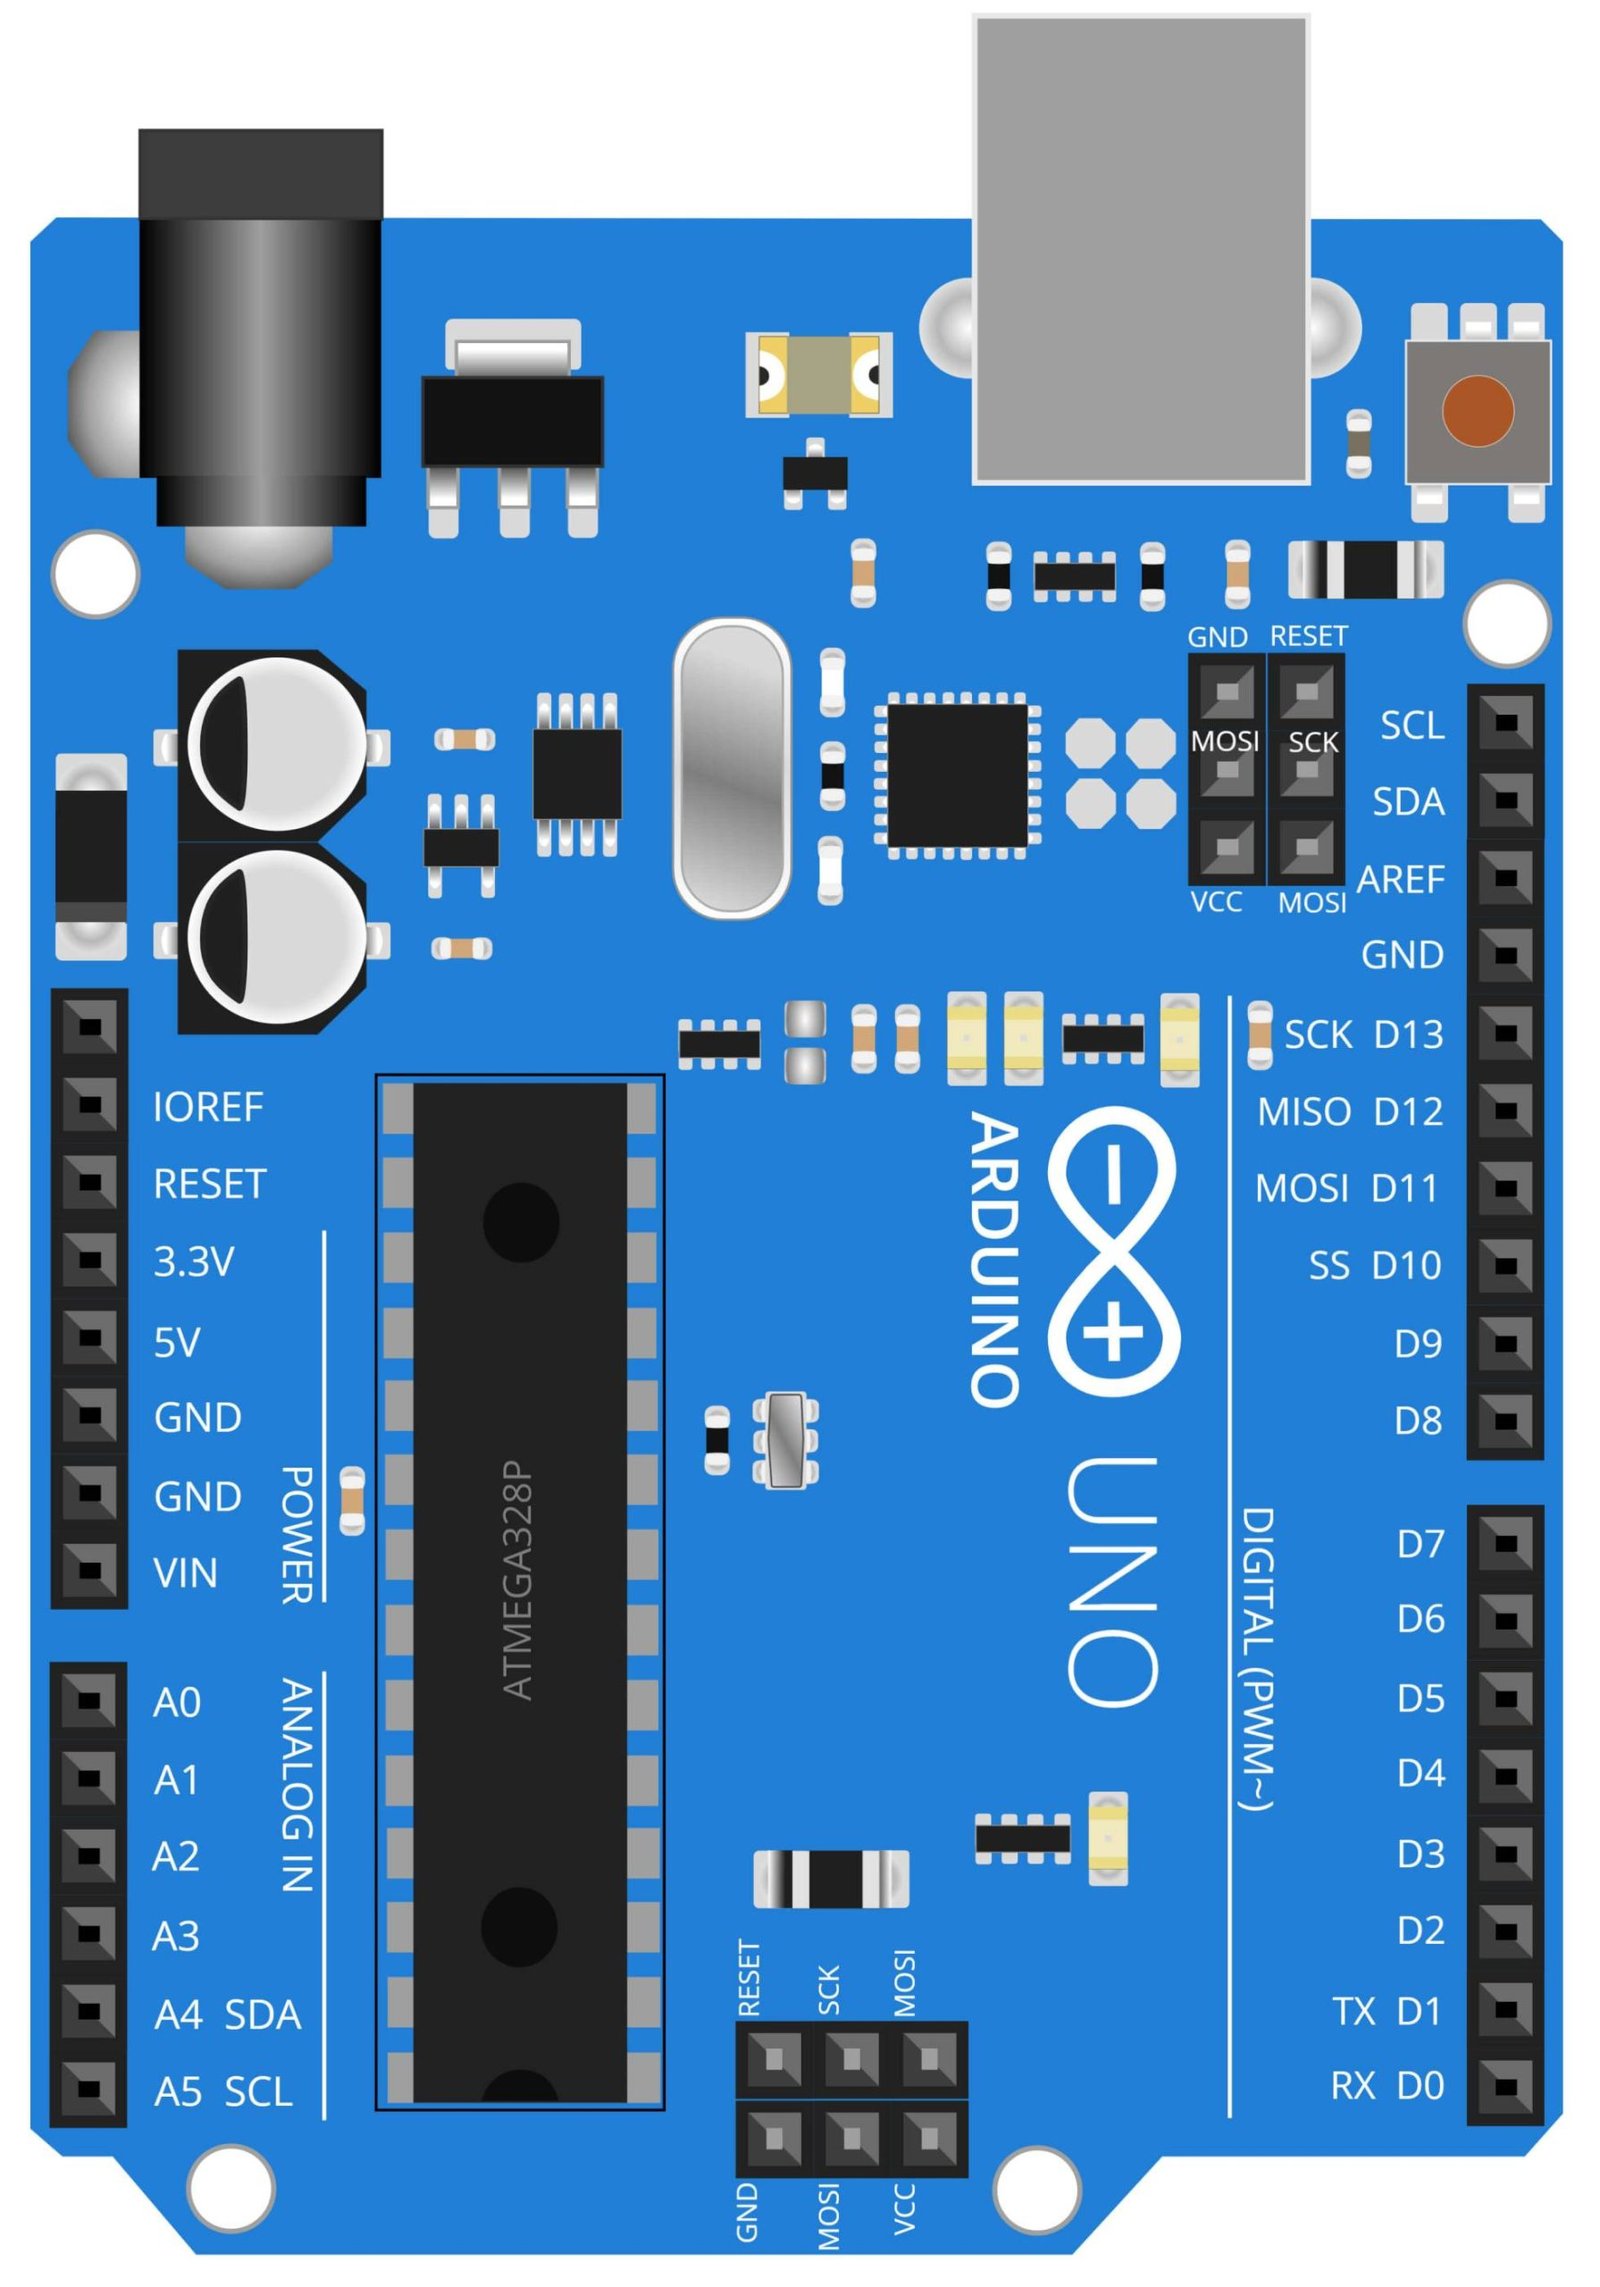
Arduino UNO
The Arduino UNO is a microcontroller board based on the ATmega328P. It is an open-source platform that allows for easy programming and prototyping of electronic projects. In this project, the IR Sensor and Ultrasonic Sensor,” the Arduino UNO serves as the brain of the robot car, controlling the movement of the motors and processing the sensor data. The Arduino UNO reads the input from the IR sensors, which are used for line following, and Ultrasonic sensor, which is used for obstacle detection and avoidance. Based on the sensor input, the Arduino UNO sends the appropriate signals to the motors to control the robot’s movement. The Arduino UNO provides the flexibility and ease of use needed for this type of project, and similar projects in the field of robotics and automation.
IR Sensor
An Infrared (IR) sensor is a device that detects the presence of IR radiation. IR sensors are commonly used in a variety of applications, including remote controls, object detection, and line following. In this project, the IR Sensor and Ultrasonic Sensor,” the IR sensors are used to detect the presence of a black line on a white surface. The robot car follows the line using the information provided by the IR sensors. The IR sensor has an IR LED that emits infrared light and a photodiode that detects the reflected light. When the IR LED emits light, it reflects back from the surface and the photodiode detects the reflected light. Depending on the reflectivity of the surface, the amount of light detected by the photodiode varies, and this variation is used to determine whether the robot is on the line or not. The use of IR sensors in this project makes the robot car capable of following a line with high precision and accuracy.
BO DC Geared Motor
A BO DC Geared Motor is a type of DC motor that is equipped with a gear reduction system. This type of motor is characterized by its high torque and low speed output. In this project, the BO DC Geared Motor is used to power the wheels of the robot car. The geared motor provides a high torque output that is needed to move the robot car, while the low speed output allows for precise control of the robot’s movement. The motors are controlled by the Arduino UNO microcontroller which sends the appropriate signals to the motor driver to control the speed and direction of the motors. The use of BO DC Geared Motors in this project provides a simple and efficient way to control the robot’s movement, and allows for smooth and accurate navigation of the robot car.
Steps and Info:
1. Get correct components as given. You can buy online or offline. I buy electronics components mostly from Amazon.
2. Start connecting the components. If you are new to connecting components in an electronic circuit, then use a Breadboard or you can straight up make connections using Jumper wires but it will create problem when there will be two or more connections needed at one pin (for example two or more different sensors 5V connection to Arduino’s 5V pin). But before soldering components on a PCB or printing a PCB for your circuit, better try using breadboard so that any errors and mistakes can be observed on breadboard and not after soldering. Or do connections in your way.
3. Now after building the circuit, download the Arduino IDE from https://www.arduino.cc/ website.
4. If you are new to Arduino IDE software, then watch this video we made specially for beginners about Arduino IDE.
5. If you know Arduino IDE then straight up copy the code we given and paste it into the Arduino IDE sketch.
6. Connect the Arduino to your Computer/device. Select a proper port, proper Arduino type and whatever other settings are. Here it is Arduino UNO. (If you don’t know what this all is then watch our video: ).
7. Compile the code and Upload it.
8. If any error occurs then try to troubleshoot it by finding/copy-pasting it into our Solve Errors page https://electronicsprojects.in/solve-errors/, or you can straight up paste the error on Internet and you know the rest. Also check if there are no spelling/syntax errors in the code. Compile the code again once to check if errors are fixed. I have given proper connections and code but still nothing is perfect.
9. Once code compiles and uploads smoothly, you can start testing the working of your circuit/project.
10. Now you will need the chassis and wheels for the car. I have given some links down below where you can download 3D printable car model for this project. You can also buy a kit online, I guess there are kits available which are related to this project. I found some on Amazon, I didn’t given link but you can search it. Also you can simply build a chassis and wheels by hard cardboard.
11. As this project is based on motor control, so it will make you do lots of trial and error. These are some of the errors:
A. Car wheels moving in different directions: 1. Check connections of motors to the bridge. 2. Remove and change motor direction in various ways.
B. IR Sensors are not detecting the black line: 1. Don’t use shiny black line, such has those tapes which are used to seal open electric wires. 2. Change and Adjust IR Sensor range by adjusting the potentiometer on the sensor.
C. Ultrasonic Sensor not detecting or moving like mad: 1. Check connections. 2. Try to adjust distance and movement of servo in the program or just adjust the shaft of servo.
D. Car is not moving on the line properly or only detects the line when car is slow: 1. Again check IR Sensor Distance. 2. Adjust the program code.
12. If you get any other problem or want to correct some error which you solved it from your side, then it will be very helpful if you shared with us.
13. If things don’t work then check connections, code, motors and sensors. Also you can talk with me and the community through discord. All the links to social is given at the right side of this page.
Program Code:
/* https://www.electronicsprojects.in Line Follower and Obstacle Avoiding Robot using Arduino, IR Sensor and Ultrasonic Sensor */

#include <NewPing.h>
#include <Servo.h>
#include <AFMotor.h>

#define TRIGGER_PIN A1
#define ECHO_PIN A0
#define max_distance 50

#define irLeft A5
#define irRight A4

#define MAX_SPEED 200
#define MAX_SPEED_OFFSET 20

Servo servo;

NewPing sonar(TRIGGER_PIN, ECHO_PIN, max_distance);

AF_DCMotor motor1(1, MOTOR12_1KHZ);
AF_DCMotor motor2(2, MOTOR12_1KHZ);
AF_DCMotor motor3(3, MOTOR34_1KHZ);
AF_DCMotor motor4(4, MOTOR34_1KHZ);


int distance = 0;
int leftDistance;
int rightDistance;
boolean object;

void setup() {
  Serial.begin(9600);
  pinMode(irLeft, INPUT);
  pinMode(irRight, INPUT);
  servo.attach(10);
  servo.write(90);

  motor1.setSpeed(120);
  motor2.setSpeed(120);
  motor3.setSpeed(120);
  motor4.setSpeed(120);
}

void loop() {
  if (digitalRead(irLeft) == 0 && digitalRead(irRight) == 0 ) {
    objectAvoid();
    //forword
  }
  else if (digitalRead(irLeft) == 0 && digitalRead(irRight) == 1 ) {
    objectAvoid();
    Serial.println("TL");
    //leftturn
    moveLeft();
  }
  else if (digitalRead(irLeft) == 1 && digitalRead(irRight) == 0 ) {
    objectAvoid();
    Serial.println("TR");
    //rightturn
    moveRight();
  }
  else if (digitalRead(irLeft) == 1 && digitalRead(irRight) == 1 ) {
    //Stop
    Stop();
  }
}

void objectAvoid() {
  distance = getDistance();
  if (distance <= 15) {
    //stop
    Stop();
    Serial.println("Stop");

    lookLeft();
    lookRight();
    delay(100);
    if (rightDistance <= leftDistance) {
      //left
      object = true;
      turn();
      Serial.println("moveLeft");
    } else {
      //right
      object = false;
      turn();
      Serial.println("moveRight");
    }
    delay(100);
  }
  else {
    //forword
    Serial.println("moveforword");
    moveForward();
  }
}

int getDistance() {
  delay(50);
  int cm = sonar.ping_cm();
  if (cm == 0) {
    cm = 100;
  }
  return cm;
}

int lookLeft () {
  //lock left
  servo.write(150);
  delay(500);
  leftDistance = getDistance();
  delay(100);
  servo.write(90);
  Serial.print("Left:");
  Serial.print(leftDistance);
  return leftDistance;
  delay(100);
}

int lookRight() {
  //lock right
  servo.write(30);
  delay(500);
  rightDistance = getDistance();
  delay(100);
  servo.write(90);
  Serial.print("   ");
  Serial.print("Right:");
  Serial.println(rightDistance);
  return rightDistance;
  delay(100);
}
void Stop() {
  motor1.run(RELEASE);
  motor2.run(RELEASE);
  motor3.run(RELEASE);
  motor4.run(RELEASE);
}
void moveForward() {
  motor1.run(FORWARD);
  motor2.run(FORWARD);
  motor3.run(FORWARD);
  motor4.run(FORWARD);
}
void moveBackward() {
  motor1.run(BACKWARD);
  motor2.run(BACKWARD);
  motor3.run(BACKWARD);
  motor4.run(BACKWARD);

}
void turn() {
  if (object == false) {
    Serial.println("turn Right");
    moveLeft();
    delay(700);
    moveForward();
    delay(800);
    moveRight();
    delay(900);
    if (digitalRead(irRight) == 1) {
      loop();
    } else {
      moveForward();
    }
  }
  else {
    Serial.println("turn left");
    moveRight();
    delay(700);
    moveForward();
    delay(800);
    moveLeft();
    delay(900);
    if (digitalRead(irLeft) == 1) {
      loop();
    } else {
      moveForward();
    }
  }
}
void moveRight() {
  motor1.run(BACKWARD);
  motor2.run(BACKWARD);
  motor3.run(FORWARD);
  motor4.run(FORWARD);
}
void moveLeft() {
  motor1.run(FORWARD);
  motor2.run(FORWARD);
  motor3.run(BACKWARD);
  motor4.run(BACKWARD);
}