Description:
Ultrasonic Range Finder is a device used to measure distance without any traditional device such as tape measure, etc. This device can measure distance from any object precisely and is also easy to use. Here we are using HC-SR04 Ultrasonic Sensor which will detect the distance and output can be seen on 16×2 LCD Display. And we are using Arduino UNO.
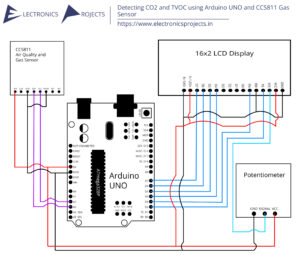
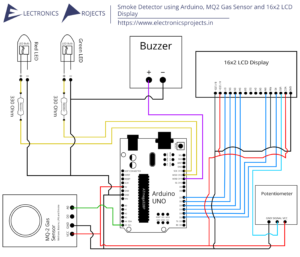
Circuit Diagram:

Components:
| SR. NO. | COMPONENT | PINOUT DIAGRAM | BUY |
|---|---|---|---|
| 1 | Arduino UNO (Other Arduinos can be used too) | Arduino UNO Pinout Diagram⇗ | |
| 2 | HC-SR04 Ultrasonic Sensor | ||
| 3 | 16×2 LCD Display | ||
| 4 | 10K Ohm Potentiometer |
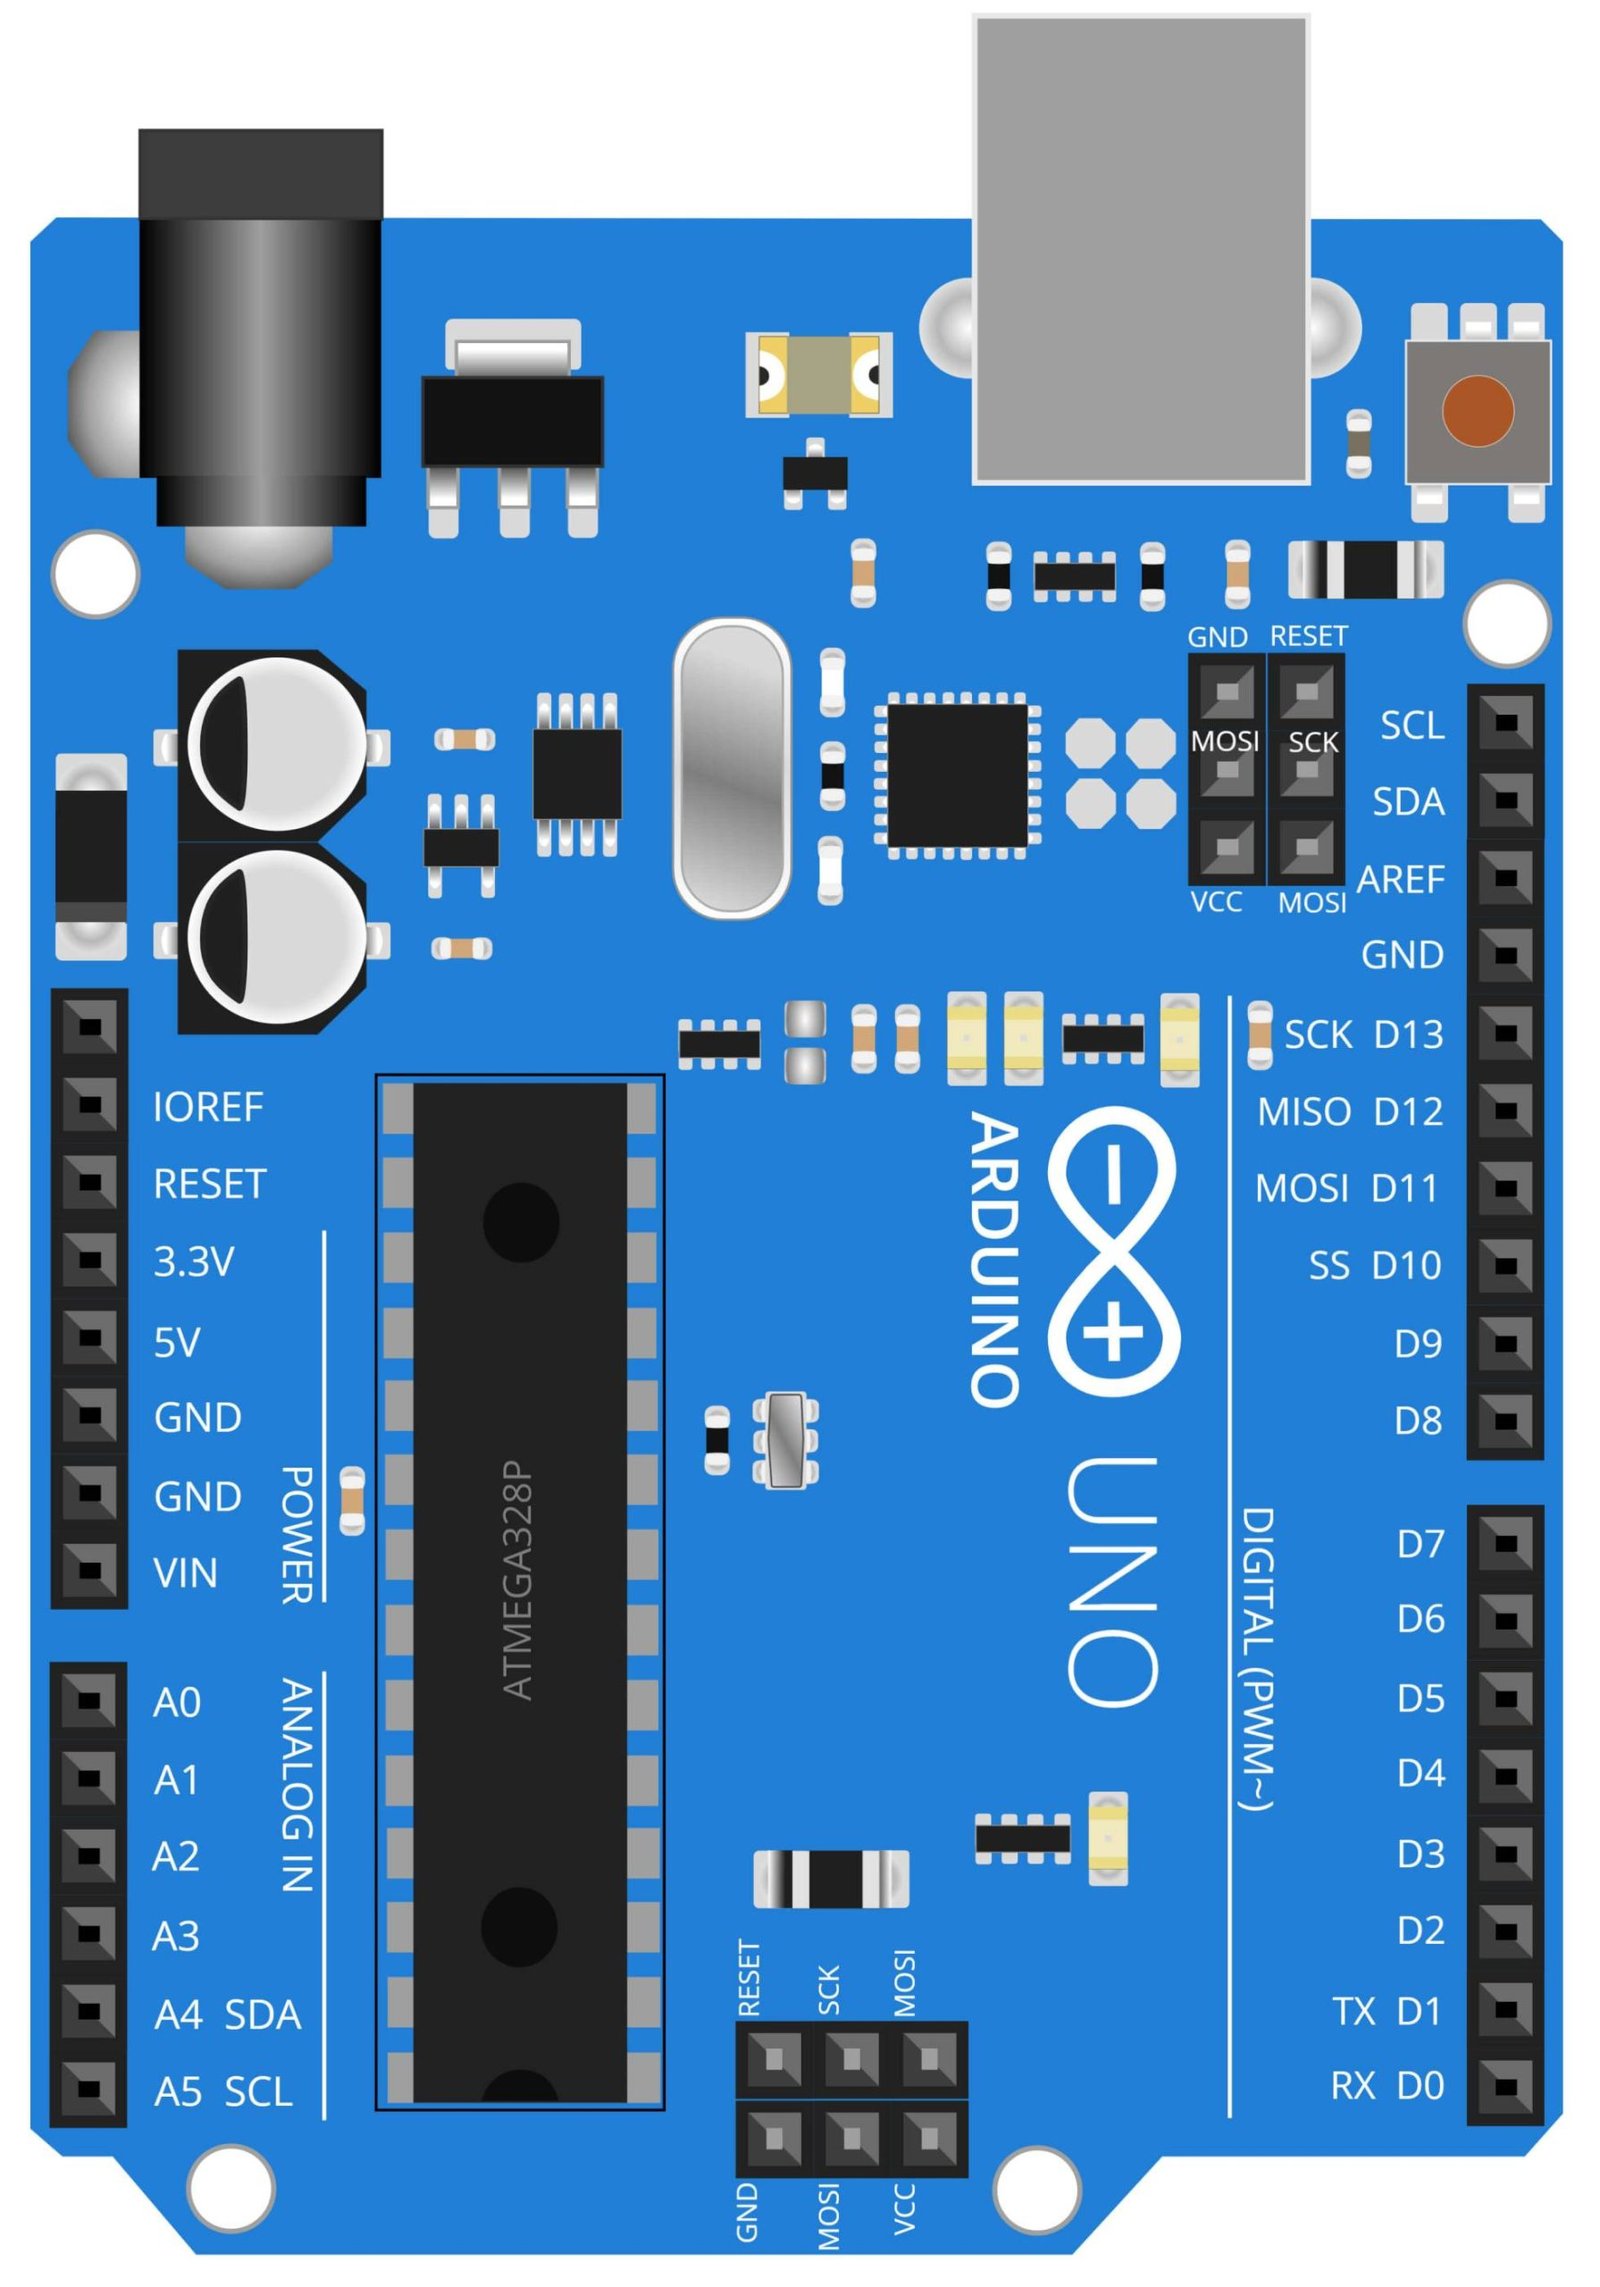
Arduino UNO
The Arduino UNO is a microcontroller board that is widely used in a variety of DIY projects, including an ultrasonic range finder. It is based on the ATmega328P microcontroller and can be programmed using the Arduino IDE, which allows for easy and quick development of projects. In the context of an ultrasonic range finder, the Arduino UNO is used to process signals received from the HC-SR04 Ultrasonic sensor and display the distance on a 16×2 LCD display. The Arduino UNO sends out a signal to the HC-SR04 sensor, which then sends out an ultrasonic sound wave, and receives the reflected signal. The Arduino UNO then uses this information to calculate the distance to an object and displays it on the 16×2 LCD display. The Arduino UNO has a variety of input and output pins that allow it to interface with different sensors and actuators, such as the HC-SR04 Ultrasonic sensor and the 16×2 LCD display. This makes it an ideal solution for creating an ultrasonic range finder that is accurate and easy to use.
Steps and Info:
1. Get correct components as given. You can buy online or offline. I buy electronics components mostly from Amazon.
2. Start connecting the components. If you are new to connecting components in an electronic circuit, then use a Breadboard or you can straight up make connections using Jumper wires but it will create problem when there will be two or more connections needed at one pin(for example two or more different sensors 5V connection to Arduino’s 5V pin). But before soldering components on a PCB or printing a PCB for your circuit, better try using breadboard so that any errors and mistakes can be observed on breadboard and not after soldering. Or do connections in your way.
3. Now after building the circuit, download the Arduino IDE from https://www.arduino.cc/ website.
4. If you are new to Arduino IDE software, then watch this video we made specially for beginners about Arduino IDE.
5. If you know Arduino IDE then straight up copy the code we given and paste it into the Arduino IDE sketch.
6. Connect the Arduino to your Computer/device. Select a proper port, proper Arduino type and whatever other settings are. Here it is Arduino UNO. (If you don’t know what this all is then watch our video: ).
7. Compile the code and Upload it.
8. If any error occurs then try to troubleshoot it by finding/copy-pasting it into our Solve Errors page https://electronicsprojects.in/solve-errors/, or you can straight up paste the error on Internet and you know the rest. Also check if there are no spelling/syntax errors in the code. Compile the code again once to check if errors are fixed. I have given proper connections and code but still nothing is perfect.
9. Once code compiles and uploads smoothly, you can start testing the working of your circuit/project.
10. This project is pretty simple and straight forward. Just keep your hand near the tranducers of the Ultrasonic sensor and move the hand away/close to the sensor. You will see distance between the sensor and your hand in centimeters and meters on the 16×2 LCD display. If it doesn’t, then check wire connections and code. Also if the 16×2 LCD displays some alien language then try to change wires connected to the LCD and Arduino or change the connection numbers in the code.
Program Code:
/* https://electronicsprojects.in Ultrasonic Range Finder using Arduino UNO, HC-SR04 Ultrasonic Sensor and 16x2 LCD Display */

#include <LiquidCrystal.h>

#define trigger 18 /* Analog pin A4 */
#define echo 19 /* Analog pin A5 */

LiquidCrystal lcd(2,3,4,5,6,7); /* If output not came then try this (7,6,5,4,3,2) */

float time=0,distance=0;

void setup()
{
 lcd.begin(16,2);
 pinMode(trigger,OUTPUT);
 pinMode(echo,INPUT);
 lcd.print("Ultrasonic");
 lcd.setCursor(0,1);
 lcd.print("Range Finder");
 delay(1500);
 lcd.clear();
}

void loop()
{
 lcd.clear();
 digitalWrite(trigger,LOW);
 delayMicroseconds(2);
 digitalWrite(trigger,HIGH);
 delayMicroseconds(10);
 digitalWrite(trigger,LOW);
 delayMicroseconds(2);
 time=pulseIn(echo,HIGH);
 distance=time*340/20000;
 lcd.clear();
 lcd.print("Distance:");
 lcd.print(distance);
 lcd.print("cm");
 lcd.setCursor(0,1);
 lcd.print("Distance:");
 lcd.print(distance/100);
 lcd.print("m");
 delay(500);
}