Description:
Ultrasonic Levitation using Arduino is a pretty easy project based on simple phenomenon of vibrations of sounds. Here a very light weight small size object can be levitated in between the Ultrasonic Transducers. The controller here used is Arduino UNO and to amplify the waves from Ultrasonic Transducers and L298N Motor Driver is used. The improvements I did in this projects: Created a good 3D printable model for attaching the Ultrasonic Transducers and a redesigned the circuit diagram.
Circuit Diagram:
")
Components:
| SR. NO. | COMPONENT | PINOUT DIAGRAM | BUY |
|---|---|---|---|
| 1 | Arduino UNO (Other Arduinos can be used too) | Arduino UNO Pinout Diagram⇗ | |
| 2 | HC-SR04 Ultrasonic Sensor Module | ||
| 3 | L298N Motor Driver | ||
| 4 | 3D Printed Structure/some diy thing |
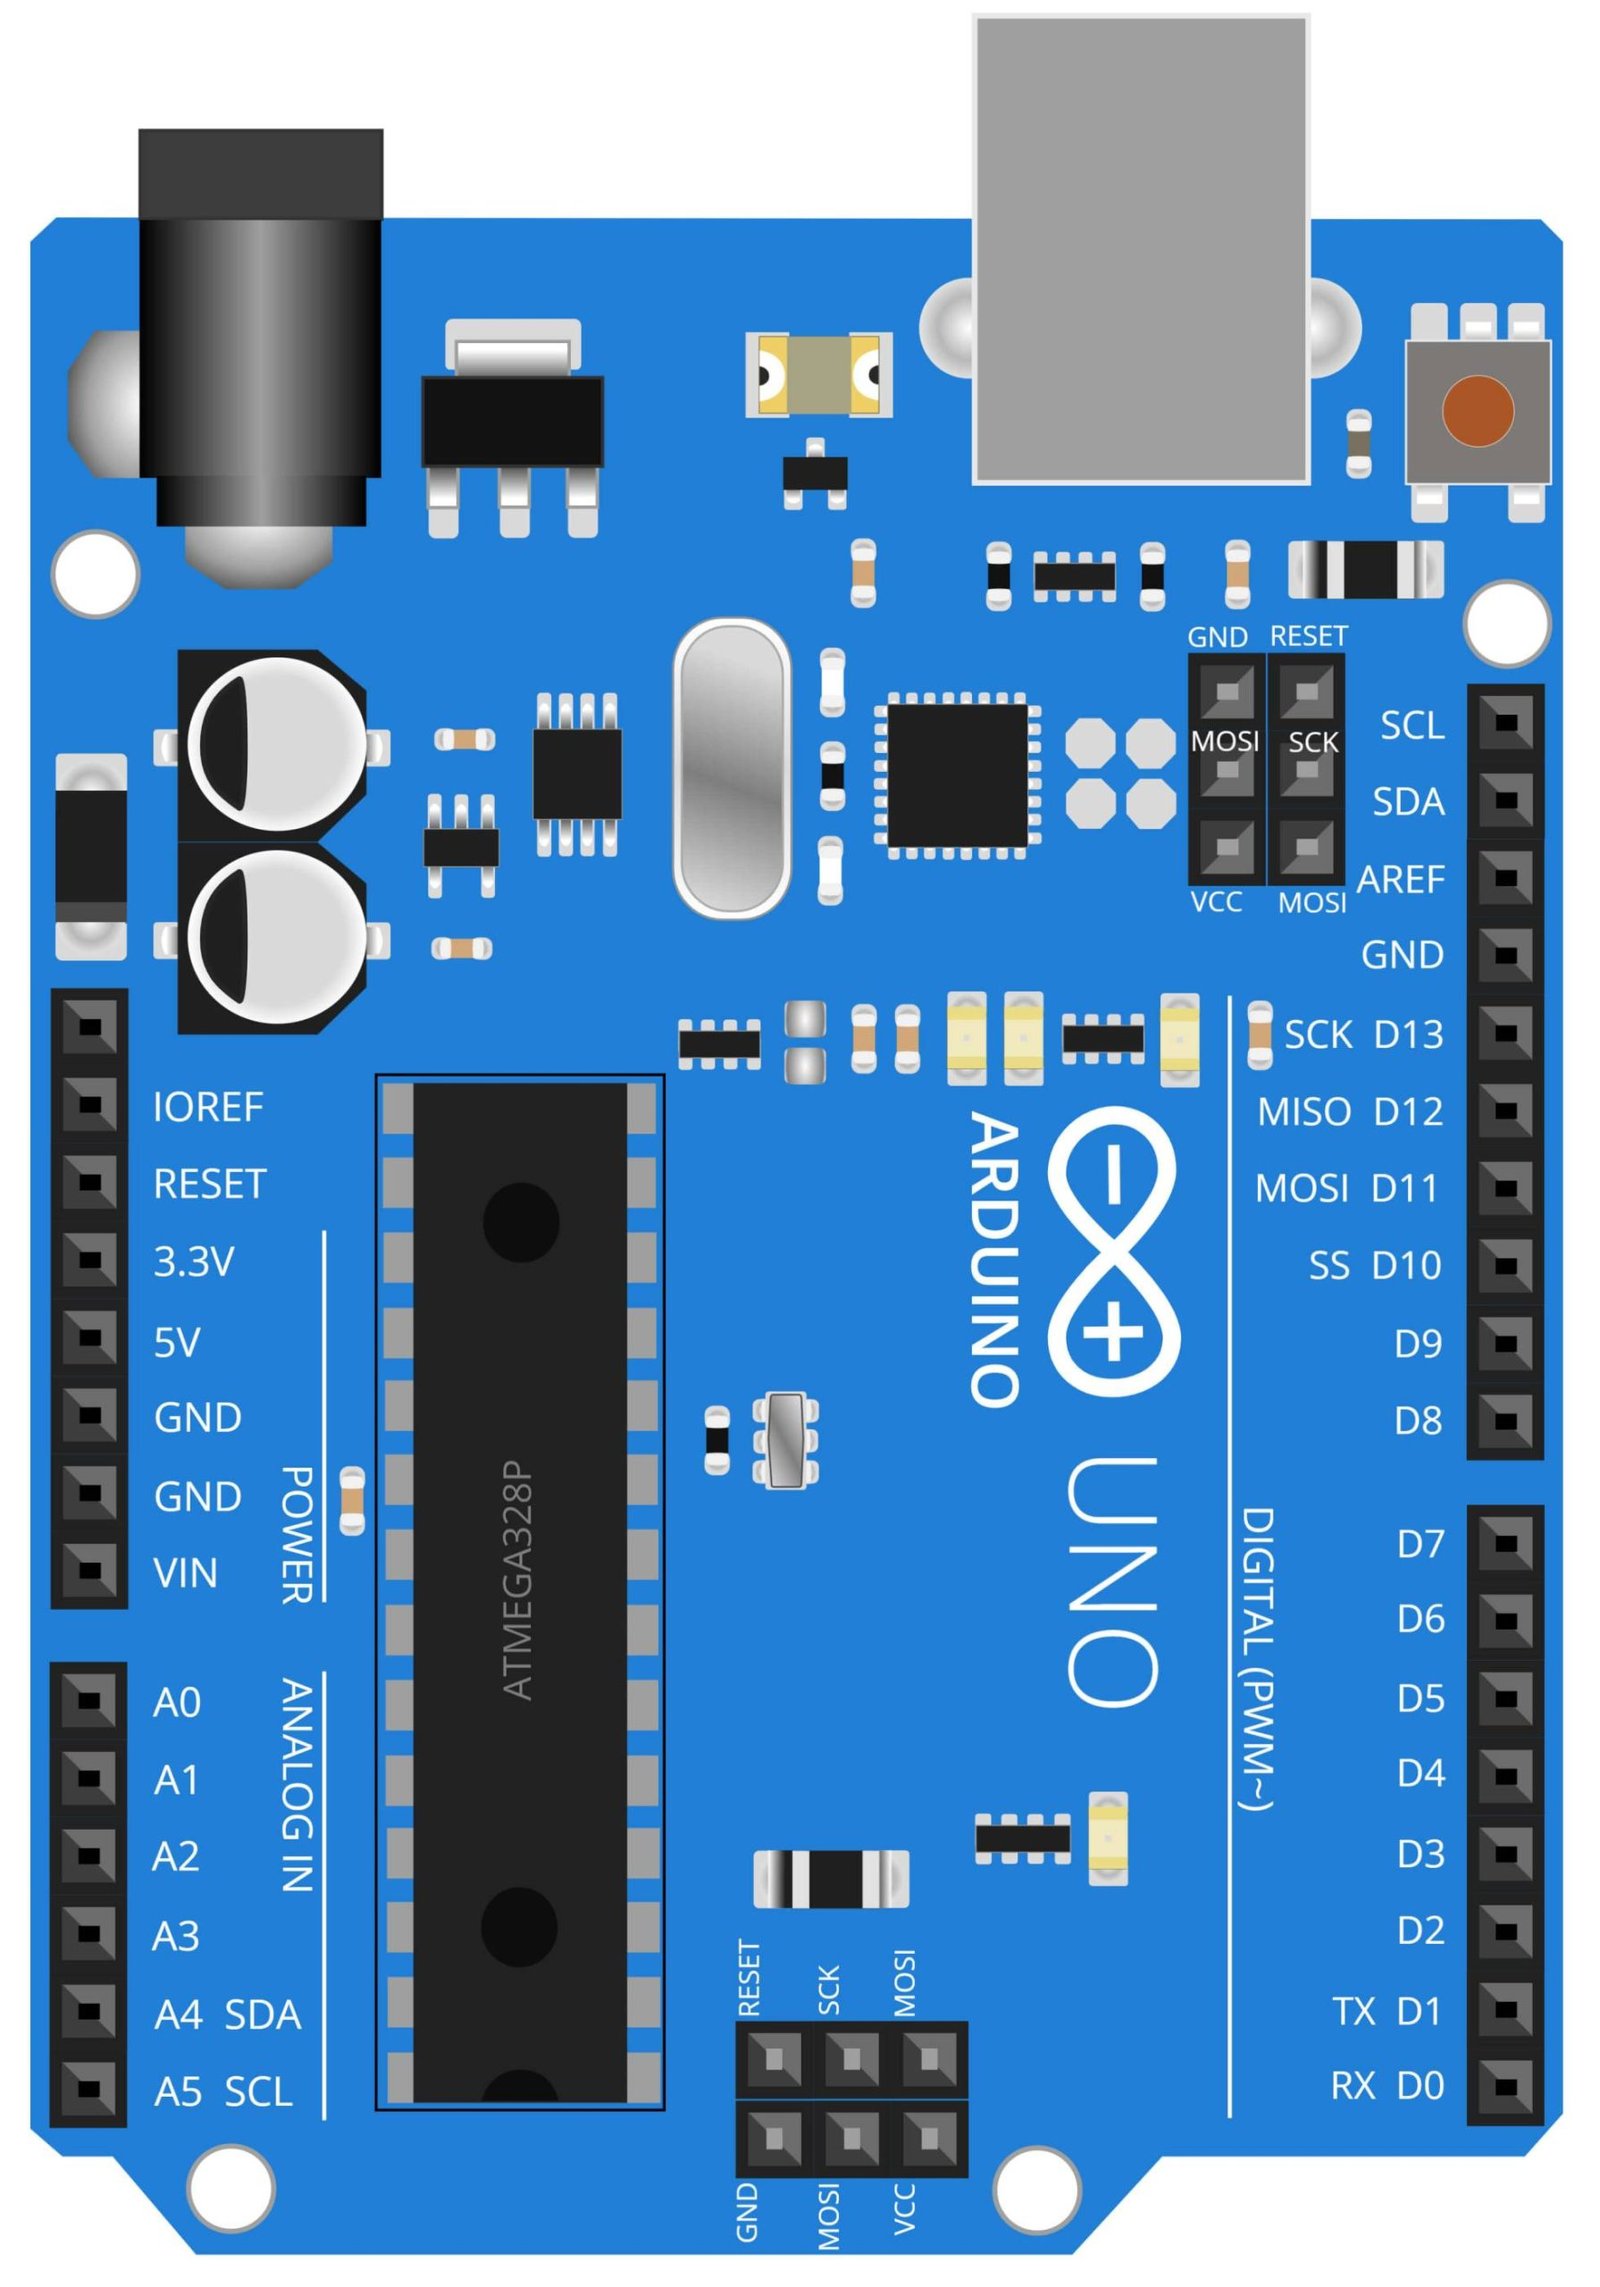
Arduino UNO
The Arduino UNO is a microcontroller board based on the ATmega328P. It has 14 digital input/output pins, 6 analog inputs, a 16 MHz quartz crystal, a USB connection, and a power jack. The Arduino UNO is a popular choice among hobbyists and makers for its ease of use and wide range of libraries and example code.
In this project, the Arduino UNO serves as the brain of the device, controlling the ultrasonic transducers of the HC-SR04 sensor to levitate small objects. The sensor emits ultrasonic waves and the Arduino UNO reads the signal reflected back from the object and controls the transducers to maintain the levitation.

Ultrasonic Transducer
Ultrasonic transducers are devices that convert electrical energy into mechanical energy in the form of ultrasonic waves, and vice versa. They are commonly used in a variety of applications such as sonar, distance measurement, and levitation.
In this project, the ultrasonic transducers are used to emit and receive ultrasonic waves, which are then used to levitate small objects. The transducers are controlled by the Arduino UNO, which reads the signal reflected back from the object and adjust the transducers to maintain the levitation.
Ultrasonic transducers are known for their high efficiency and reliability and are capable of producing high frequency sound waves, which are used to levitate small objects in this project. They are also capable of measuring distances very precisely, which is crucial for maintaining the levitation in the project.
Steps and Info:
1. Get correct components as given. You can buy online or offline. I buy electronics components mostly from Amazon.
2. Start connecting the components. If you are new to connecting components in an electronic circuit, then use a Breadboard or you can straight up make connections using Jumper wires but it will create problem when there will be two or more connections needed at one pin (for example two or more different sensors 5V connection to Arduino’s 5V pin). But before soldering components on a PCB or printing a PCB for your circuit, better try using breadboard so that any errors and mistakes can be observed on breadboard and not after soldering. Or do connections in your way.
3. Now after building the circuit, download the Arduino IDE from https://www.arduino.cc/ website.
4. If you are new to Arduino IDE software, then watch this video we made specially for beginners about Arduino IDE.
5. If you know Arduino IDE then straight up copy the code we given and paste it into the Arduino IDE sketch.
6. Connect the Arduino to your Computer/device. Select a proper port, proper Arduino type and whatever other settings are. Here it is Arduino UNO. (If you don’t know what this all is then watch our video: ).
7. Compile the code and Upload it.
8. If any error occurs then try to troubleshoot it by finding/copy-pasting it into our Solve Errors page https://electronicsprojects.in/solve-errors/, or you can straight up paste the error on Internet and you know the rest. Also check if there are no spelling/syntax errors in the code. Compile the code again once to check if errors are fixed. I have given proper connections and code but still nothing is perfect.
9. Once code compiles and uploads smoothly, you can start testing the working of your circuit/project.
10. I have added a good 3D printable stand for attaching the Ultrasonic Transducers, links is down below. If you don’t want to print, then you will have to make the structure your own.
11. Once the structure is ready, attach the two Ultrasonic Transducers, one at upside facing downward and another one at downside facing upward.
12. Turn on the circuit and place very light weight object (for example: a single small Thermocol Ball) in between the transducers using tweezers. You may need to adjust the height of the upper transducer if the object is not floating. At some point the object will start to float.
13. If it doesn’t work then check connections, height of transducers and code. Also you can talk with me and the community through discord. All the links to social is given at the right side of this page.
Program Code:
/* Credits for the Code: https://makezine.com */

byte TP = 0b10101010; // Every other port receives the inverted signal
void setup() {
DDRC = 0b11111111; // Set all analog ports to be outputs
// Initialize Timer1
noInterrupts(); // Disable interrupts
TCCR1A = 0;
TCCR1B = 0;
TCNT1 = 0;
OCR1A = 200; // Set compare register (16MHz / 200 = 80kHz square wave -> 40kHz full wave)
TCCR1B |= (1 << WGM12); // CTC mode
TCCR1B |= (1 << CS10); // Set prescaler to 1 ==> no prescaling
TIMSK1 |= (1 << OCIE1A); // Enable compare timer interrupt
interrupts(); // Enable interrupts
}
ISR(TIMER1_COMPA_vect) {
PORTC = TP; // Send the value of TP to the outputs
TP = ~TP; // Invert TP for the next run
}
void loop() {
// Nothing left to do here :)
}Download:
Links:
3D Printable Model STL File:
Structure for holding Ultrasonic Transducers: https://www.thingiverse.com/thing:5465466 | Credits to: https://www.thingiverse.com/akatsukimember/designs