Description:
In this project we build a Smart Watch using ESP32 Board. It is a very simple digital clock which shows day, date and time. We have used DS3231 Real Time Clock module to pull the current day, date and time. A 0.96” SPI OLED Display is used to view the thing and everything is controlled by ESP WROOM 32.
Circuit Diagram:

Components:
| SR. NO. | COMPONENT | PINOUT DIAGRAM | BUY |
|---|---|---|---|
| 1 | ESP WROOM 32 Board | Arduino UNO Pinout Diagram⇗ | |
| 2 | 0.96″ SPI OLED Display | ||
| 3 | DS3231 RTC Module |
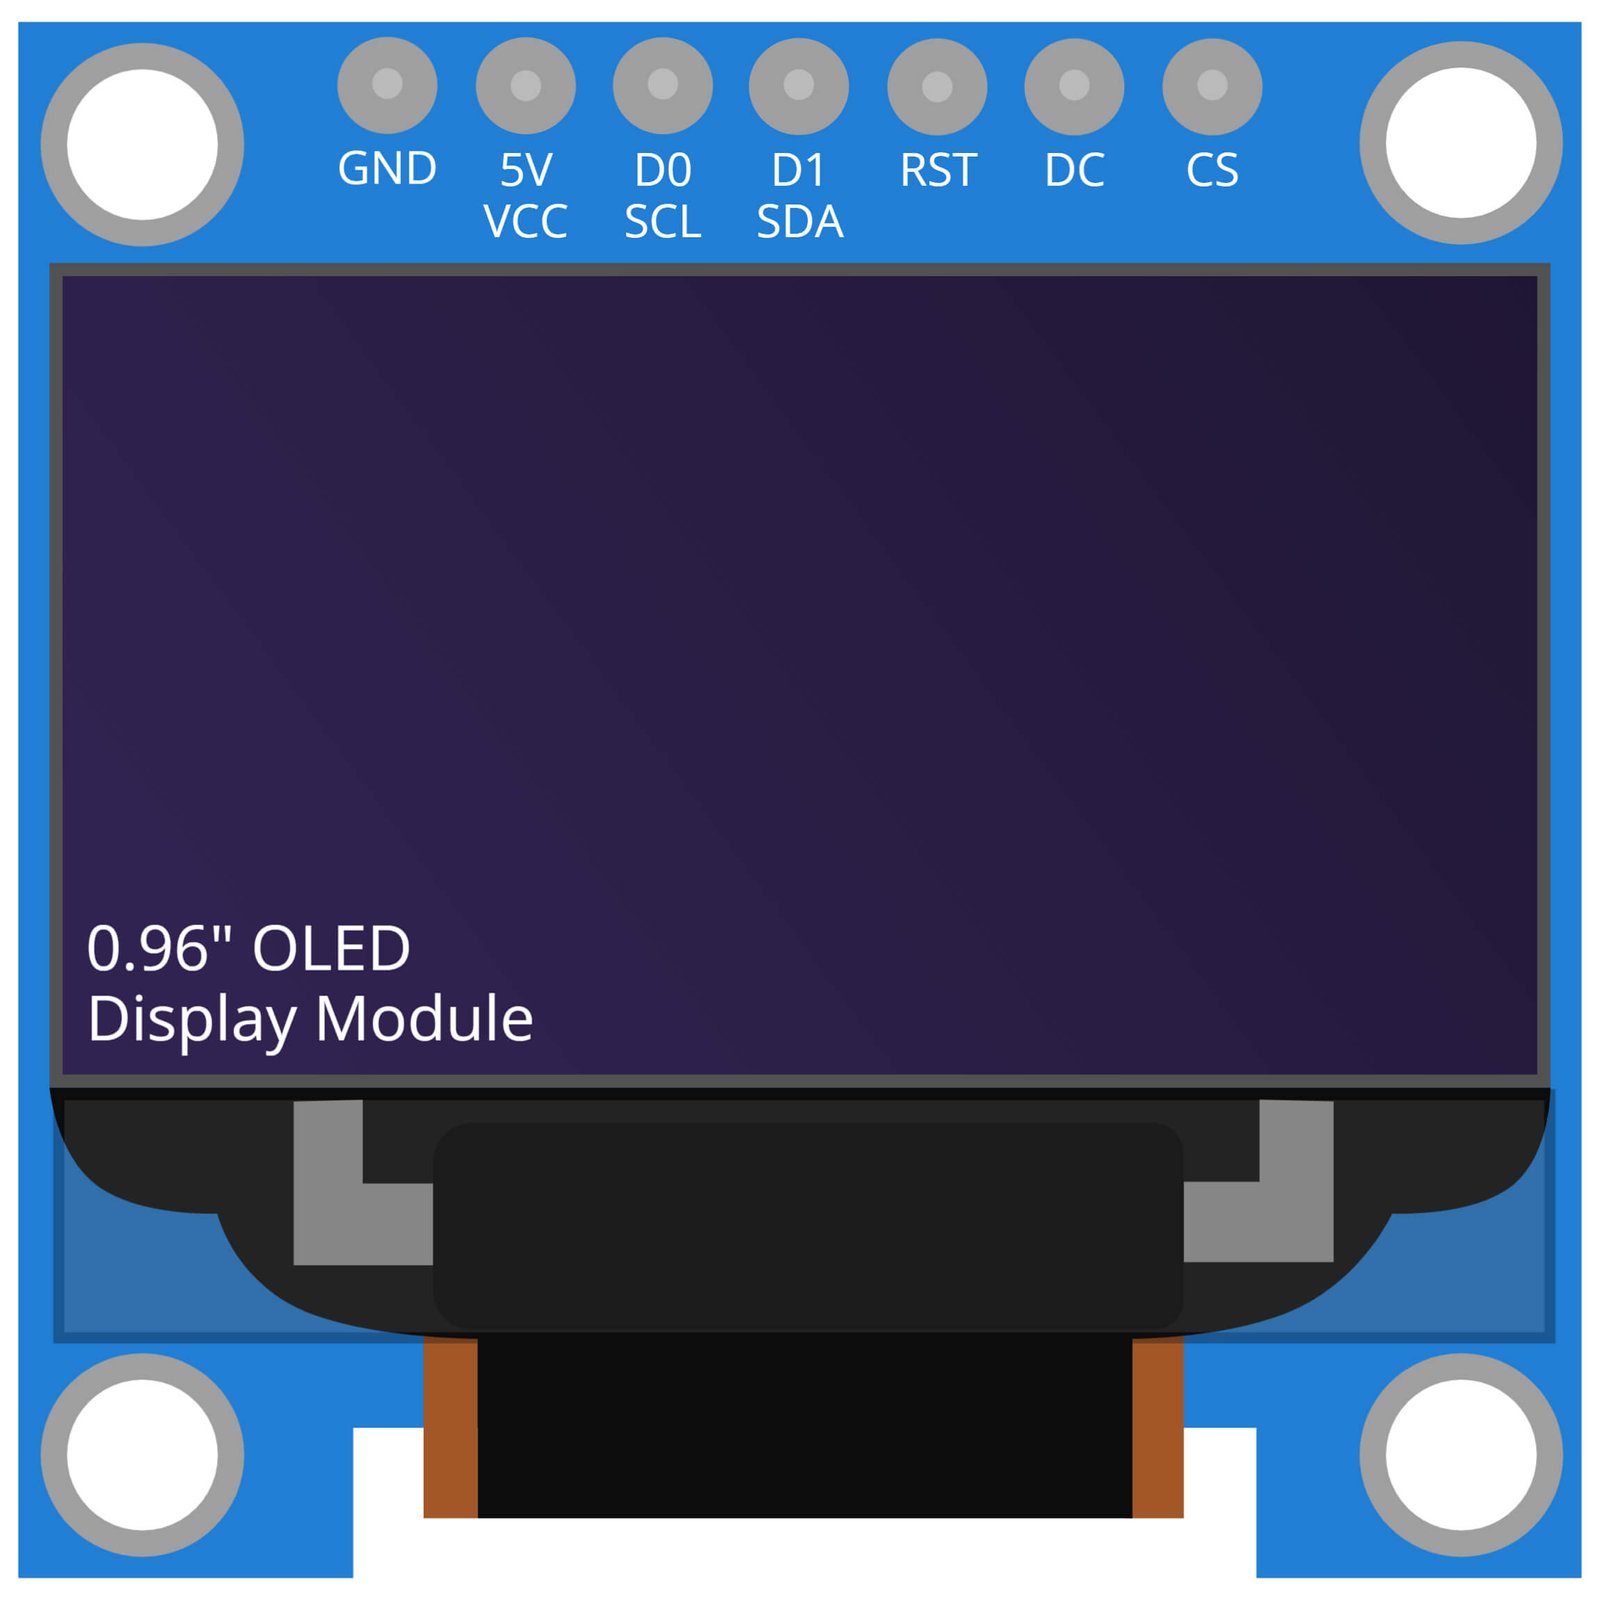
0.96 Inch OLED Display Module
The 0.96 Inch OLED Display is a small, high-contrast, and low-power display that is commonly used in various electronic projects, particularly in wearables like smartwatches. This type of display is perfect for use in a smartwatch as it is lightweight, easy to interface with, and has a wide viewing angle. The OLED technology used in this display allows for deep black levels and vibrant colors, making it ideal for displaying text, images, and graphics. The OLED display is also easy to interface with the ESP32 microcontroller, which is the main microcontroller used in the smartwatch project. Additionally, this OLED display is compatible with the ESP32 via I2C communication, which allows for minimal wiring, thus making it a perfect choice for a compact smartwatch design. The OLED display is also used to show time and date which is taken from the DS3231 Real Time Clock module and it’s also used to show notifications, notifications like calls, messages, and other alerts.
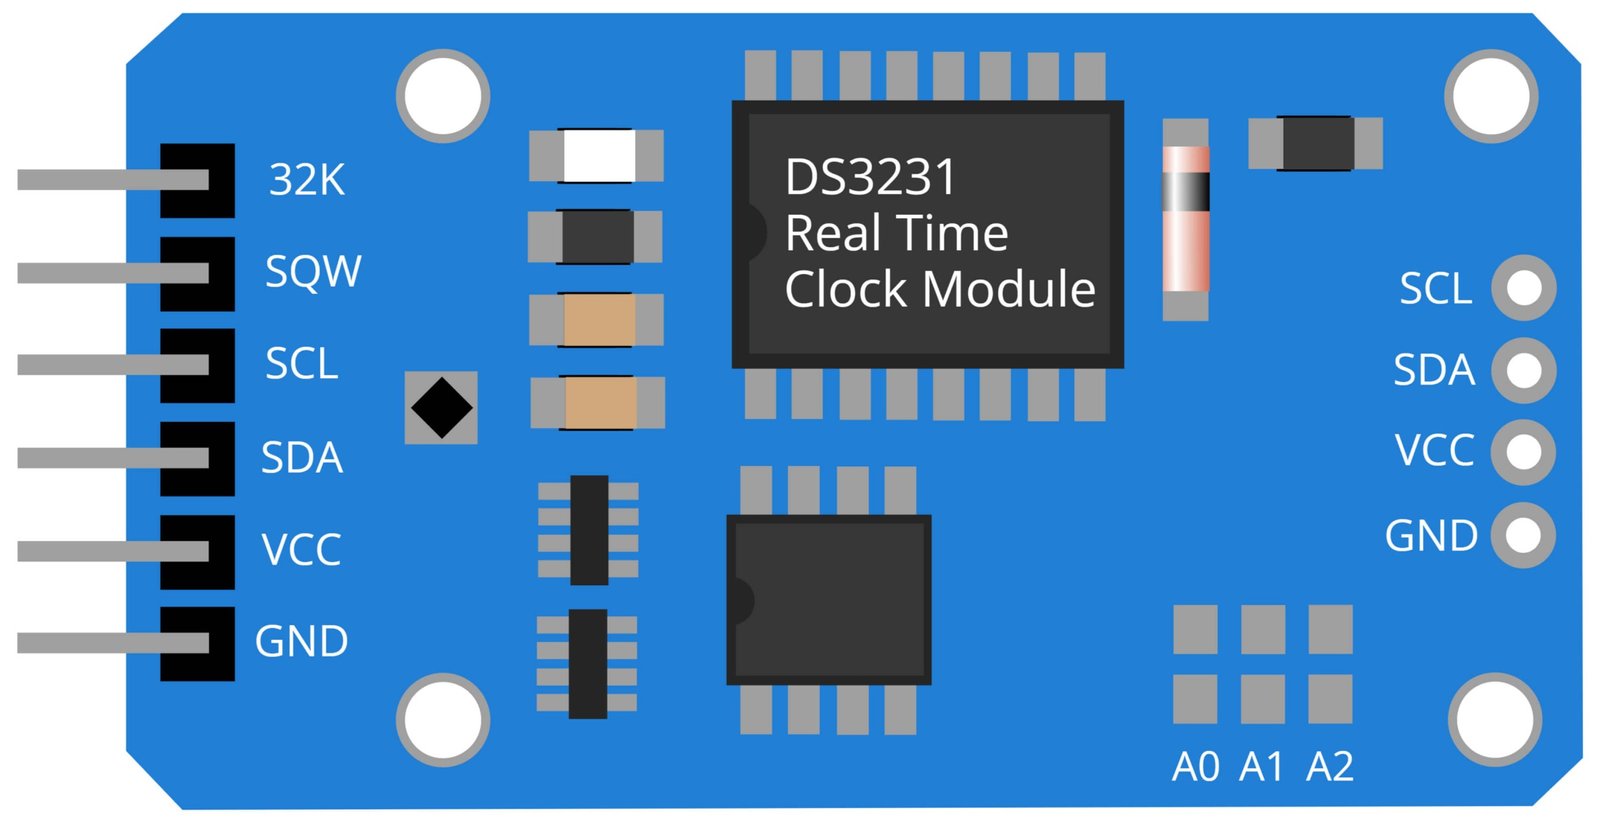
DS3231 Real Time Clock Module
The DS3231 Real Time Clock (RTC) module is a low-cost, highly accurate device that is used to keep track of time and date. It is commonly used in projects such as smart watches, clocks, and other time-keeping applications. In the project “Smart Watch using ESP32, 0.96” OLED Display and DS3231 Real Time Clock Module,” the DS3231 RTC module is used to keep track of the current time and date, which is then displayed on the 0.96 inch OLED display. The module is highly accurate, with a timekeeping accuracy of ±2ppm (parts per million) from 0°C to +40°C, and is also temperature compensated, ensuring accurate timekeeping even in varying temperature conditions. Additionally, the DS3231 RTC module has a built-in battery backup, which allows it to keep time even when the main power source is disconnected.
Steps and Info:
1. Get correct components as given. You can buy online or offline. I buy electronics components mostly from Amazon.
2. Start connecting the components. If you are new to connecting components in an electronic circuit, then use a Breadboard or you can straight up make connections using Jumper wires but it will create problem when there will be two or more connections needed at one pin (for example two or more different sensors 5V connection to Arduino’s 5V pin). But before soldering components on a PCB or printing a PCB for your circuit, better try using breadboard so that any errors and mistakes can be observed on breadboard and not after soldering. Or do connections in your way.
3. Now after building the circuit, download the Arduino IDE from https://www.arduino.cc/ website.
4. If you are new to Arduino IDE software, then watch this video we made specially for beginners about Arduino IDE.
5. If you know Arduino IDE then straight up copy the code we given and paste it into the Arduino IDE sketch.
6. Now if you don’t have ESP board installed in the Arduino IDE, then follow below steps or directly jump to step 8.
7. Click on File in the top Menu, Click on Preferences.
8. Now add the below URLs in ‘Additional Boards Manager URLs:’ box. The URLs have comma (,) in between them.
https://dl.espressif.com/dl/package_esp32_index.json, http://arduino.esp8266.com/stable/package_esp8266com_index.json
9. Click Ok.
10. Now click on Tools in the top Menu, click on Board, click on Boards Manager, Search “esp”, Install both files ‘esp32’ and ‘esp8266’ file.
11. Now go back to Tools again, go to boards, find ‘ESP32 Dev Module’ and select it.
12. Compile the code and Upload it.
13. If any error occurs then try to troubleshoot it by finding/copy-pasting it into our Solve Errors page https://electronicsprojects.in/solve-errors/, or you can straight up paste the error on Internet and you know the rest. Also check if there are no spelling/syntax errors in the code. Compile the code again once to check if errors are fixed. I have given proper connections and code but still nothing is perfect.
14. Once code compiles and uploads smoothly, you can start testing the working of your circuit/project.
15. Turn the circuit ON, current day, date and time will be displayed on the 0.96” SPI OLED display
16. If it doesn’t work, then check connections and code. Also you can talk with me and the community through discord. All the links to social is given at the right side of this page.
Program Code:
/* https://www.electronicsprojects.in Smart Watch using ESP 32, 0.96” OLED Display and DS3231 Real Time Clock Module */

#include <SPI.h>
#include <Wire.h>
#include <Adafruit_GFX.h>
#include <Adafruit_SSD1306.h>
#include "RTClib.h"
RTC_DS3231 rtc;
char daysOfTheWeek[7][12] = {"Sunday", "Monday", "Tuesday", "Wednesday", "Thursday", "Friday", "Saturday"};
#define OLED_MOSI  23
#define OLED_CLK   18
#define OLED_DC    4
#define OLED_CS    5
#define OLED_RESET 2
Adafruit_SSD1306 display(OLED_MOSI, OLED_CLK, OLED_DC, OLED_RESET, OLED_CS);
void setup()
{
Serial.begin(9600);
if (! rtc.begin()) {
Serial.println("RTC not found");
while (1);
}
rtc.adjust(DateTime(__DATE__, __TIME__));
display.begin(SSD1306_SWITCHCAPVCC);
display.clearDisplay();
display.setTextColor(WHITE);
//display.startscrollright(0x00, 0x0F);
display.setTextSize(2);
display.setCursor(0,5);
display.print("  Clock ");
display.display();
delay(3000);
}
void loop()
{
DateTime now = rtc.now();
display.clearDisplay();
display.setTextSize(2);
display.setCursor(75,0);
display.println(now.second(), DEC);
display.setTextSize(2);
display.setCursor(25,0);
display.println(":");
display.setTextSize(2);
display.setCursor(65,0);
display.println(":");
display.setTextSize(2);
display.setCursor(40,0);
display.println(now.minute(), DEC);
display.setTextSize(2);
display.setCursor(0,0);
display.println(now.hour(), DEC);
display.setTextSize(1);
display.setCursor(0,15);
display.println(now.day(), DEC);
display.print(daysOfTheWeek[now.dayOfTheWeek()]);
display.setTextSize(1);
display.setCursor(25,15);
display.println("-");
display.setTextSize(1);
display.setCursor(40,15);
display.println(now.month(), DEC);
display.setTextSize(1);
display.setCursor(55,15);
display.println("-");
display.setTextSize(1);
display.setCursor(70,15);
display.println(now.year(), DEC);
display.display();
}