Description:
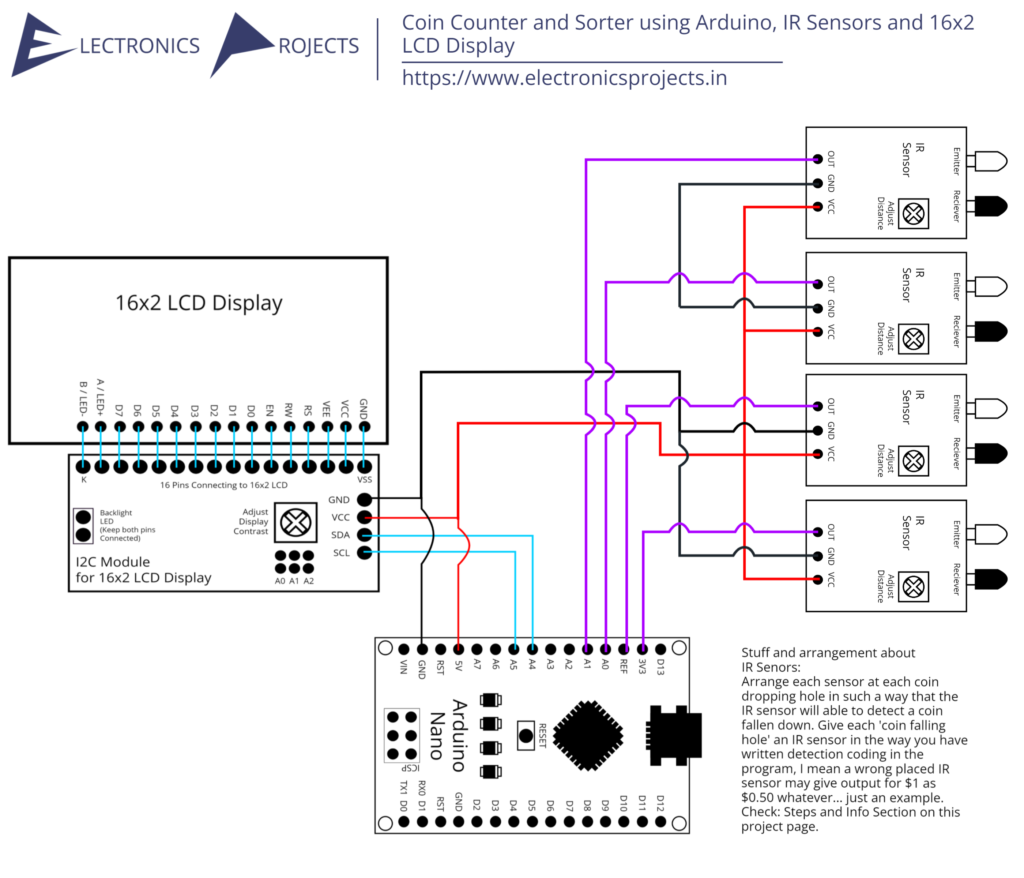
This is a very simple coin counter and sorter using Arduino. Here a 3D Printed or DIY build structure is used which simply sorts the coin according to their sizes and these coins are detected by IR sensors in each slots. Each detection is calculated and processed through an Arduino with total number of coins displayed on a 16×2 LCD Display. (It doesn’t count the value of coins, it just counts how many each type of coins there are.).
Circuit Diagram:
Components:
| SR. NO. | COMPONENT | PINOUT DIAGRAM | BUY |
|---|---|---|---|
| 1 | Arduino Nano (Other Arduinos can be used too) | ||
| 2 | 16×2 LCD Display | ||
| 3 | I2C Module of 16×2 LCD Display | ||
| 4 | IR Sensors x 4 (You can take less or more but you will need to make changes in the program accordingly and in the coin sorting solid structure as well) |
Arduino Nano
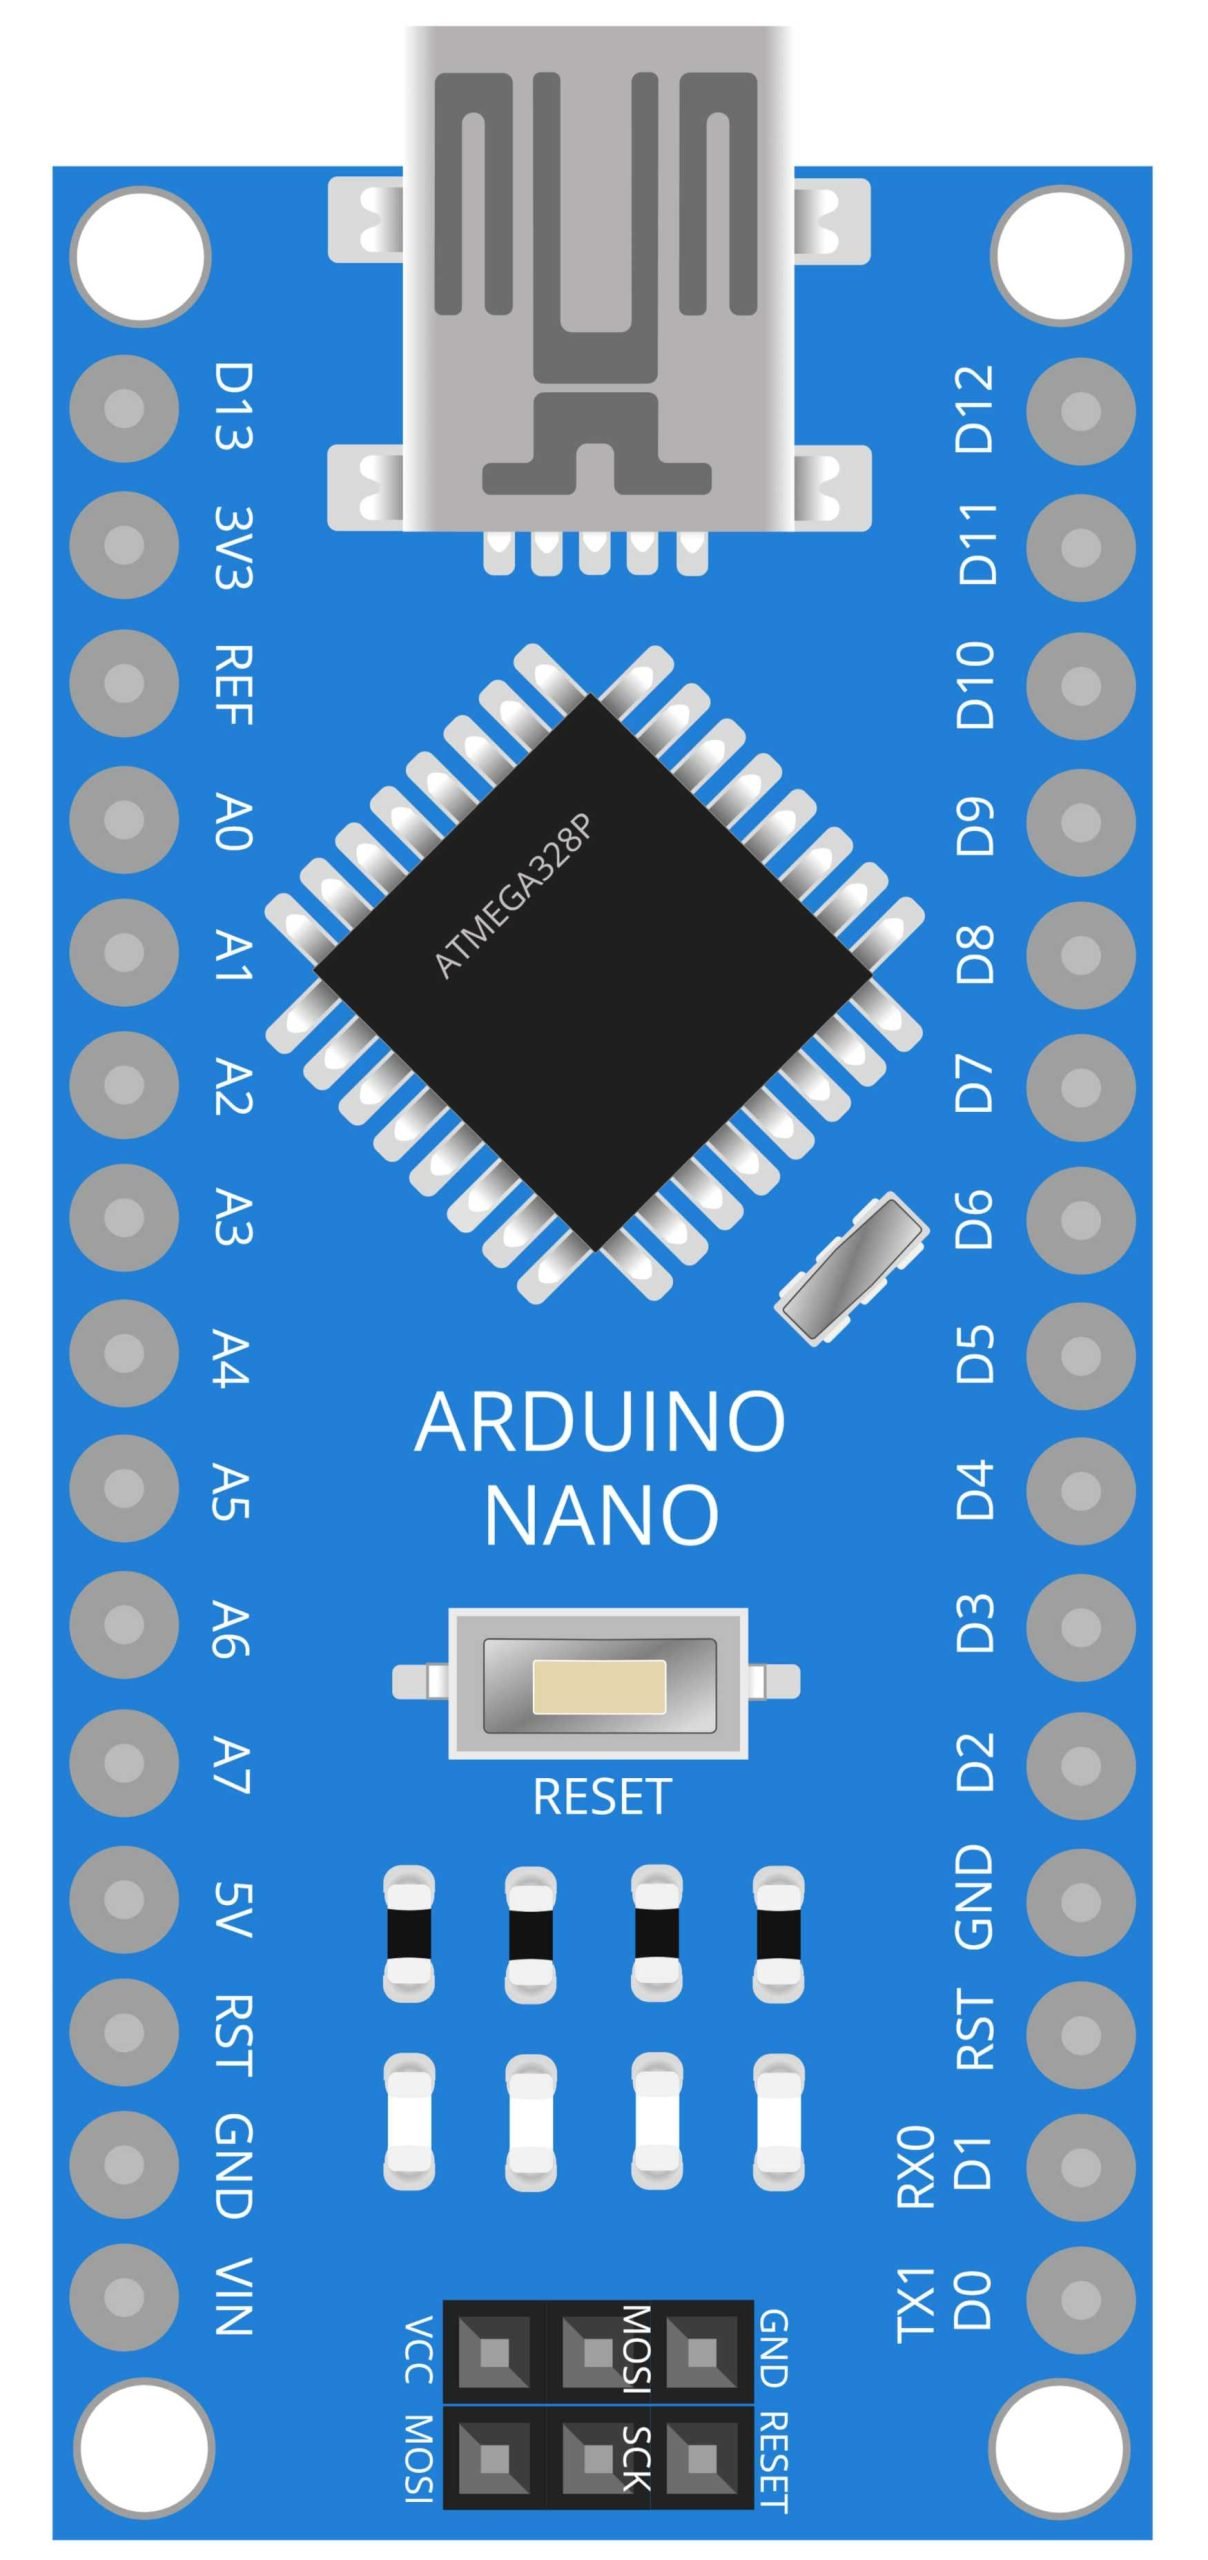
Arduino Nano is a small and powerful microcontroller board based on the ATmega328P. It has the same functionality as the Arduino Uno, but it is smaller in size and can be easily integrated into projects with limited space. The Arduino Nano has 14 digital input/output pins, 8 analog inputs, a 16 MHz quartz crystal, a USB connection, and a power jack. It can be powered by an external power supply or through the USB connection. In the Coin Counter and Sorter project, the Arduino Nano is used to control the IR sensors, I2C module, and 16×2 LCD display module. The IR sensors are used to detect the coin, and the I2C module and LCD display module are used to display the count of the coins. The Arduino Nano is programmed to read the signals from the IR sensors and increment the count of the coins accordingly. It also controls the I2C module to display the count on the LCD display module. Overall, the Arduino Nano is a crucial component in the Coin Counter and Sorter project, as it controls all the other components and makes the project functional.
I2C Module for 16×2 LCD Display
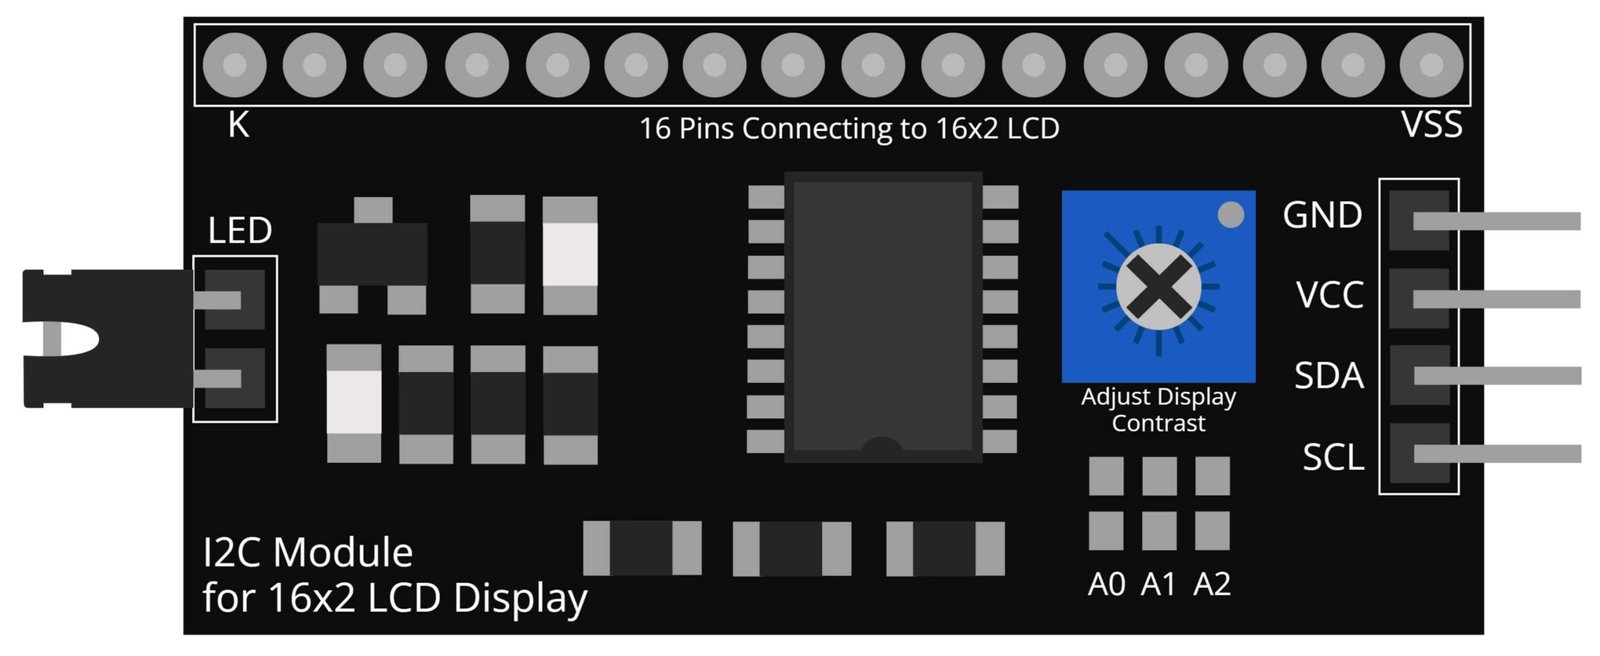
The I2C module for 16×2 LCD display is a device that allows communication between an Arduino board and a 16×2 LCD display using the I2C protocol. I2C, or Inter-Integrated Circuit, is a communication protocol that allows multiple devices to communicate with one another using just two wires. The I2C module for 16×2 LCD display acts as an interface between the Arduino Nano and the LCD display, enabling the Arduino to send commands and data to the LCD. In the Coin Counter and Sorter project, the I2C module for 16×2 LCD display is used to display the count of coins on the LCD display. The Arduino Nano sends commands to the I2C module to display the count on the LCD. This allows for a cleaner and more efficient setup, as it eliminates the need for multiple wires between the Arduino and the LCD. The I2C module also allows for easy expansion, as multiple devices can be connected to the same I2C bus, making it easy to add more functionality to the project.
IR Sensor
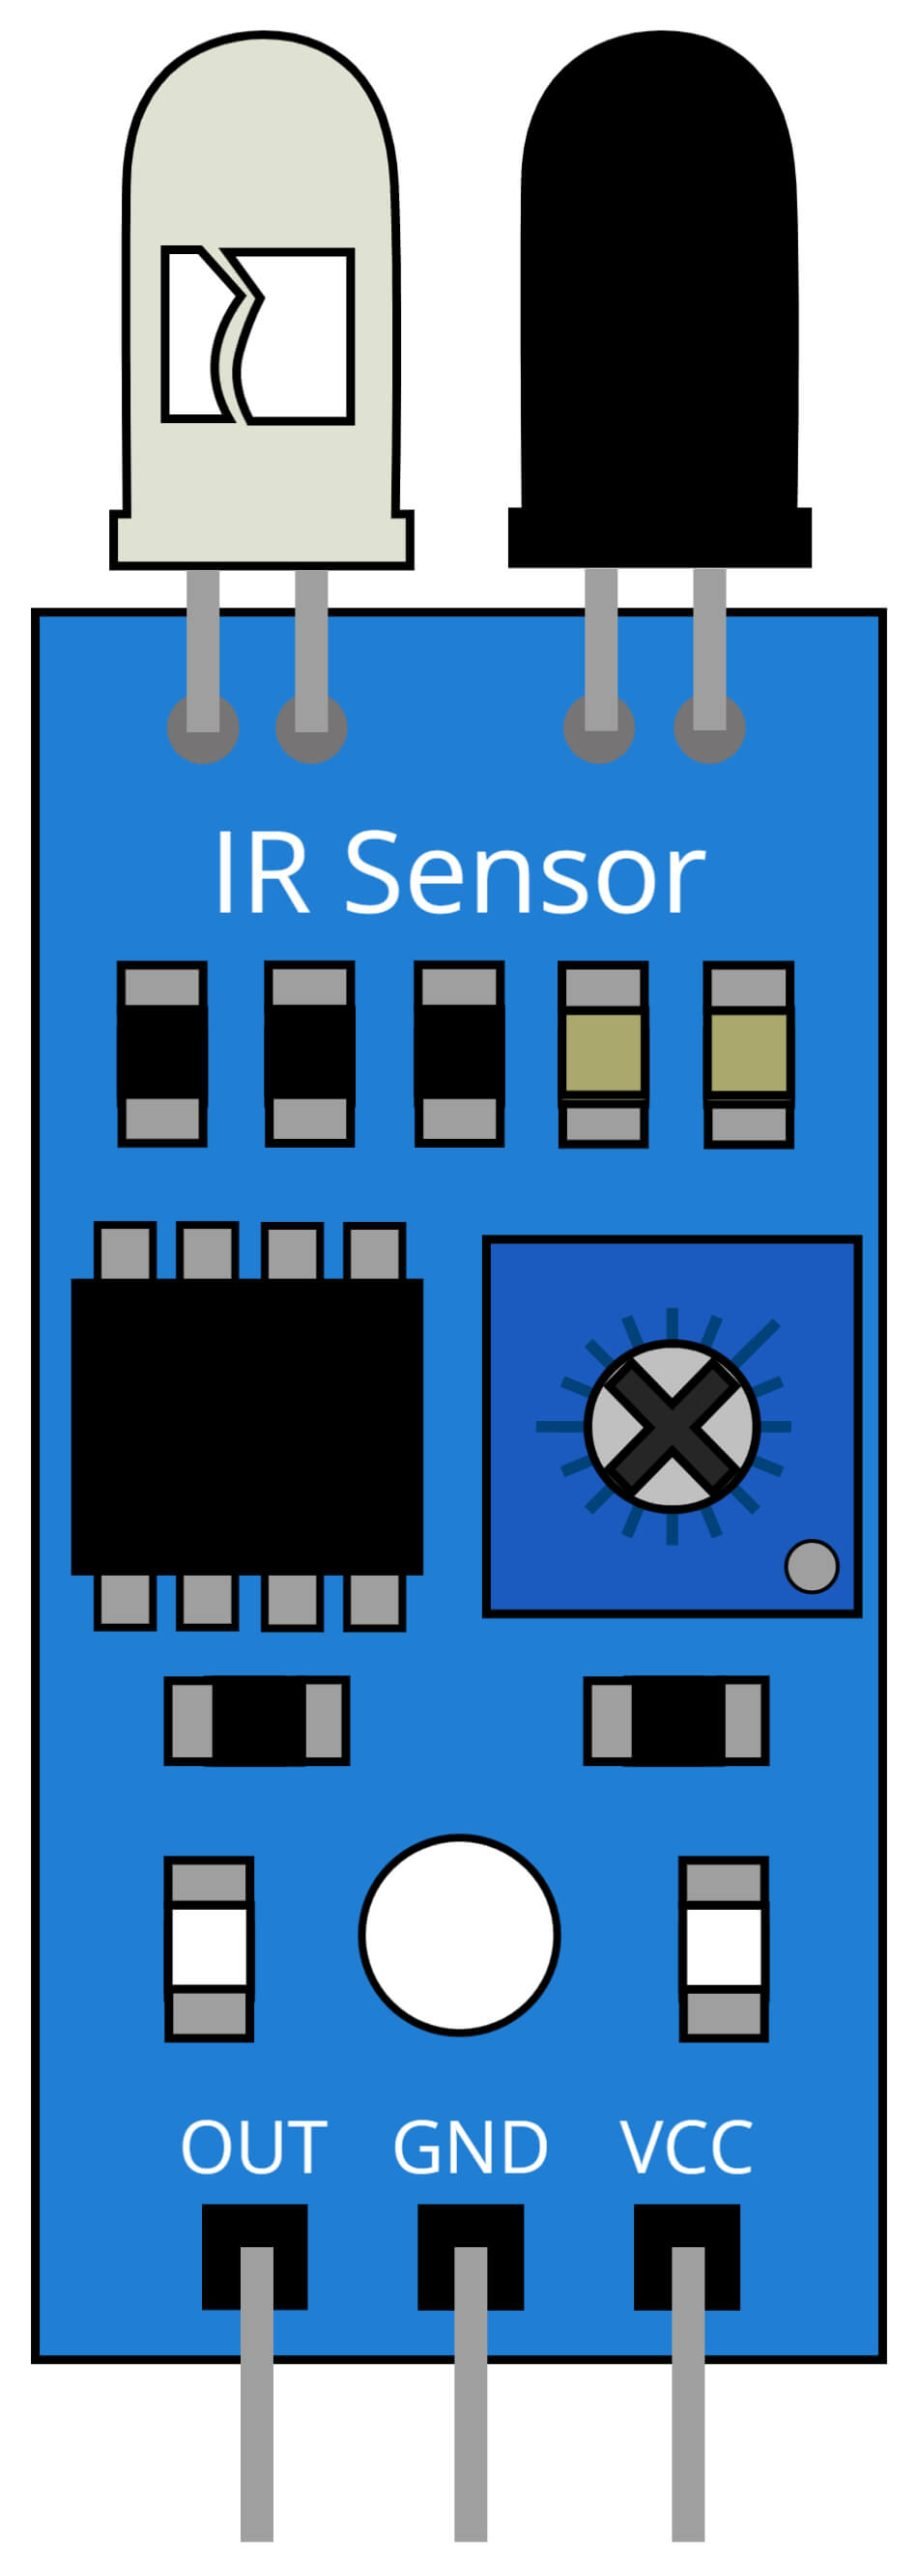
IR sensors, or Infrared sensors, are devices that detect the presence of an object by sensing the infrared radiation emitted or reflected by the object. IR sensors work by emitting infrared radiation and measuring the amount of radiation that is reflected back. Depending on the type of sensor, the IR sensor can detect the presence of an object, its distance, or even its speed. In the Coin Counter and Sorter project, IR sensors are used to detect the presence of a coin. The IR sensor emits infrared radiation and measures the amount of radiation that is reflected back by the coin. Based on this measurement, the sensor can detect the presence of a coin and send a signal to the Arduino Nano. The Arduino then increments the count of coins and displays the count on the 16×2 LCD Display Module. IR sensors are chosen for this project because they are small, inexpensive, and easy to interface with microcontroller boards like Arduino. They are also reliable and have a high sensitivity to detect small changes in the IR radiation, making them suitable for coin detection.
Steps and Info:
1. Get correct components as given. You can buy online or offline. I buy electronics components mostly from Amazon.
2. Start connecting the components. If you are new to connecting components in an electronic circuit, then use a Breadboard or you can straight up make connections using Jumper wires but it will create problem when there will be two or more connections needed at one pin (for example two or more different sensors 5V connection to Arduino’s 5V pin). But before soldering components on a PCB or printing a PCB for your circuit, better try using breadboard so that any errors and mistakes can be observed on breadboard and not after soldering. Or do connections in your way and build the circuit
3. Now you will need a coin sorting structure, I have given a link down below in Links Section from where you could download a 3D Printable STL file. You can also DIY build it using light thickness plywood or some card board. Also make it according to the sizes of your coins.
4. After building the structure and the circuit, download the Arduino IDE from https://www.arduino.cc/ website.
5. If you are new to Arduino IDE software, then watch this video we made specially for beginners about Arduino IDE.
6. If you know Arduino IDE then straight up copy the code we given and paste it into the Arduino IDE sketch.
7. Add the coins symbol and value in the code. I have used four different slots for the coins, if you are using more or less then you will need to make changes in the code and increase or decrease the number of IR sensors as well.
6. Connect the Arduino to your Computer/device. Select a proper port, proper Arduino type and whatever other settings are. Here it is Arduino UNO. (If you don’t know what this all is then watch our video: ).
7. Compile the code and Upload it.
8. If any error occurs then try to troubleshoot it by finding/copy-pasting it into our Solve Errors page https://electronicsprojects.in/solve-errors/, or you can straight up paste the error on Internet and you know the rest. Also check if there are no spelling/syntax errors in the code. Compile the code again once to check if errors are fixed. I have given proper connections and code but still nothing is perfect.
10. Now take those IR Sensors and attach them at one side of the structure(backside) near the opening of each coin dropping hole in such a way that those LEDs on the sensor will detect the falling coin. Don’t keep sensors in the path where coins slide and fall. Also attach those sensors according to the program you edited. Still if you get wrong counting then you can just interchange the sensors to make the output correct.
11. If any problems occur then check connections and code. Check the range of IR sensors as well and set the range at particular range(5 to 10 cm is fine). Also you can talk with me and the community through discord. All the links to social is given at the right side of this page.
12. Correction: There is a little mistake in Circuit diagram I made, There is no ground connection to the two IR sensors. So please don’t forget to connect them to the ground. I will edit it later.
Program Code:
/* https://www.electronicsprojects.in Coin Counter and Sorter using Arduino, IR Sensors and 16x2 LCD Display */

#include <Wire.h>
#include <LiquidCrystal_I2C.h> /* Liquidcrystal I2C Library by Frank de Brabander, you can download this library from Manage Libraries from tools*/
LiquidCrystal_I2C lcd(0x27,16,2);
int a1=0,a2=0,a3=0,a4=0;
int b1=0,b2=0,b3=0,b4=0;
void setup()
{
lcd.init();
lcd.backlight();
lcd.setCursor(0,0);
lcd.print("Coin Counter");
lcd.setCursor(0,1);
lcd.print("and Sorter Thing");
delay(1000);
lcd.clear();
}
void loop()
{
int s1=analogRead(A0);
int s2=analogRead(A1);
int s3=analogRead(A2);
int s4=analogRead(A3);
 lcd.setCursor(0,0);
 lcd.print("$1  $2  $3  $4");  /* Add your coin symbols and values here, the values I added are for example only */
if(s1>=200 && a1==0)
{
  a1=1;
}
else if(s1<200 && a1==1)
{
  a1=0;
  b1++;
}
if(s2>=200 && a2==0)
{
  a2=1;
}
else if(s2<200 && a2==1)
{
  a2=0;
  b2++;
}
if(s3>=200 && a3==0)
{
  a3=1;
}
else if(s3<200 && a3==1)
{
  a3=0;
  b3++;
}
if(s4>=200 && a4==0)
{
  a4=1;
}
else if(s4<200 && a4==1)
{
  a4=0;
  b4++;
}
lcd.setCursor(1,1);
lcd.print(b1);
lcd.setCursor(5,1);
lcd.print(b2);
lcd.setCursor(9,1);
lcd.print(b3);
lcd.setCursor(13,1);
lcd.print(b4);

}
Download:
Links:
3D Printable Model STL file:
Coin Sorter Structure: https://www.thingiverse.com/thing:499177 | Credits to https://www.thingiverse.com/youngcat/designs

