
“Interfacing IR Sensor with Arduino is a crucial step in bringing your electronics projects to life. In this guide, you will learn how to connect your IR sensor to an Arduino Uno, read its output, and interface multiple sensors to the Arduino. Whether you’re a beginner or an advanced user in electronics and programming, this guide provides step-by-step instructions, circuit connections, and code snippets to help you get the most out of your IR sensor and Arduino. Whether you’re working on a security system, obstacle detection project, or any other application, this guide will be your comprehensive resource for Interfacing IR Sensor with Arduino.
Components:
| SR. NO. | COMPONENT | PINOUT DIAGRAM | BUY |
|---|---|---|---|
| 1. | IR Sensor | ||
| 2. | Arduino UNO | Arduino UNO Pinout Diagram ⇗ |
What is IR Sensor?
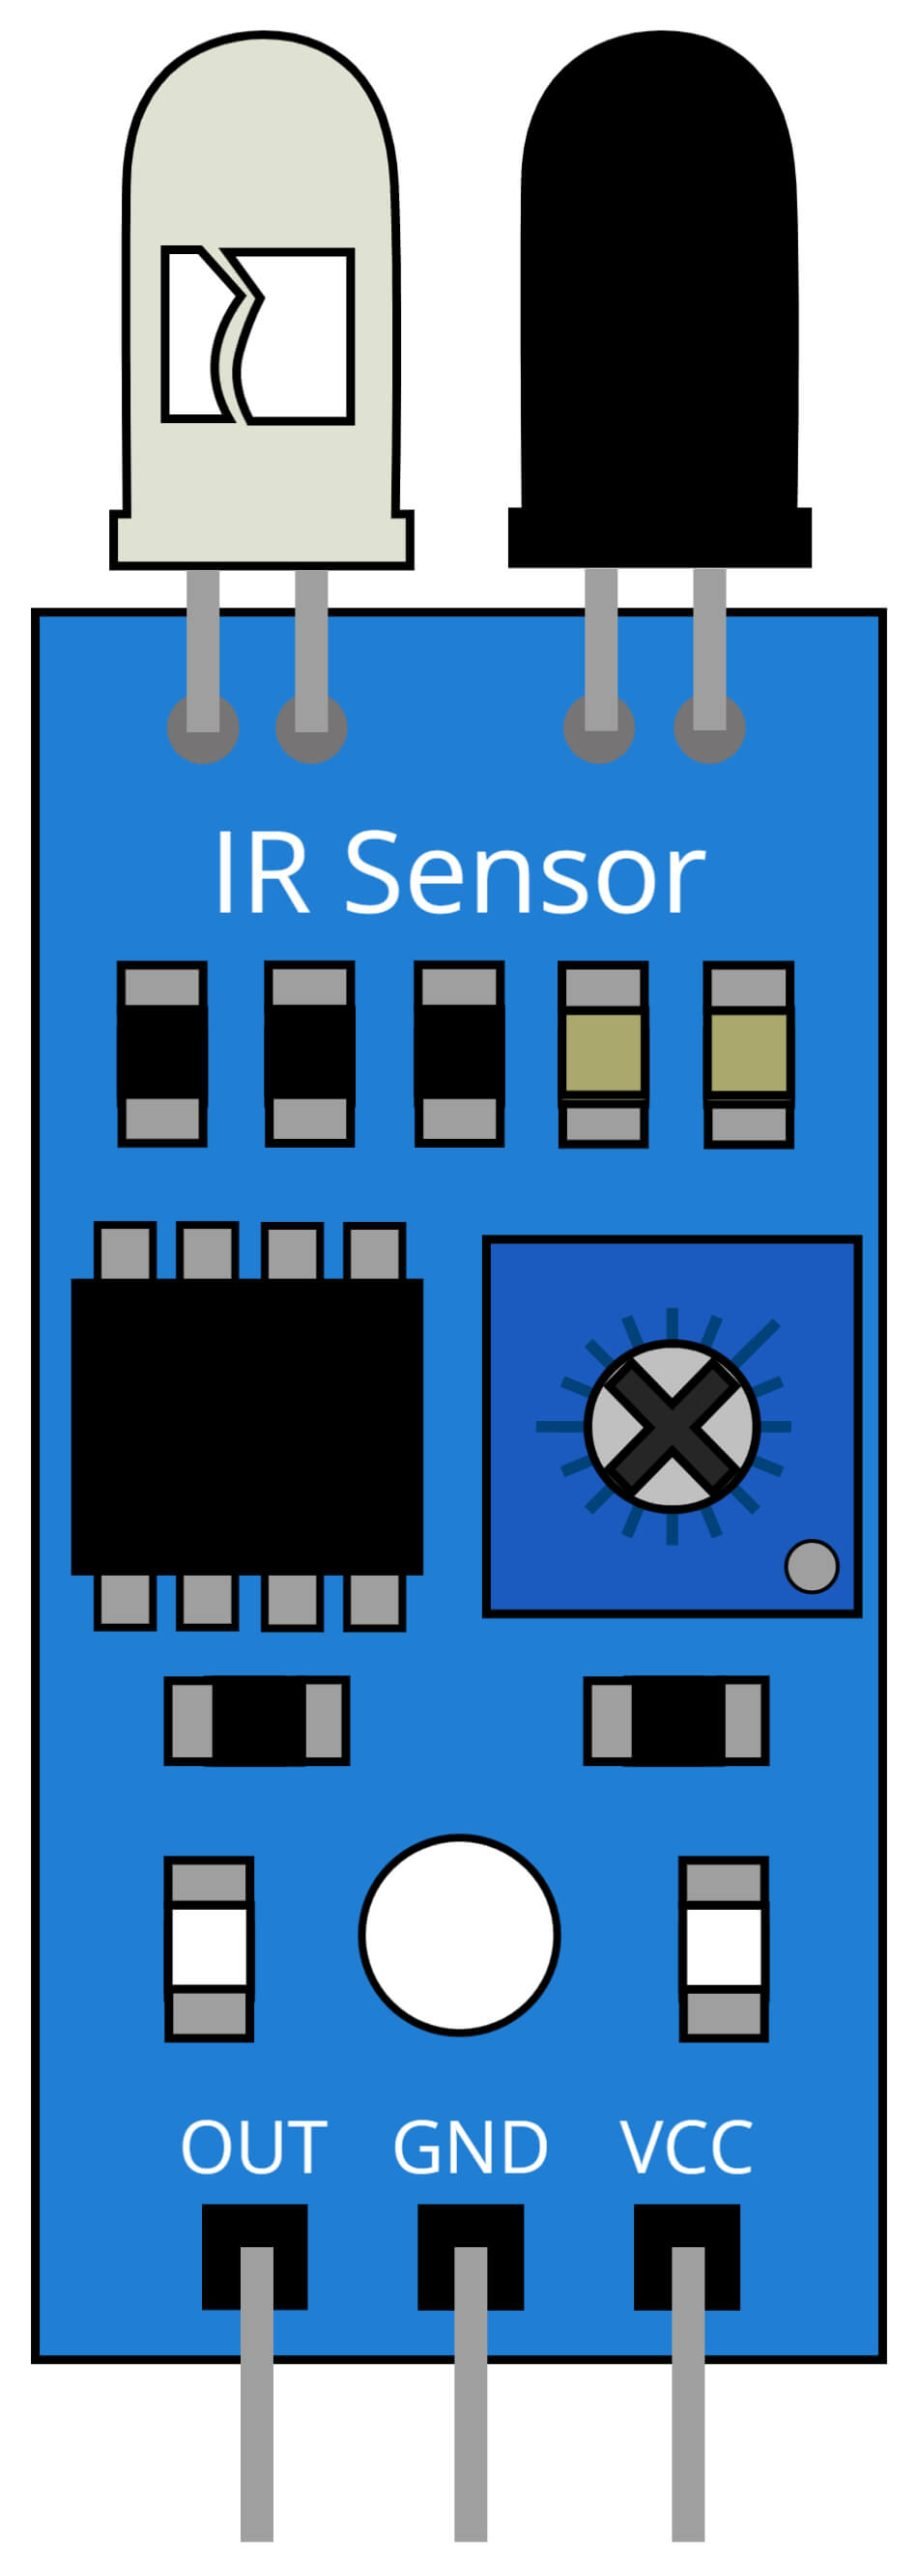
An IR sensor, also known as an Infrared sensor, is an electronic device that detects and measures infrared radiation. Infrared radiation is a type of electromagnetic radiation with a wavelength longer than visible light. IR sensors work by emitting an infrared beam and then measuring the amount of reflected light. They are widely used in various applications such as remote control devices, security systems, obstacle detection, and industrial automation.
The IR sensor consists of two main parts: an infrared emitter and an infrared detector. The emitter emits an infrared beam, which bounces back to the detector if it encounters an object. The detector measures the reflected light and converts it into an electrical signal, which is then processed by the sensor’s circuit. Based on the electrical signal, the IR sensor can determine the distance, speed, or presence of an object.
IR sensors are available in various shapes, sizes, and types, each with its own set of capabilities and limitations. For example, there are IR sensors that can detect objects at a long range, others that can detect objects in high speeds, and others that can detect small or large objects. IR sensors are also available in both analog and digital forms, with different specifications for sensitivity, accuracy, and response time.
What is Arduino UNO?
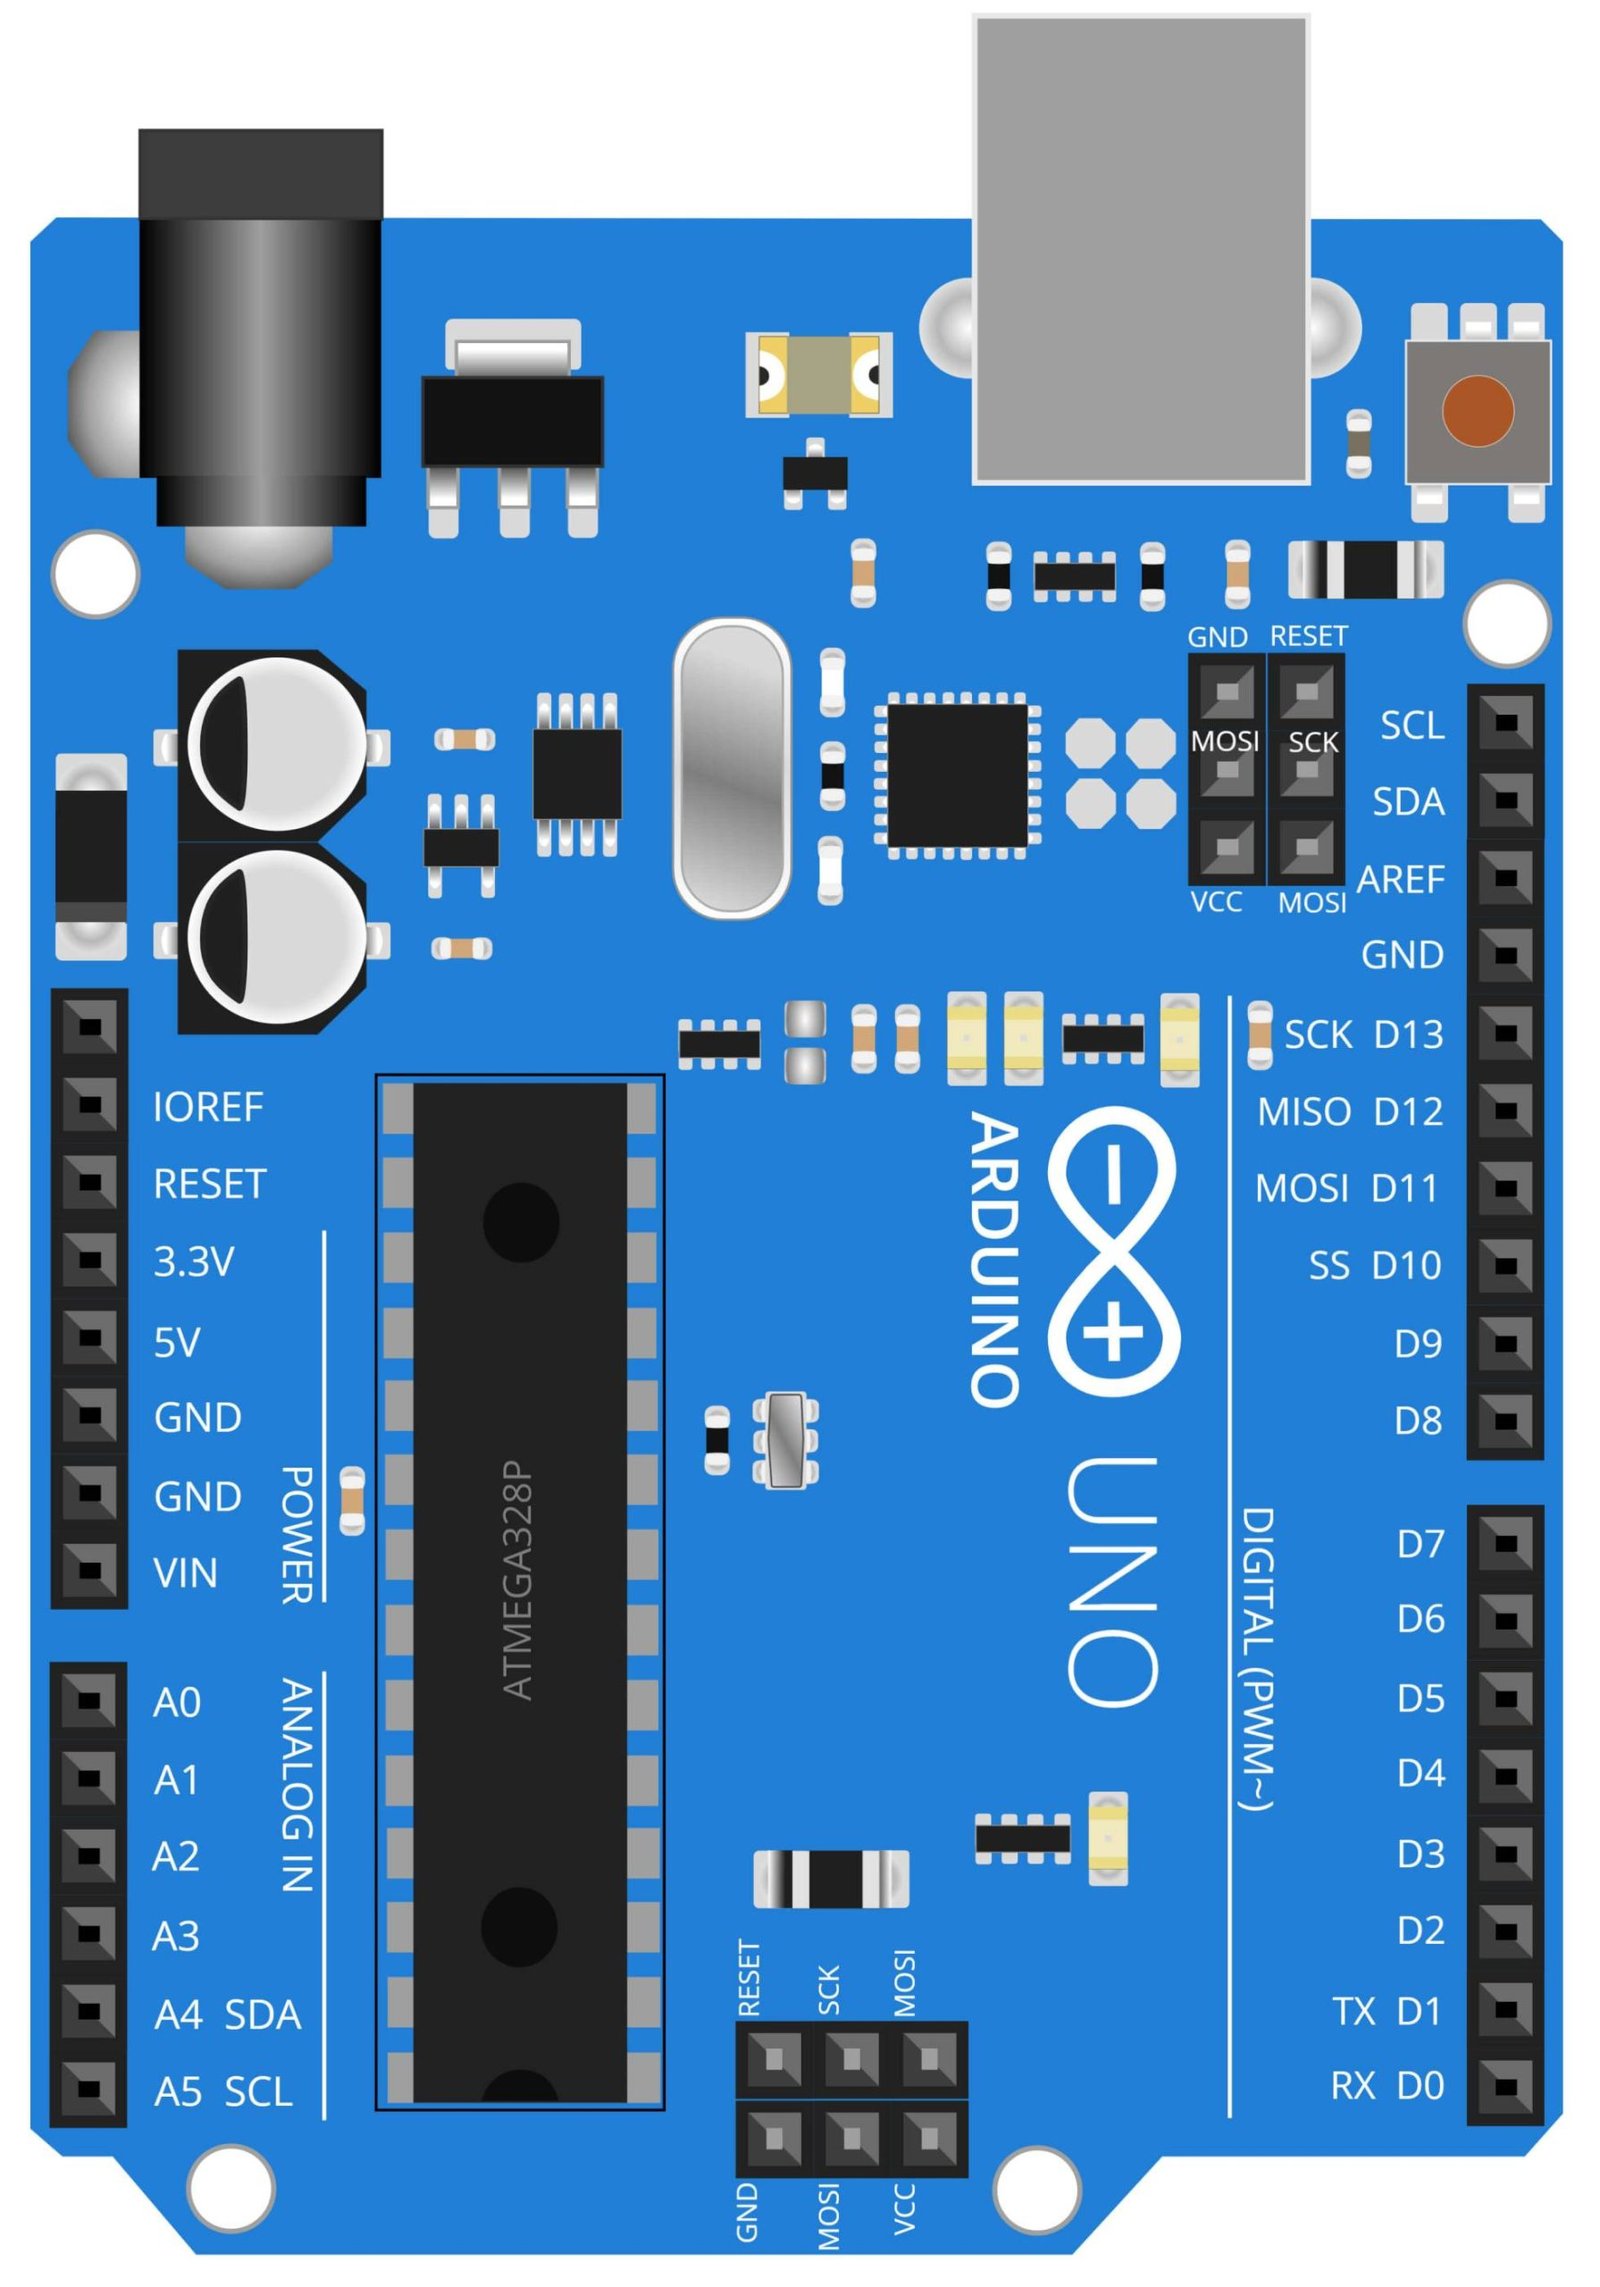
Arduino UNO is a microcontroller development board based on the ATmega328P microcontroller. It is a part of the Arduino family of open-source electronics platforms, designed to make it easier for hobbyists, makers, and students to build interactive electronics projects. The Arduino UNO is one of the most popular boards in the Arduino line and is a great starting point for those new to microcontroller programming and electronics.
The Arduino UNO has a simple design that includes a set of digital and analog input/output (I/O) pins, a power jack, a USB port, and a reset button. The board can be powered through the USB port or an external power source. The Arduino UNO can be programmed using the Arduino Integrated Development Environment (IDE), which provides a user-friendly interface for writing, uploading, and debugging code. The Arduino UNO supports C++ as its main programming language, making it accessible to a wide range of users with different programming backgrounds.
The Arduino UNO can be used for a wide range of projects, from simple DIY projects to complex commercial applications. Some of the popular uses for the Arduino UNO include controlling LEDs, reading sensors, driving motors, creating games, and interfacing with other devices. The Arduino UNO is also compatible with a large number of third-party libraries, shields, and sensors, which makes it easier to expand the capabilities of the board for specific projects.
Interfacing IR Sensor with Arduino UNO:

Program Code:
const int IR_sensor = 7; // Define IR sensor pin

void setup() {
  pinMode(IR_sensor, INPUT); // Set IR sensor pin as input
  Serial.begin(9600); // Start serial communication
}

void loop() {
  int sensorValue = digitalRead(IR_sensor); // Read IR sensor value
  Serial.println(sensorValue); // Print IR sensor value to serial monitor
  delay(100); // Delay 100ms
}
This code will read the IR sensor value, and print it to the serial monitor. You can view the output in the Serial Monitor in the Arduino IDE.
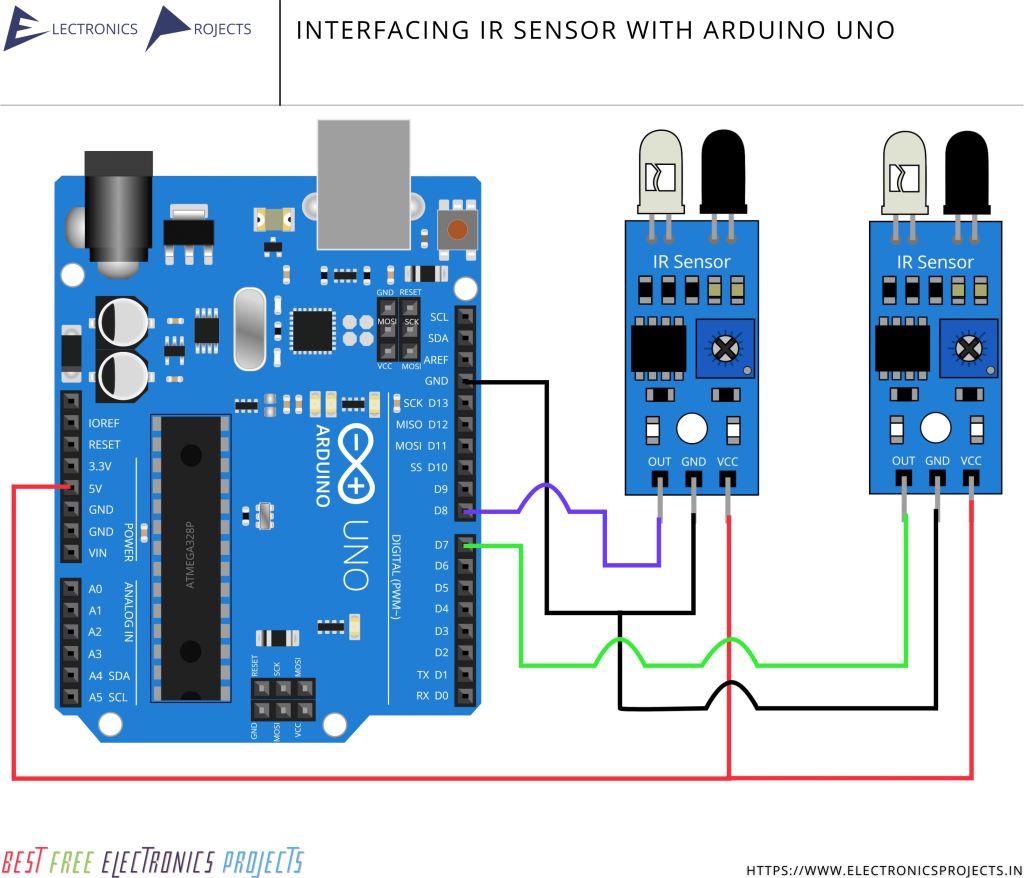
Interfacing 2 IR Sensors with Arduino UNO:
Program Code:
const int IR_sensor1 = 7; // IR sensor 1 connected to digital pin 7
const int IR_sensor2 = 8; // IR sensor 2 connected to digital pin 8

void setup() {
  pinMode(IR_sensor1, INPUT); // Set IR sensor 1 pin as input
  pinMode(IR_sensor2, INPUT); // Set IR sensor 2 pin as input
  Serial.begin(9600); // Start serial communication
}

void loop() {
  int sensorValue1 = digitalRead(IR_sensor1); // Read IR sensor 1 value
  int sensorValue2 = digitalRead(IR_sensor2); // Read IR sensor 2 value
  Serial.print("Sensor 1: ");
  Serial.print(sensorValue1);
  Serial.print("  Sensor 2: ");
  Serial.println(sensorValue2); // Print IR sensor values to serial monitor
  delay(100); // Delay 100ms
}
This code will read the values of both IR sensors and print them to the serial monitor, where you can view the output using the Arduino IDE.
Adding more IR sensors:
To add more IR sensors, you would need to follow these steps:
1. Declare a constant for each additional IR sensor, giving each a unique name and corresponding digital pin on the Arduino.
const int IR_sensor3 = 9; // IR sensor 3 connected to digital pin 9
const int IR_sensor4 = 10; // IR sensor 4 connected to digital pin 10
2. In the setup() function, set the pin mode for each additional IR sensor.
pinMode(IR_sensor3, INPUT); // Set IR sensor 3 pin as input
pinMode(IR_sensor4, INPUT); // Set IR sensor 4 pin as input
3. In the loop() function, read the value of each additional IR sensor.
int sensorValue3 = digitalRead(IR_sensor3); // Read IR sensor 3 value
int sensorValue4 = digitalRead(IR_sensor4); // Read IR sensor 4 value
4. In the loop() function, print the values of each additional IR sensor to the serial monitor.
Serial.print("Sensor 3: ");
Serial.print(sensorValue3);
Serial.print("  Sensor 4: ");
Serial.println(sensorValue4);
5. Connect the VCC, GND, and OUT pins of each additional IR sensor to the corresponding pins on the Arduino.
This code will now read the values of the additional IR sensors and print them to the serial monitor, along with the values from the previously declared IR sensors. You can continue adding as many IR sensors as you need in a similar manner, just make sure to give each IR sensor a unique constant name and corresponding digital pin.
Projects related to IR Sensor and Arduino:
Coin Counter and Sorter using Arduino, IR Sensors and 16×2 LCD Display ⇗
Line Follower and Obstacle Avoiding Robot using Arduino, IR Sensor and Ultrasonic Sensor ⇗