Description:
In this project we build an Alcohol Detector using Arduino and MQ3 Gas Sensor. This alcohol detector detects if the person is drunk or not. Tell a person to breath out from their mouth to the MQ3 Gas Sensor and it will detect the alcohol. The result will be displayed on 0.96” SPI OLED Display. Arduino UNO is used.
Circuit Diagram:

Components:
| SR. NO. | COMPONENT | PINOUT DIAGRAM | BUY |
|---|---|---|---|
| 1 | Arduino UNO (Other Arduinos can be used too) | Arduino UNO Pinout Diagram⇗ | |
| 2 | 0.96″ SPI OLED Display | ||
| 3 | MQ3 Gas Sensor | MQ3 Gas Sensor Pinout Diagram⇗ |
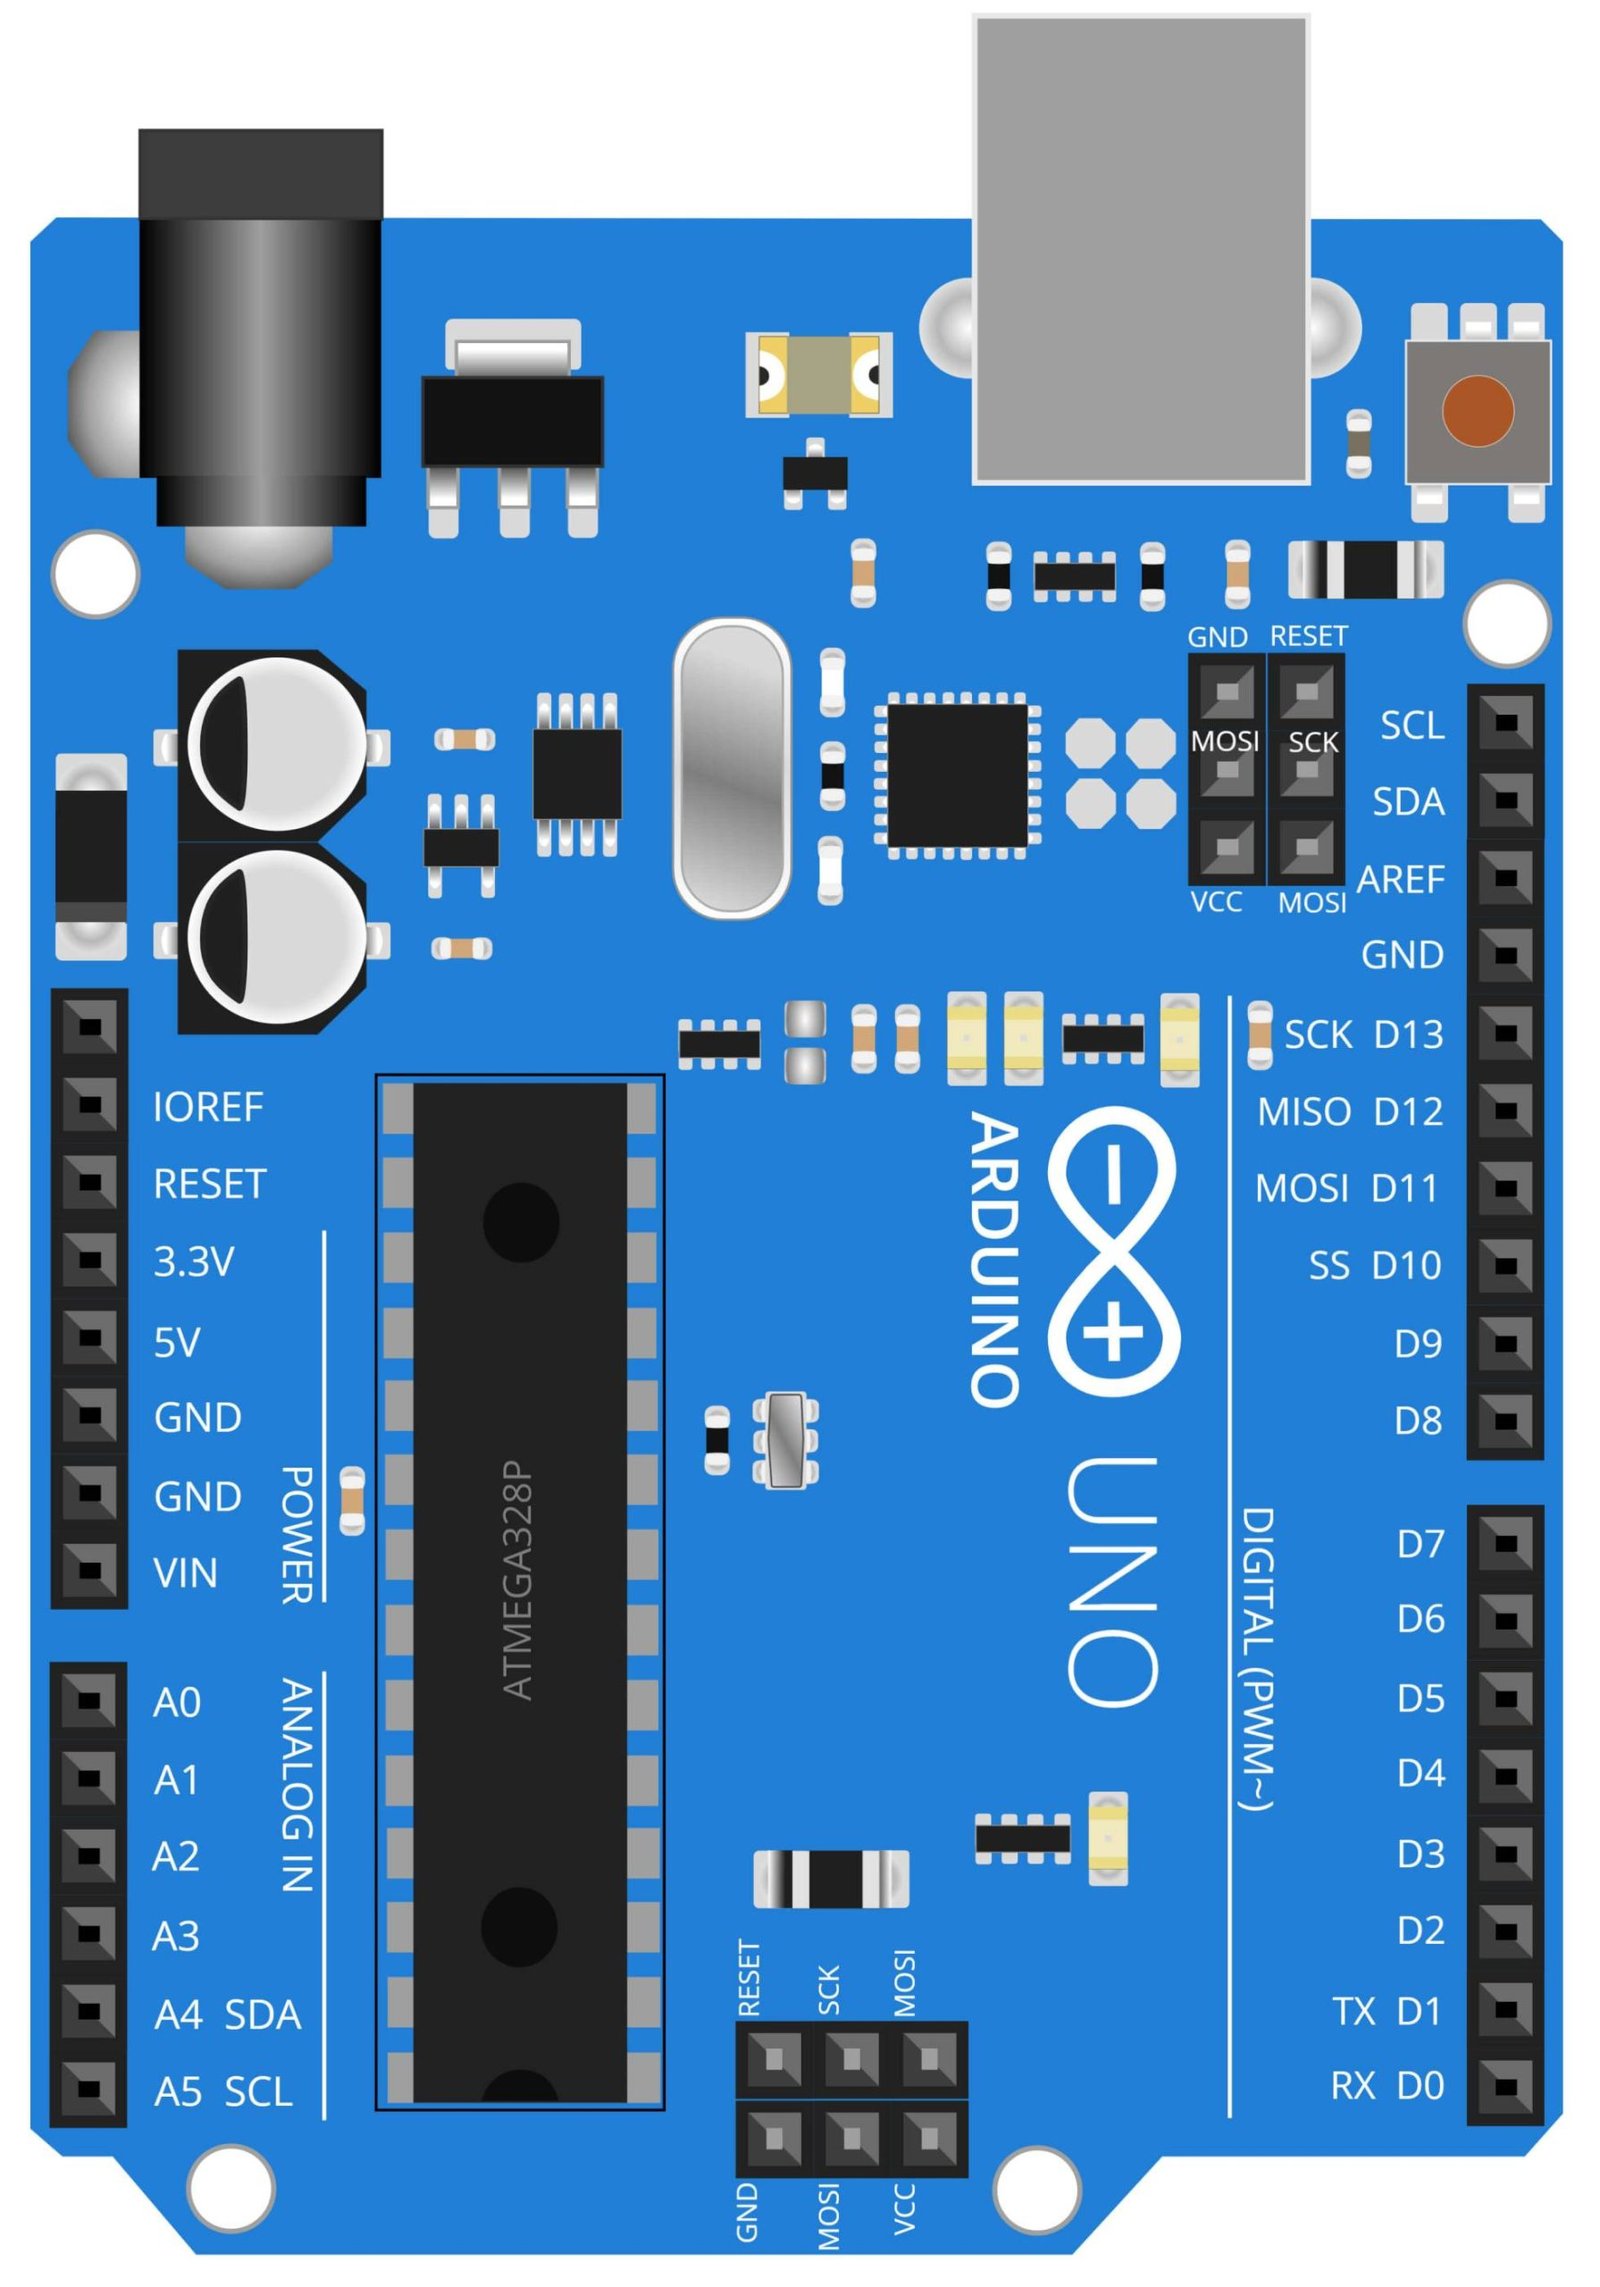
Arduino UNO
The Arduino UNO is a microcontroller board based on the ATmega328P. It has 14 digital input/output pins, 6 analog inputs, a 16 MHz quartz crystal, a USB connection, a power jack, an ICSP header and a reset button. The board is programmed using the Arduino IDE. The Arduino UNO is one of the most popular boards in the Arduino family and is widely used in DIY projects and for learning electronics and programming. In this project, the Arduino UNO is used to control the MQ3 gas sensor and the OLED display module. The sensor is used to detect the presence of alcohol in the air and the OLED display is used to display the alcohol level in real-time. The Arduino UNO is the brain of the project and it is used to control the sensor, the display, and the communication between the sensor and the display.
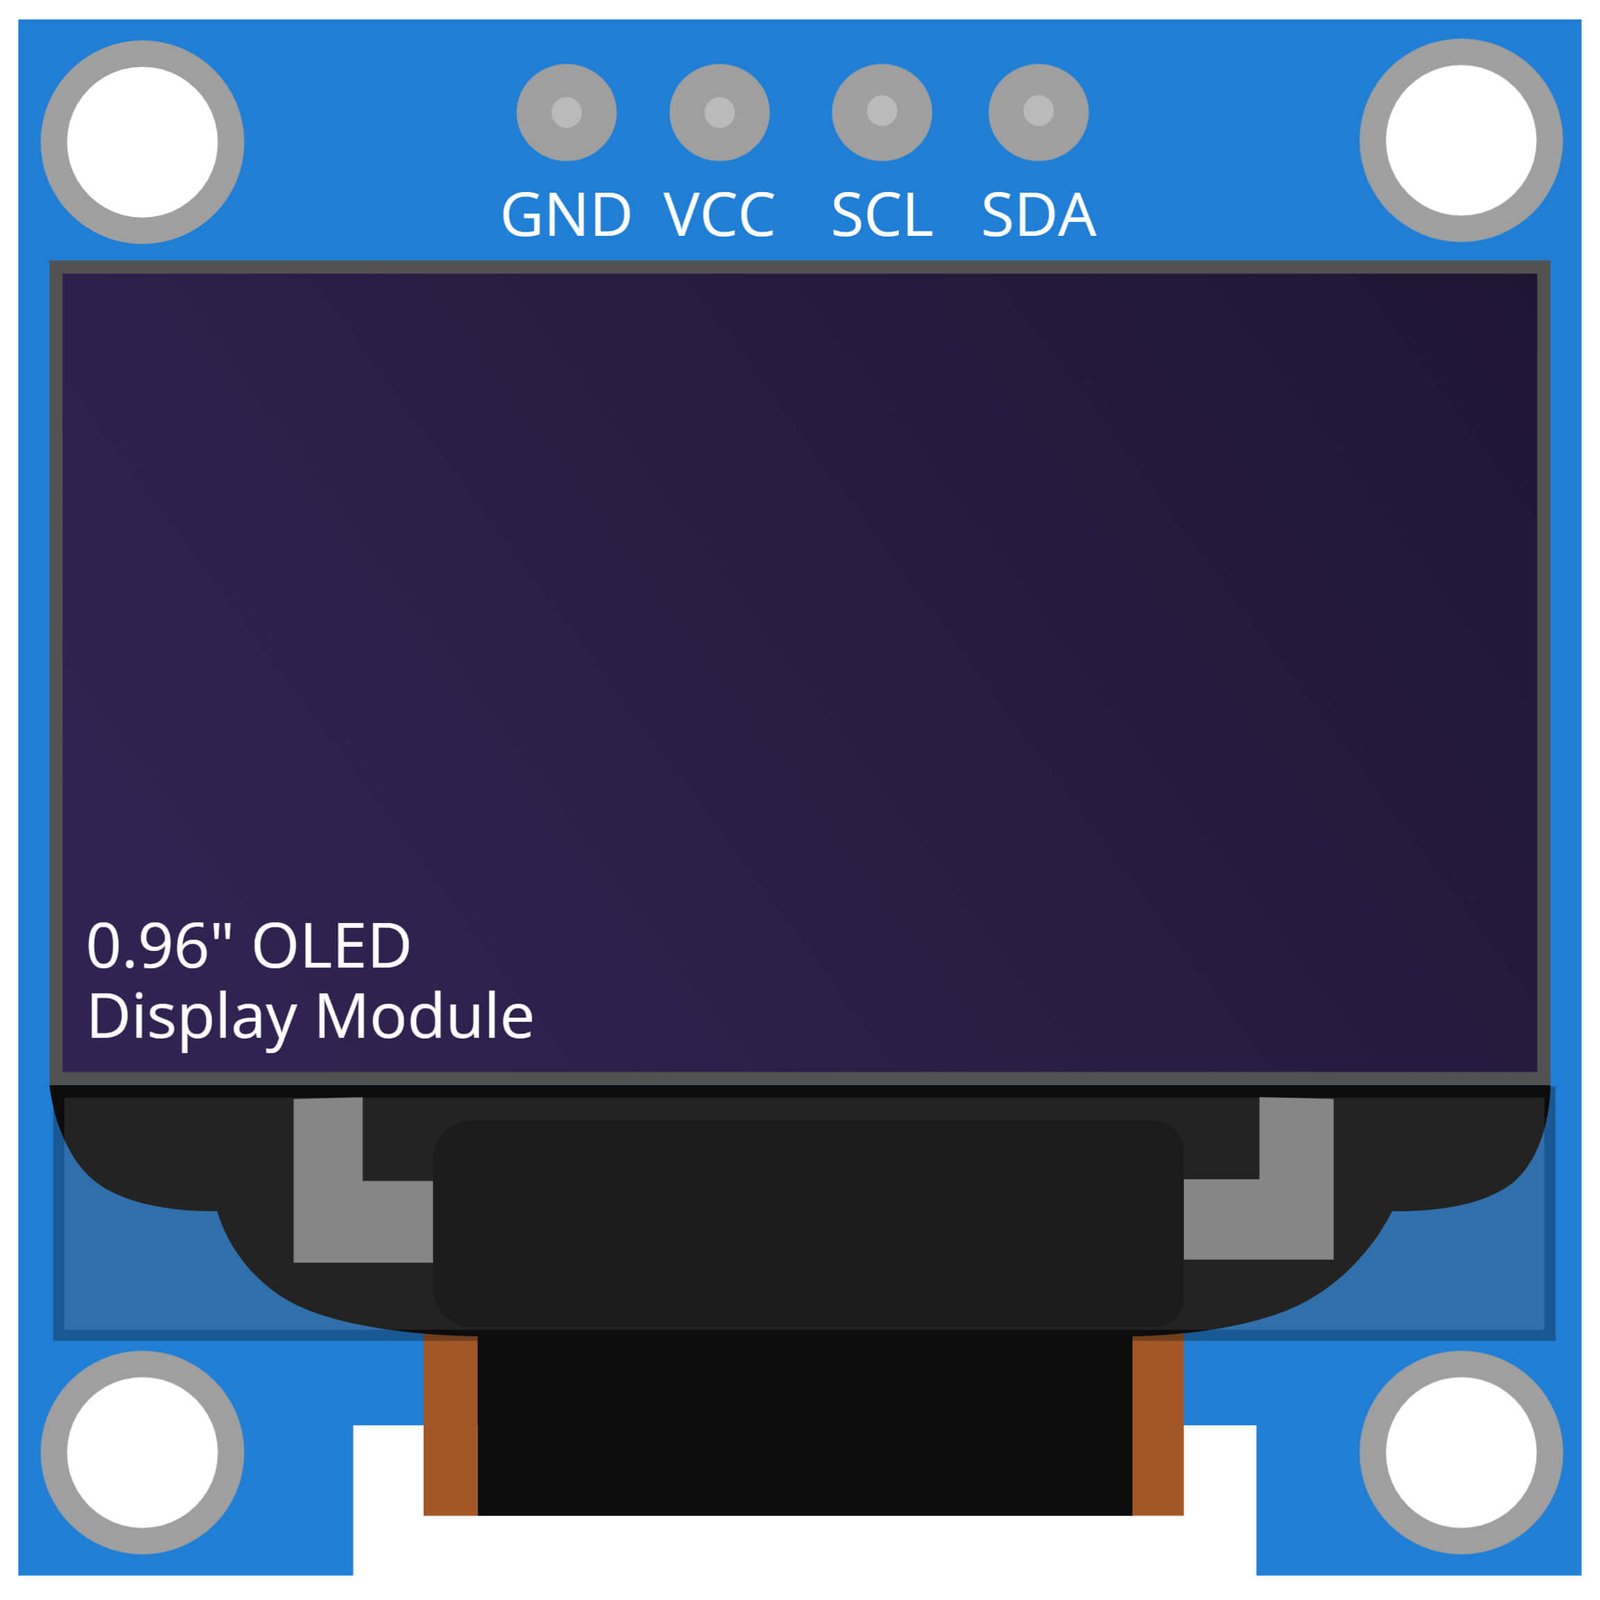
0.96 Inch OLED Display Module
The 0.96” OLED display module is a small, yet powerful display that can be used to display text and graphics on a variety of devices. In this project, it is used to display the alcohol level detected by the MQ3 gas sensor on the Arduino UNO. This display is ideal for this project because it is small in size, making it easy to integrate into the overall design of the alcohol detector. It is also very energy efficient, which is important when working with battery-powered devices. Additionally, the OLED display offers a wide viewing angle, high contrast, and a fast refresh rate, which ensures that the information displayed is clear and easy to read.
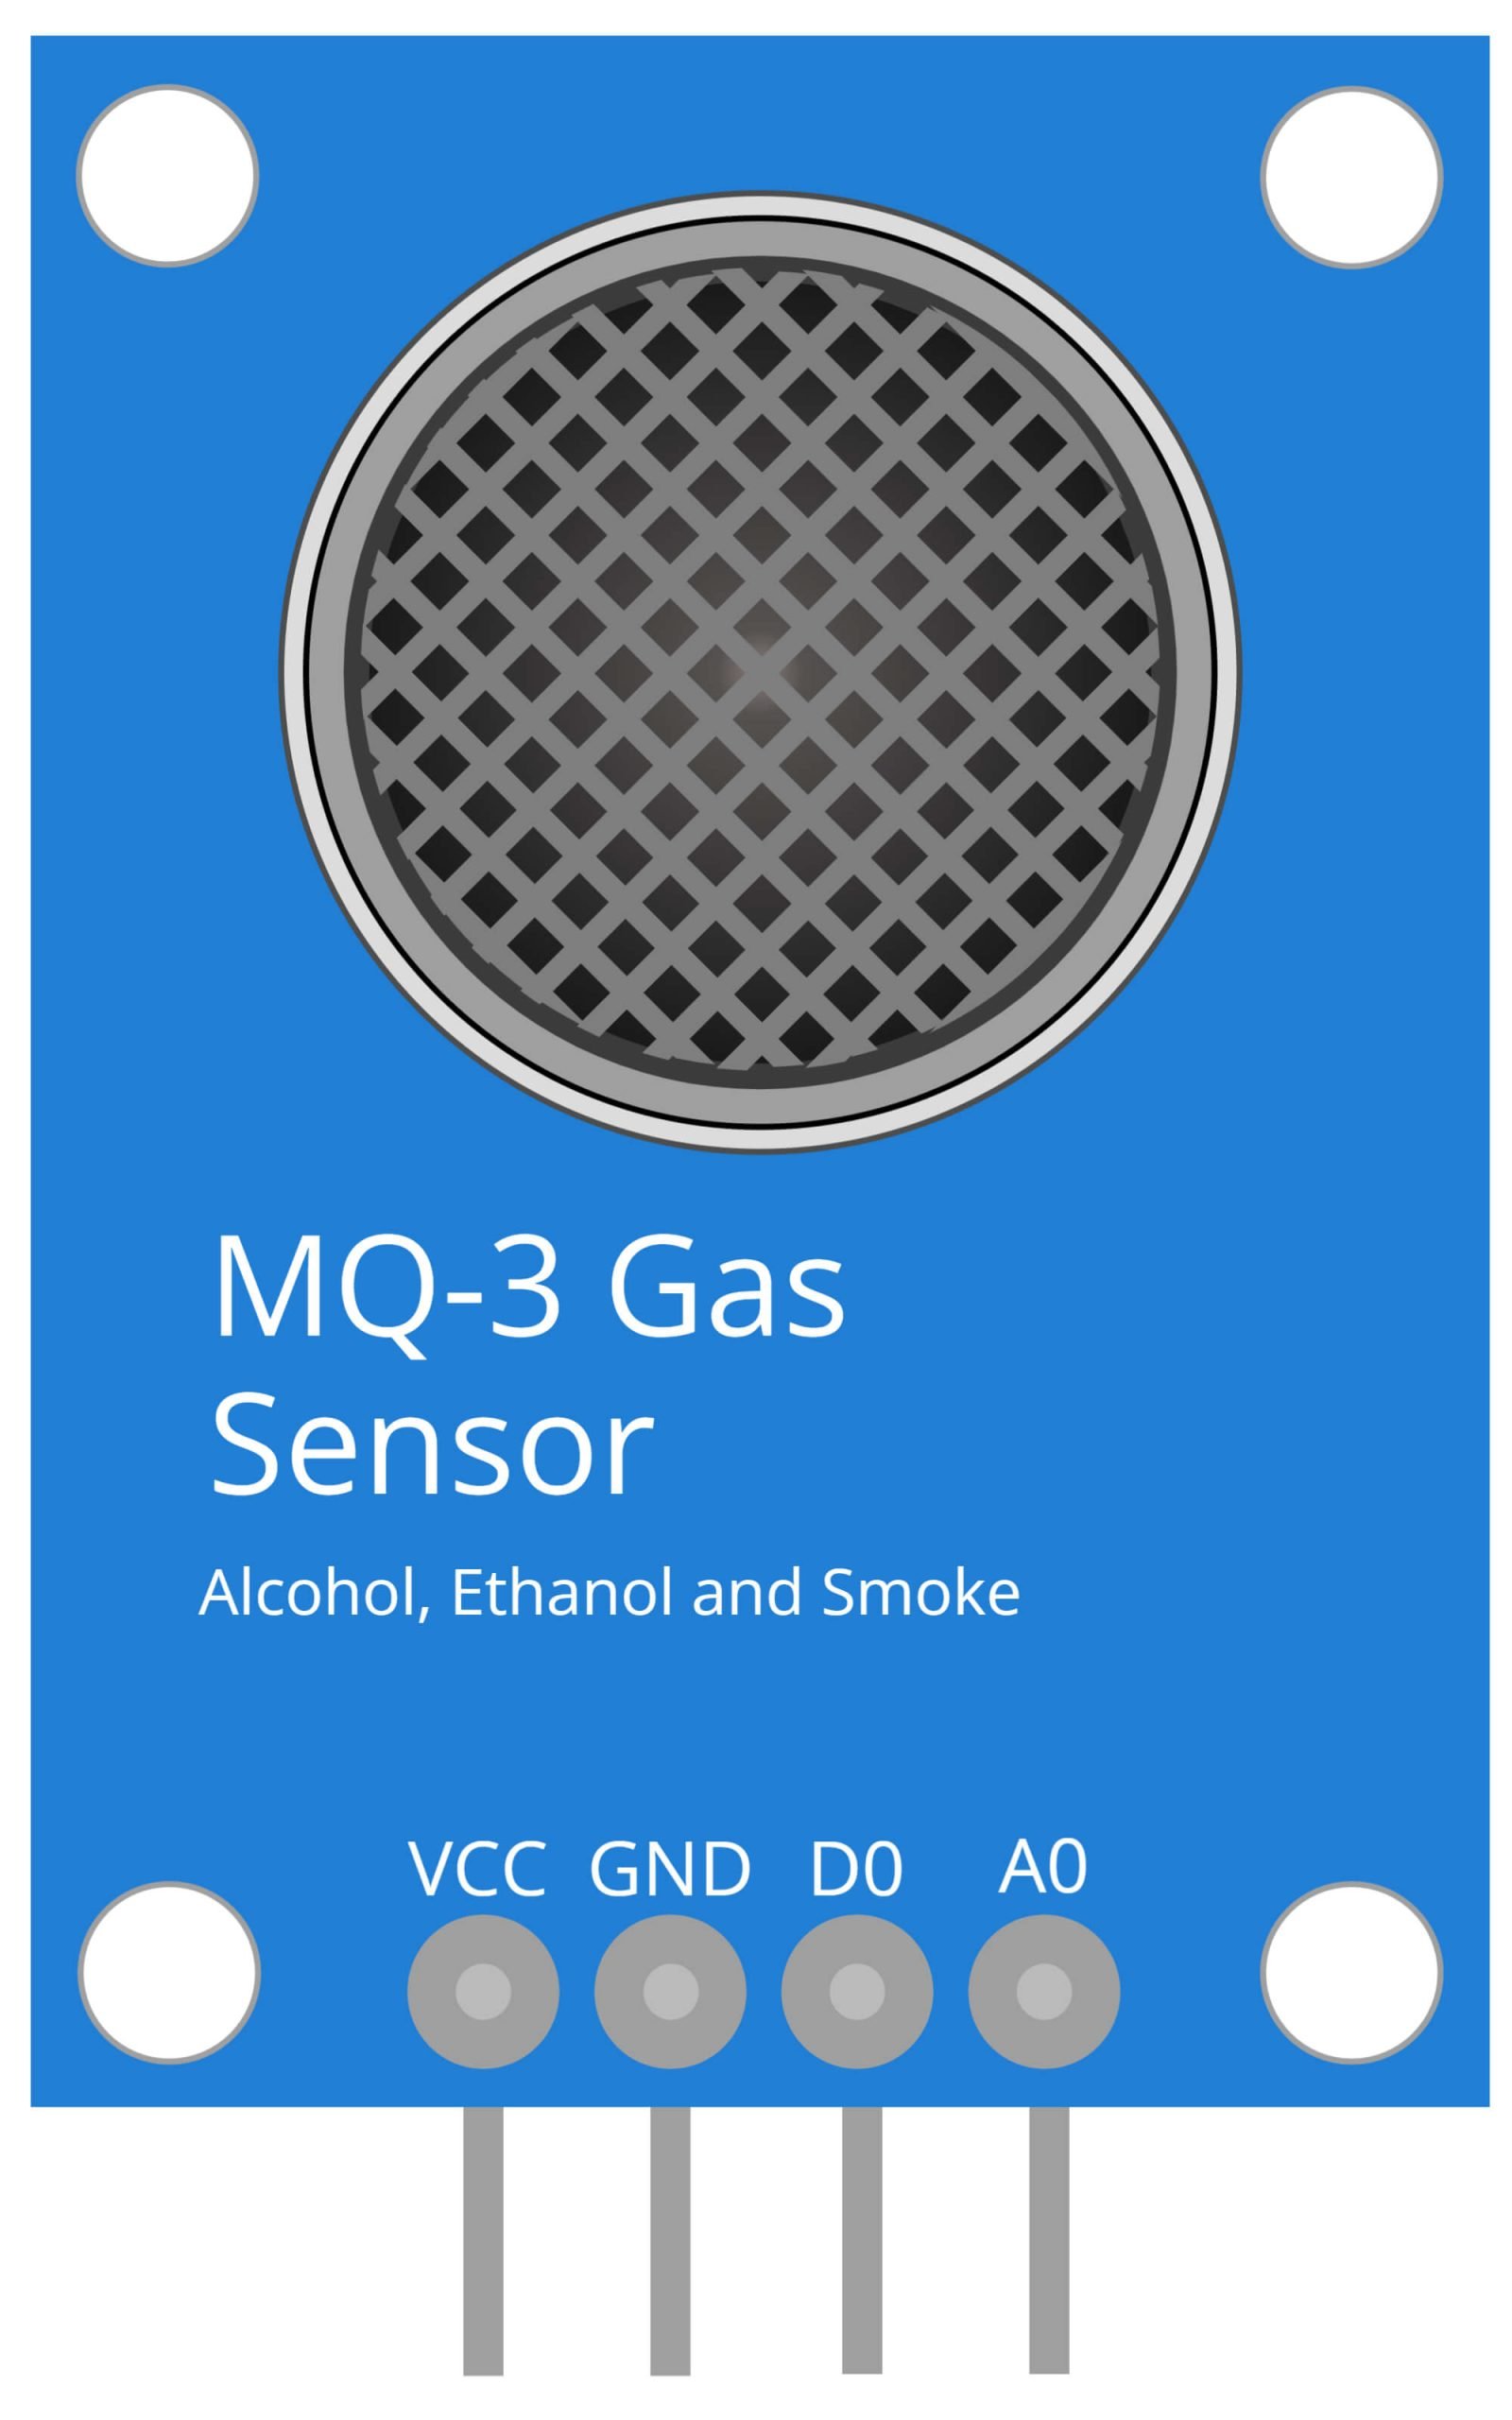
MQ3 Gas Sensor
The MQ3 gas sensor is a type of gas sensor that is commonly used to detect the presence of alcohol in the air. In this project, the MQ3 gas sensor is used to detect the alcohol level in the air and then display the results on the 0.96” OLED display module. The MQ3 gas sensor is sensitive to a wide range of alcohols and has a high sensitivity, which makes it ideal for this project. The sensor works by detecting the changes in resistance caused by the presence of alcohol in the air. This information is then sent to the Arduino UNO microcontroller, which processes the data and displays it on the OLED display module. The MQ3 gas sensor is a cost-effective and accurate way to detect alcohol levels in the air. It is also very easy to use, which is why it is commonly used in DIY projects like this one.
Steps and Info:
1. Get correct components as given. You can buy online or offline. I buy electronics components mostly from Amazon.
2. Start connecting the components. If you are new to connecting components in an electronic circuit, then use a Breadboard or you can straight up make connections using Jumper wires but it will create problem when there will be two or more connections needed at one pin (for example two or more different sensors 5V connection to Arduino’s 5V pin). But before soldering components on a PCB or printing a PCB for your circuit, better try using breadboard so that any errors and mistakes can be observed on breadboard and not after soldering. Or do connections in your way.
3. Now after building the circuit, download the Arduino IDE from https://www.arduino.cc/ website.
4. If you are new to Arduino IDE software, then watch this video we made specially for beginners about Arduino IDE.
5. If you know Arduino IDE then straight up copy the code we given and paste it into the Arduino IDE sketch.
6. Connect the Arduino to your Computer/device. Select a proper port, proper Arduino type and whatever other settings are. Here it is Arduino UNO. (If you don’t know what this all is then watch our video: ).
7. Compile the code and Upload it.
8. If any error occurs then try to troubleshoot it by finding/copy-pasting it into our Solve Errors page https://electronicsprojects.in/solve-errors/, or you can straight up paste the error on Internet and you know the rest. Also check if there are no spelling/syntax errors in the code. Compile the code again once to check if errors are fixed. I have given proper connections and code but still nothing is perfect.
9. Once code compiles and uploads smoothly, you can start testing the working of your circuit/project.
10. Tell any drunk boi to breath out near the MQ3 Gas Sensor, the sensor will detect the alcohol gas and will display the result on the 0.96’ SPI OLED Display.
11. If it doesn’t work, then check connections and code. Also you can talk with me and the community through discord. All the links to social is given at the right side of this page.
Program Code:
/* https://www.electronicsprojects.in Alcohol Detector using Arduino, MQ3 Gas Sensor and 0.96” OLED Display Module */

#include <SPI.h>
#include <Wire.h>
#include <Adafruit_GFX.h>
#include <Adafruit_SSD1306.h>

#define OLED_RESET 4
int TIME_UNTIL_WARMUP = 900;
unsigned long time;


int analogPin = A5;
int val = 0;
Adafruit_SSD1306 display(OLED_RESET);


void setup()   {

 display.begin(SSD1306_SWITCHCAPVCC, 0x3C);
 display.clearDisplay();
}


void loop() {

  delay(100);

  val = readAlcohol();
  printTitle();
  printWarming();

  time = millis()/1000;

  if(time<=TIME_UNTIL_WARMUP)
  {
    time = map(time, 0, TIME_UNTIL_WARMUP, 0, 100);
    display.drawRect(10, 50, 110, 10, WHITE); //Empty Bar
    display.fillRect(10, 50, time,10,WHITE);
  }else
  {
     printTitle();
     printAlcohol(val);
     printAlcoholLevel(val);
  }
  display.display();

}


void printTitle()
{
  display.clearDisplay();
  display.setTextSize(1);
  display.setTextColor(WHITE);
  display.setCursor(22,0);
  display.println("Drunk boi Detector ٩(︡❛ ﹏❛︠ԅ)");
}

void printWarming()
{
  display.setTextSize(2);
  display.setTextColor(WHITE);
  display.setCursor(0,20);
  display.println("Getting Ready");
}

void printAlcohol(int value)
{
  display.setTextSize(2);
  display.setTextColor(WHITE);
  display.setCursor(45,25);
  display.println(val);
}

void printAlcoholLevel(int value)
{
  display.setTextSize(1);
  display.setTextColor(WHITE);
  display.setCursor(10,55);

  if(value<200)
  {
      display.println("boi aint drunk.");
  }
  if (value>=200 && value<280)
  {
      display.println("boi is sus.");
  }
  if (value>=280 && value<350)
  {
      display.println("boi is very sus.");
  }
  if (value>=350 && value <450)
  {
      display.println("boi is mega sus");
  }
  if(value>450)
  {
     display.println("boi is Drunk! IMPOSTER!");
  }
 }

 int readAlcohol()
 {
  int val = 0;
  int val1;
  int val2;
  int val3;


  display.clearDisplay();
  val1 = analogRead(analogPin);
  delay(10);
  val2 = analogRead(analogPin);
  delay(10);
  val3 = analogRead(analogPin);

  val = (val1+val2+val3)/3;
  return val;
 }