Description:
In this project, we build a rain detector using Arduino. Here, the HL-83 Rain sensor is used which detects rain drops. After detection the Buzzer makes sound, so you will know that it’s raining. Everything this controlled using Arduino Nano(Other Arduinos can be used too.).
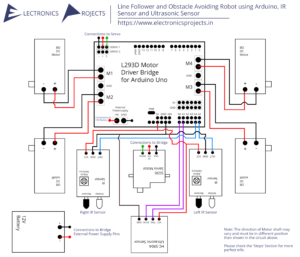
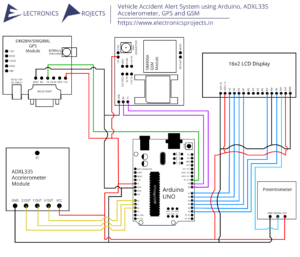
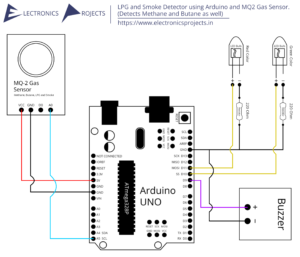
Circuit Diagram:

Components:
| SR. NO. | COMPONENT | PINOUT DIAGRAM | BUY |
|---|---|---|---|
| 1 | Arduino Nano (Other Arduinos can be used too) | Arduino UNO Pinout Diagram⇗ | |
| 2 | HL-83 Rain Sensor | ||
| 3 | Buzzer |
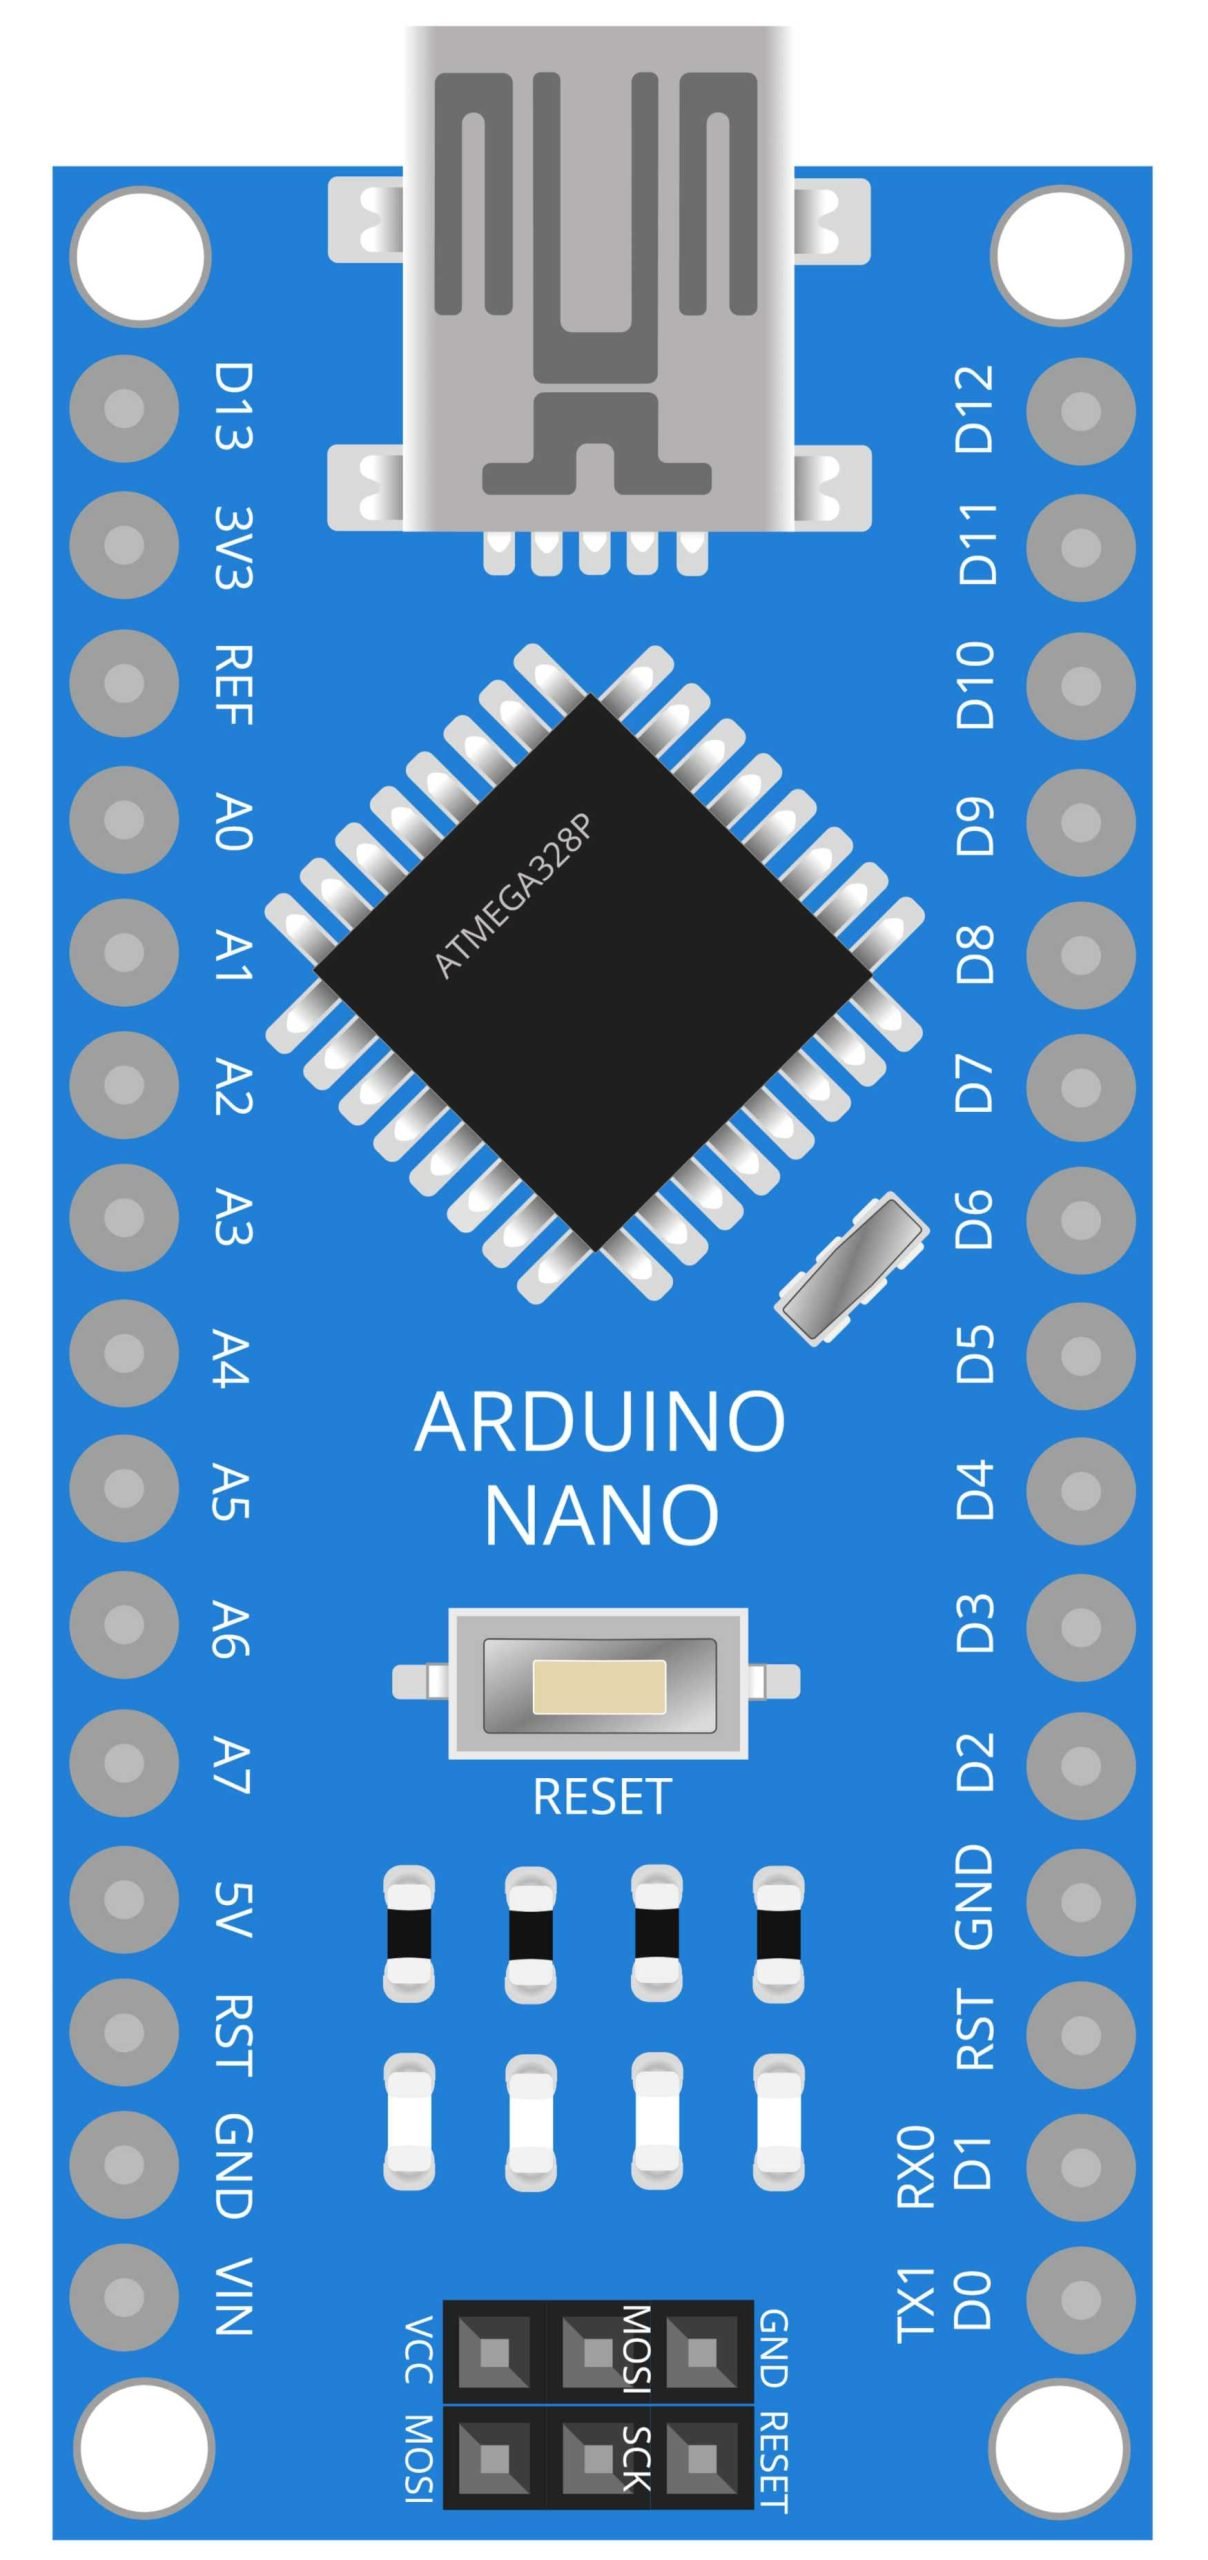
Arduino Nano
The Arduino Nano is a small and versatile microcontroller board based on the ATmega328P. It can be powered by USB or an external power supply and has a wide range of input/output (I/O) pins for connecting sensors, actuators, and other devices. In this project, the Arduino Nano is used as the main controller for the rain detector. It receives data from the HL-83 rain sensor and controls the buzzer based on the rain detection. The Arduino Nano’s small size and low power consumption make it an ideal choice for portable and battery-powered projects like this one. Additionally, the Nano’s user-friendly development environment and extensive community support make it easy for beginners to get started with programming and building their own projects.
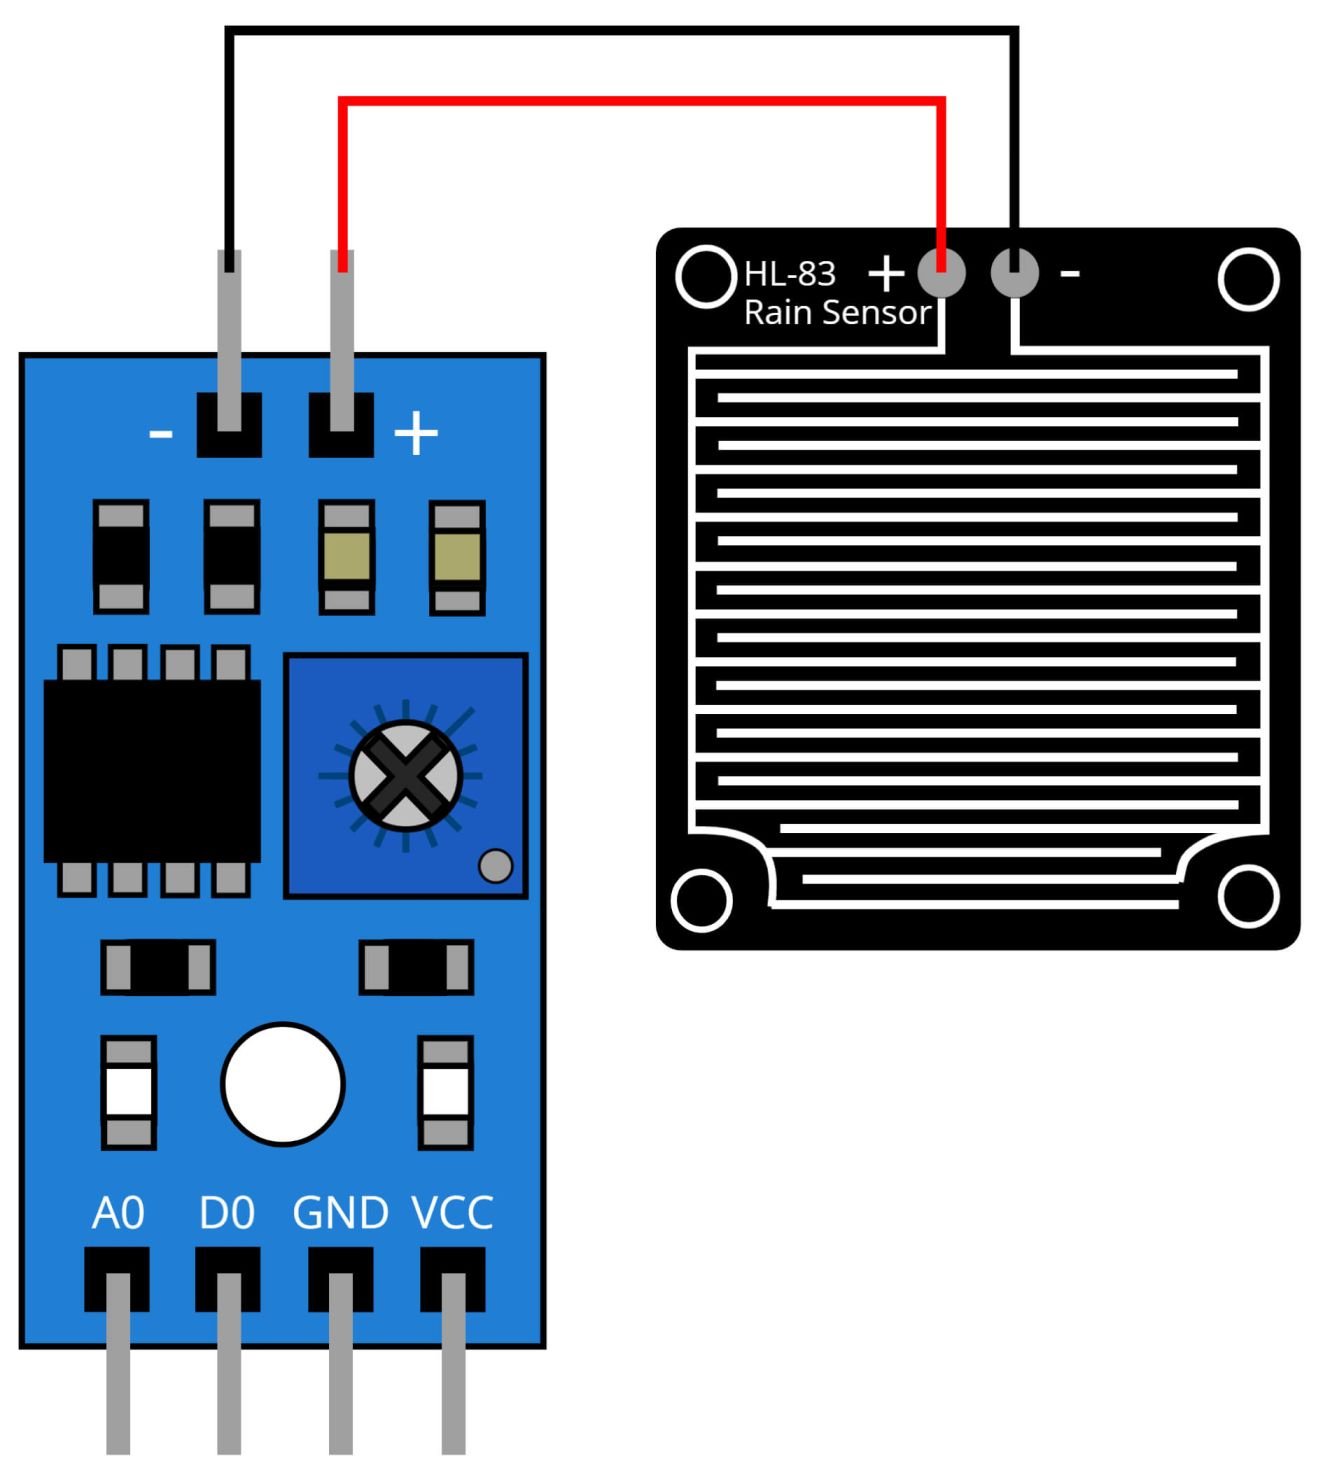
HL-83 Rain Sensor
The HL-83 rain sensor is a simple and reliable device that can detect the presence of rain. It consists of a series of parallel metal plates that are connected to an output pin on the sensor. When the plates come into contact with water, the electrical resistance between them changes, which can be detected by the Arduino Nano. In this project, the Arduino Nano is programmed to read the output from the HL-83 rain sensor and determine if it is receiving a dry or wet signal. The sensor is sensitive enough to detect even small amounts of rain, making it ideal for projects like this one. Additionally, the HL-83 sensor is cost-effective, easy to use and it does not require any additional power supply as it runs on the voltage supplied by the arduino nano. The sensor is also small and lightweight, making it easy to mount on a variety of surfaces and perfect for portable projects.
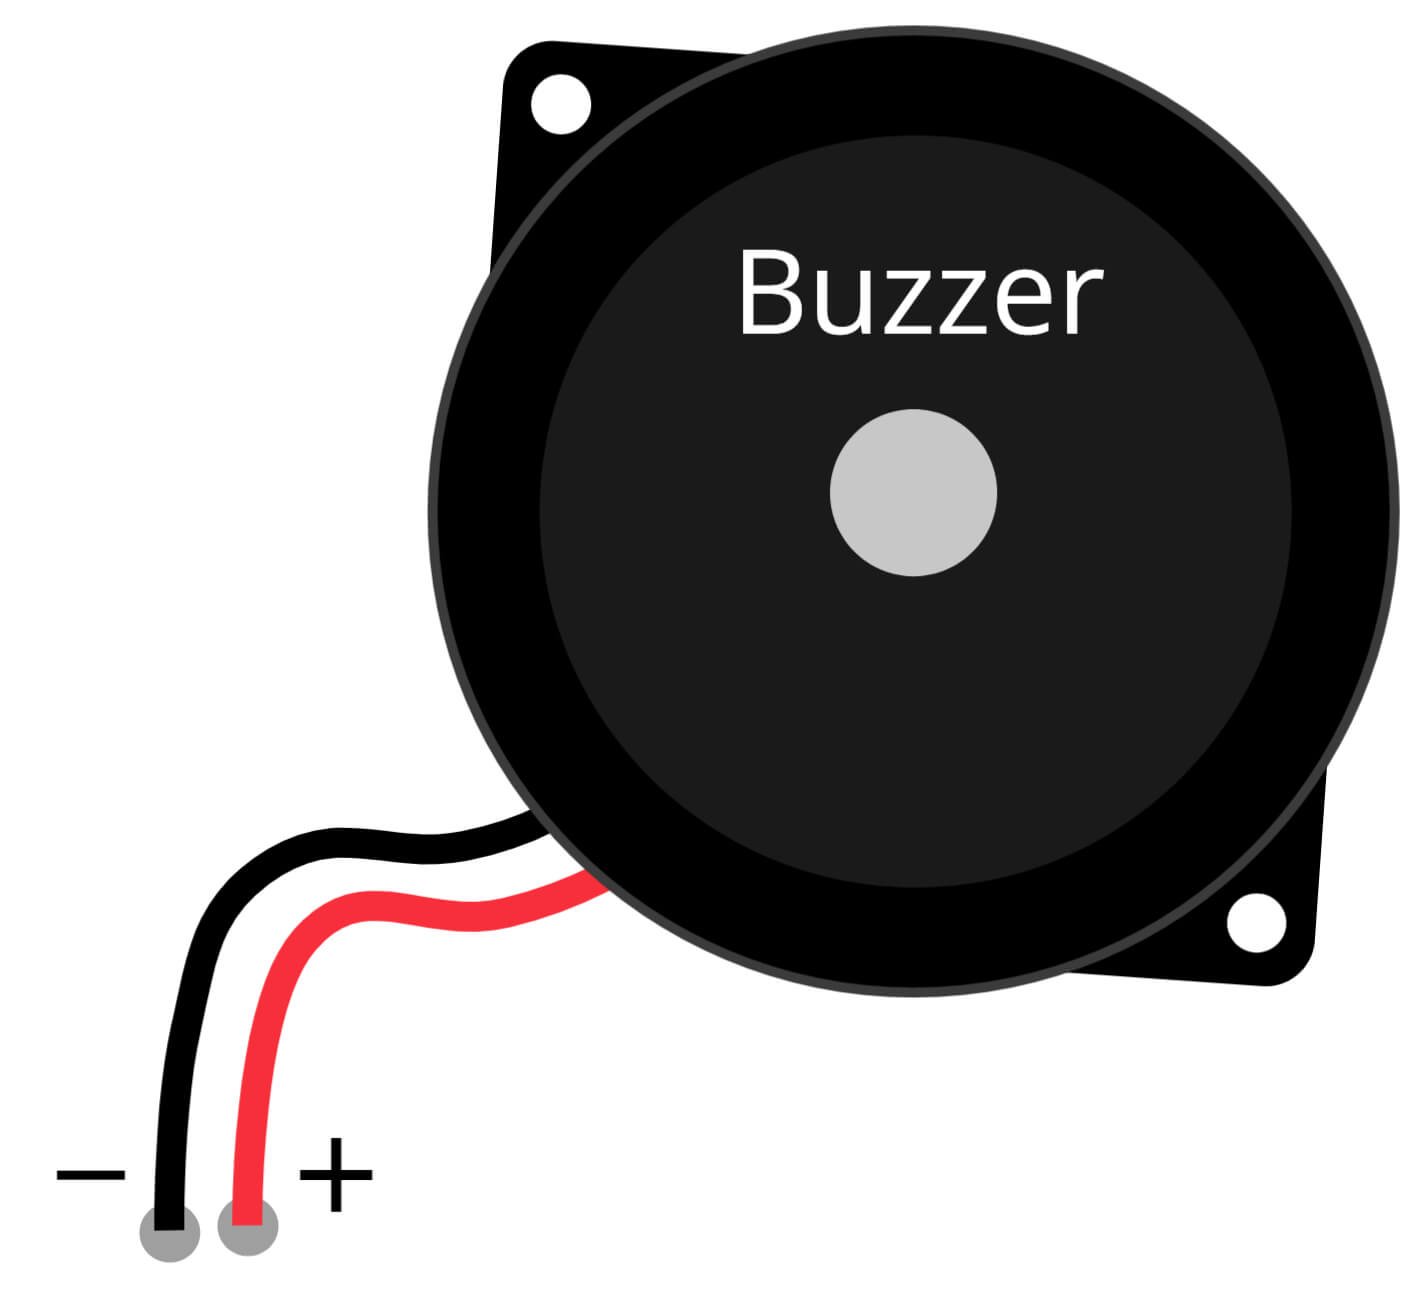
Buzzer
A buzzer is an electronic device that produces a loud, audible sound when an electric current is applied to it. In this project, the buzzer is used as an alarm system to alert the user when rain is detected. The Arduino Nano is programmed to control the buzzer, by sending a signal to it when the HL-83 rain sensor detects water. The buzzer can be used to produce a variety of different sounds, depending on the specific application. The buzzer in this project serves as an indicator for the user, once the sensor detects water it sends a signal to the buzzer which in turn produces a sound, this way the user is alerted without having to check the sensor constantly, this can be especially useful in cases where the device is placed in an area that is hard to reach.
Steps and Info:
1. Get correct components as given. You can buy online or offline. I buy electronics components mostly from Amazon.
2. Start connecting the components. If you are new to connecting components in an electronic circuit, then use a Breadboard or you can straight up make connections using Jumper wires but it will create problem when there will be two or more connections needed at one pin (for example two or more different sensors 5V connection to Arduino’s 5V pin). But before soldering components on a PCB or printing a PCB for your circuit, better try using breadboard so that any errors and mistakes can be observed on breadboard and not after soldering. Or do connections in your way.
3. Now after building the circuit, download the Arduino IDE from https://www.arduino.cc/ website.
4. If you are new to Arduino IDE software, then watch this video we made specially for beginners about Arduino IDE.
5. If you know Arduino IDE then straight up copy the code we given and paste it into the Arduino IDE sketch.
6. Connect the Arduino to your Computer/device. Select a proper port, proper Arduino type and whatever other settings are. Here it is Arduino UNO. (If you don’t know what this all is then watch our video: ).
7. Compile the code and Upload it.
8. If any error occurs then try to troubleshoot it by finding/copy-pasting it into our Solve Errors page https://electronicsprojects.in/solve-errors/, or you can straight up paste the error on Internet and you know the rest. Also check if there are no spelling/syntax errors in the code. Compile the code again once to check if errors are fixed. I have given proper connections and code but still nothing is perfect.
9. Once code compiles and uploads smoothly, you can start testing the working of your circuit/project.
10. Power up the Arduino, take the HL-83 Rain Sensor and start putting some water droplets on the sensor. When sensor detects water, then the buzzer will start making sound. If it doesn’t then check connections and code. Also you can talk with me and the community through discord. All the links to social is given at the right side of this page.
Program Code:
/* https://www.electronicsprojects.in Rain Detector using Arduino, HL-83 Rain Sensor and Buzzer */

#define rain A0
#define buzzer 5
int value;
int set=10;
void setup() {
  Serial.begin(9600);
  pinMode(buzzer,OUTPUT);
  pinMode(rain,INPUT);
  }
void loop() {

 value = analogRead(rain);
 Serial.println("Rain Detector is ON");
 Serial.println(value);
 value = map(value,0,1023,225,0);
 Serial.println(value);
 if(value>=set){
  Serial.println("Rain has came");
  digitalWrite(buzzer,HIGH);
 }
 else{
  digitalWrite(buzzer,LOW);
 }
 delay(200);
}