
Learn how to interface a PIR motion sensor with Arduino and use it to detect movement. This guide covers the wiring and code necessary to get started with this popular sensor. Discover different applications and examples of using PIR sensors with Arduino to enhance your projects. Whether you’re a beginner or an experienced maker, this blog has all the information you need to get started with PIR motion sensing
Components:
| SR.NO. | COMPONENT | PINOUT DIAGRAM | BUY |
|---|---|---|---|
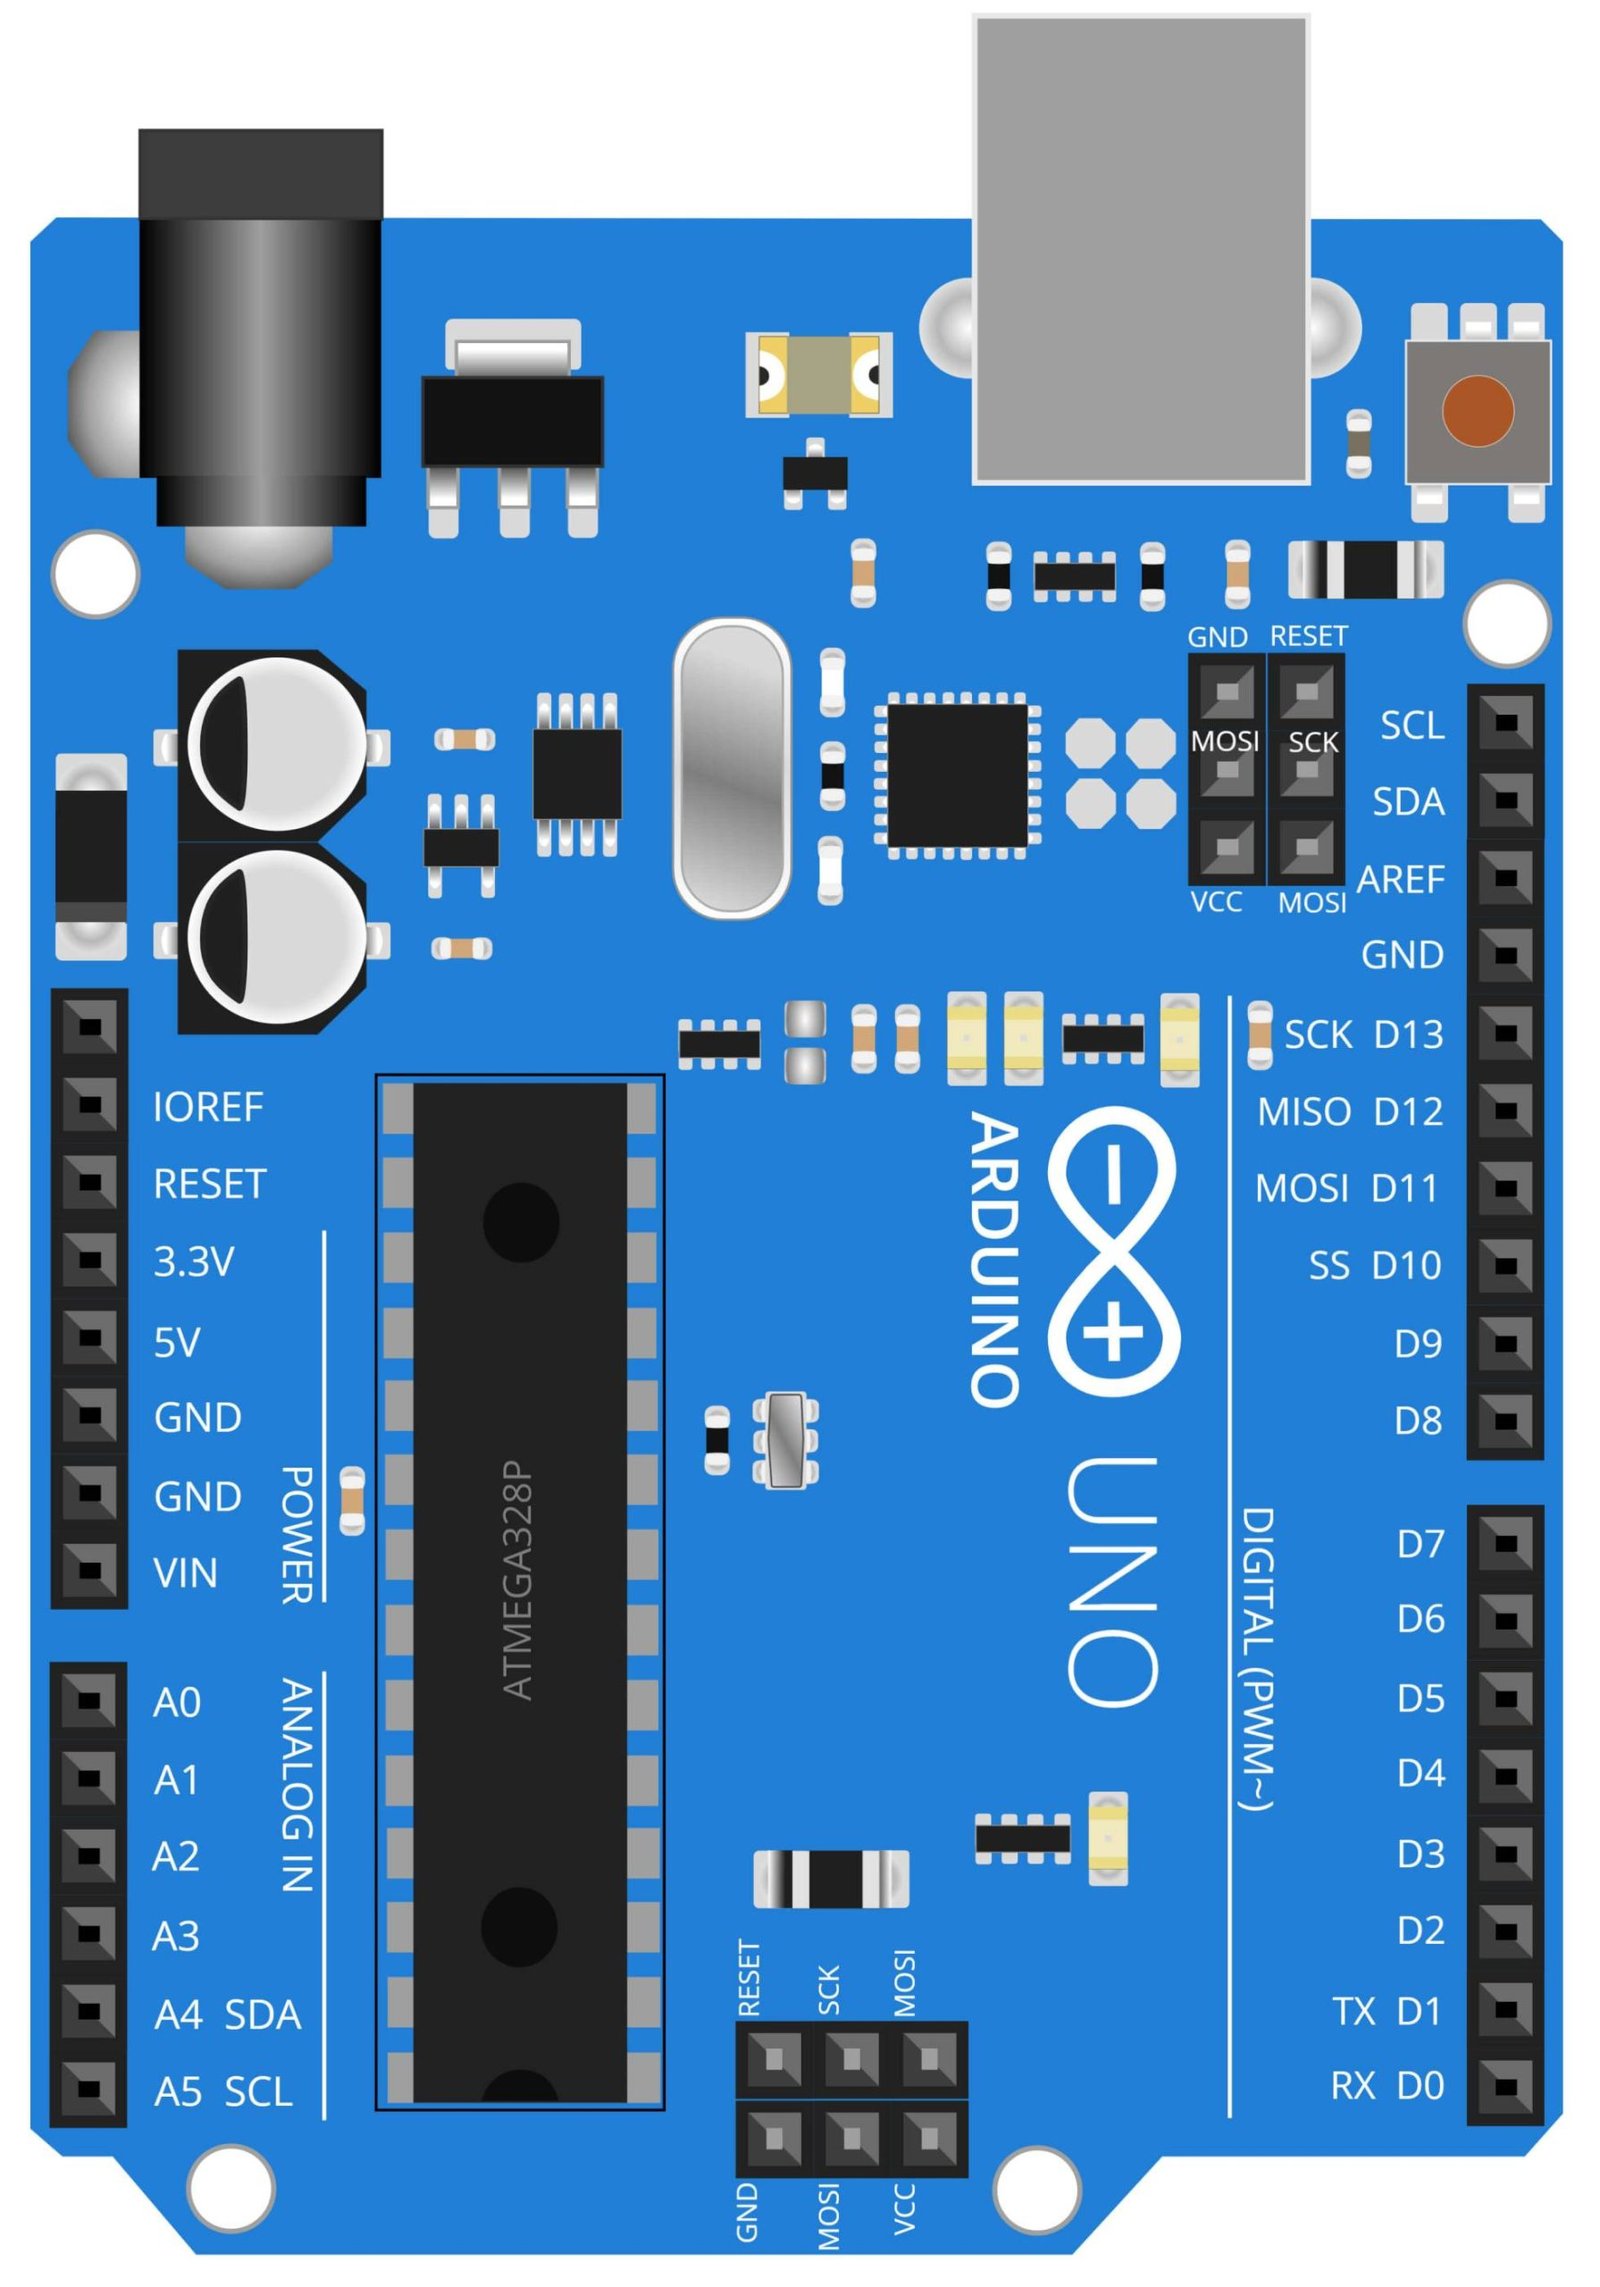
| 1. | Arduino UNO | Arduino UNO Pinout Diagram ⇗ | |
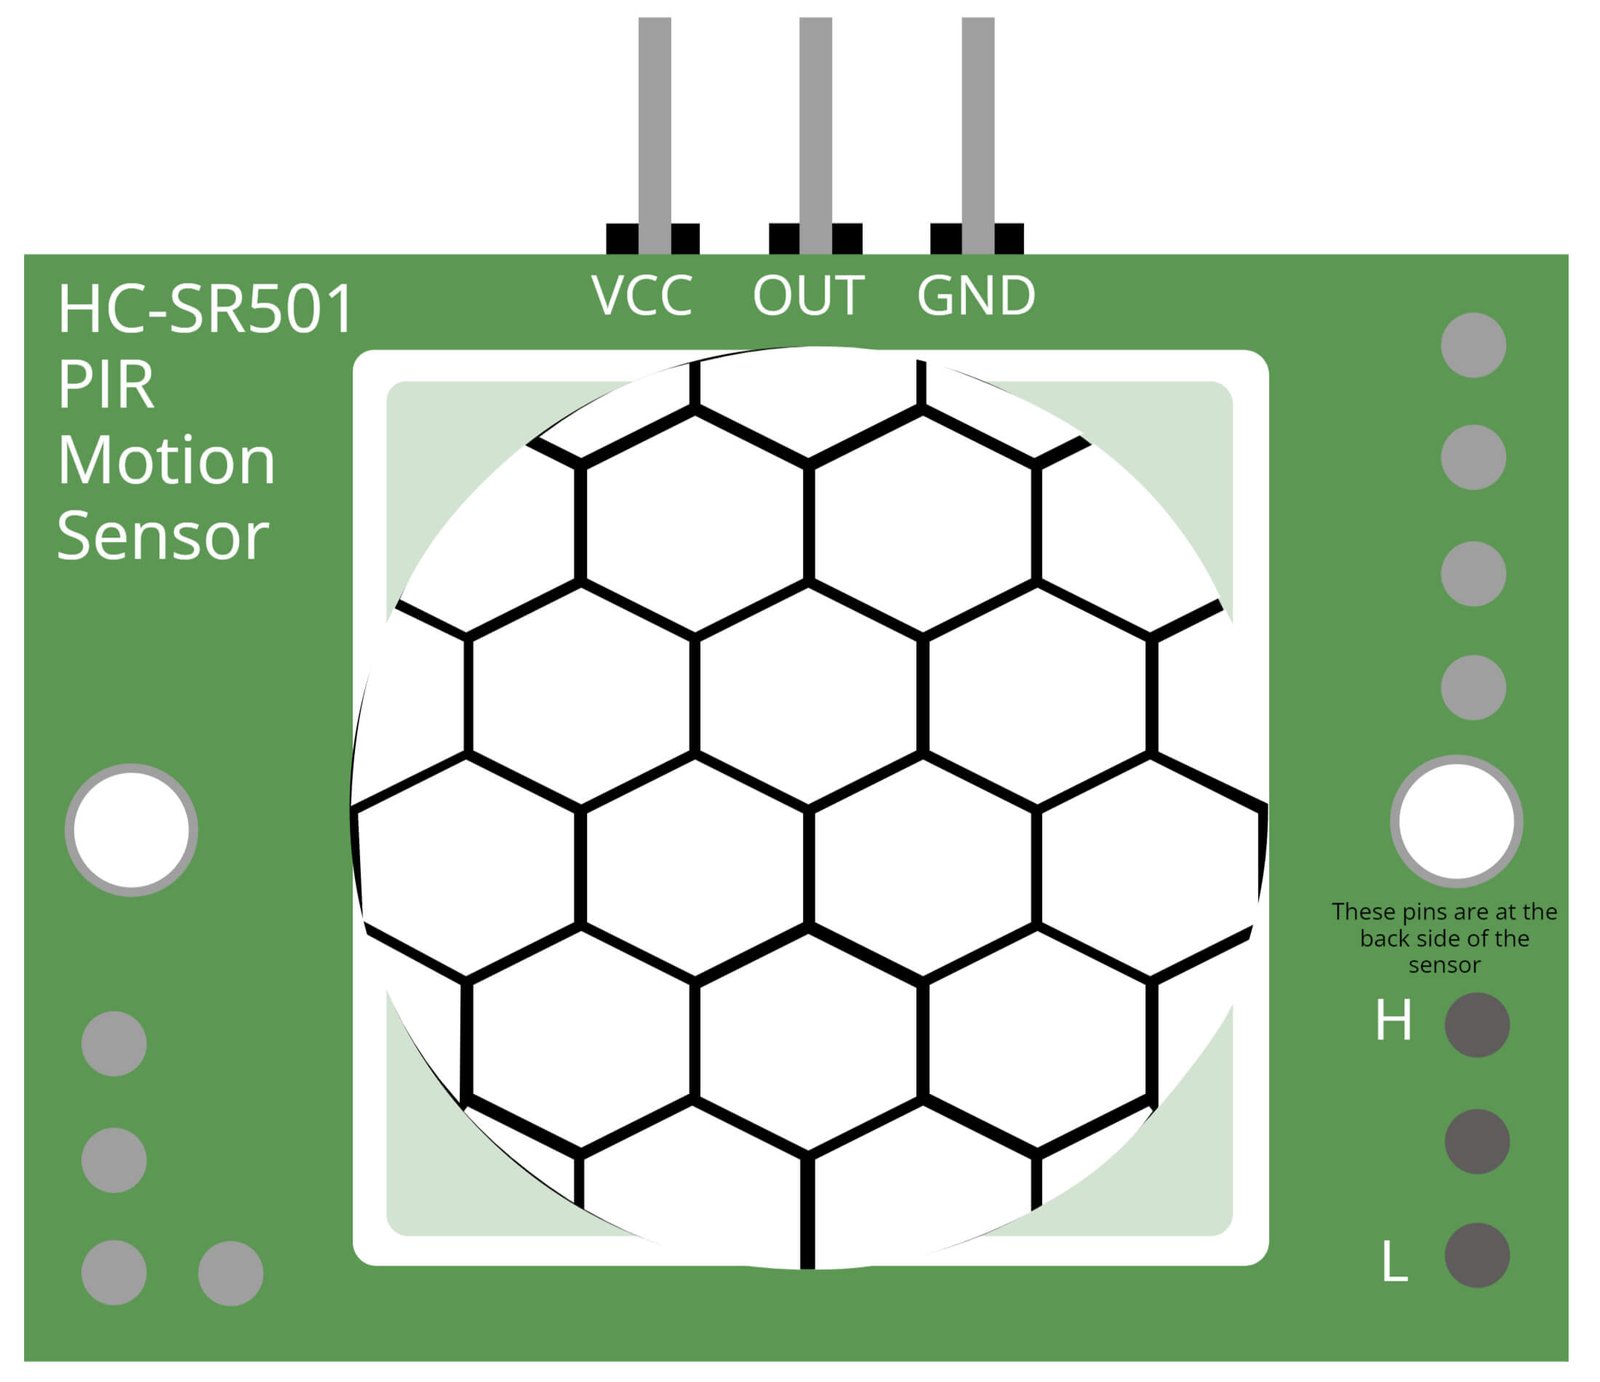
| 2. | PIR Motion Sensor | ||
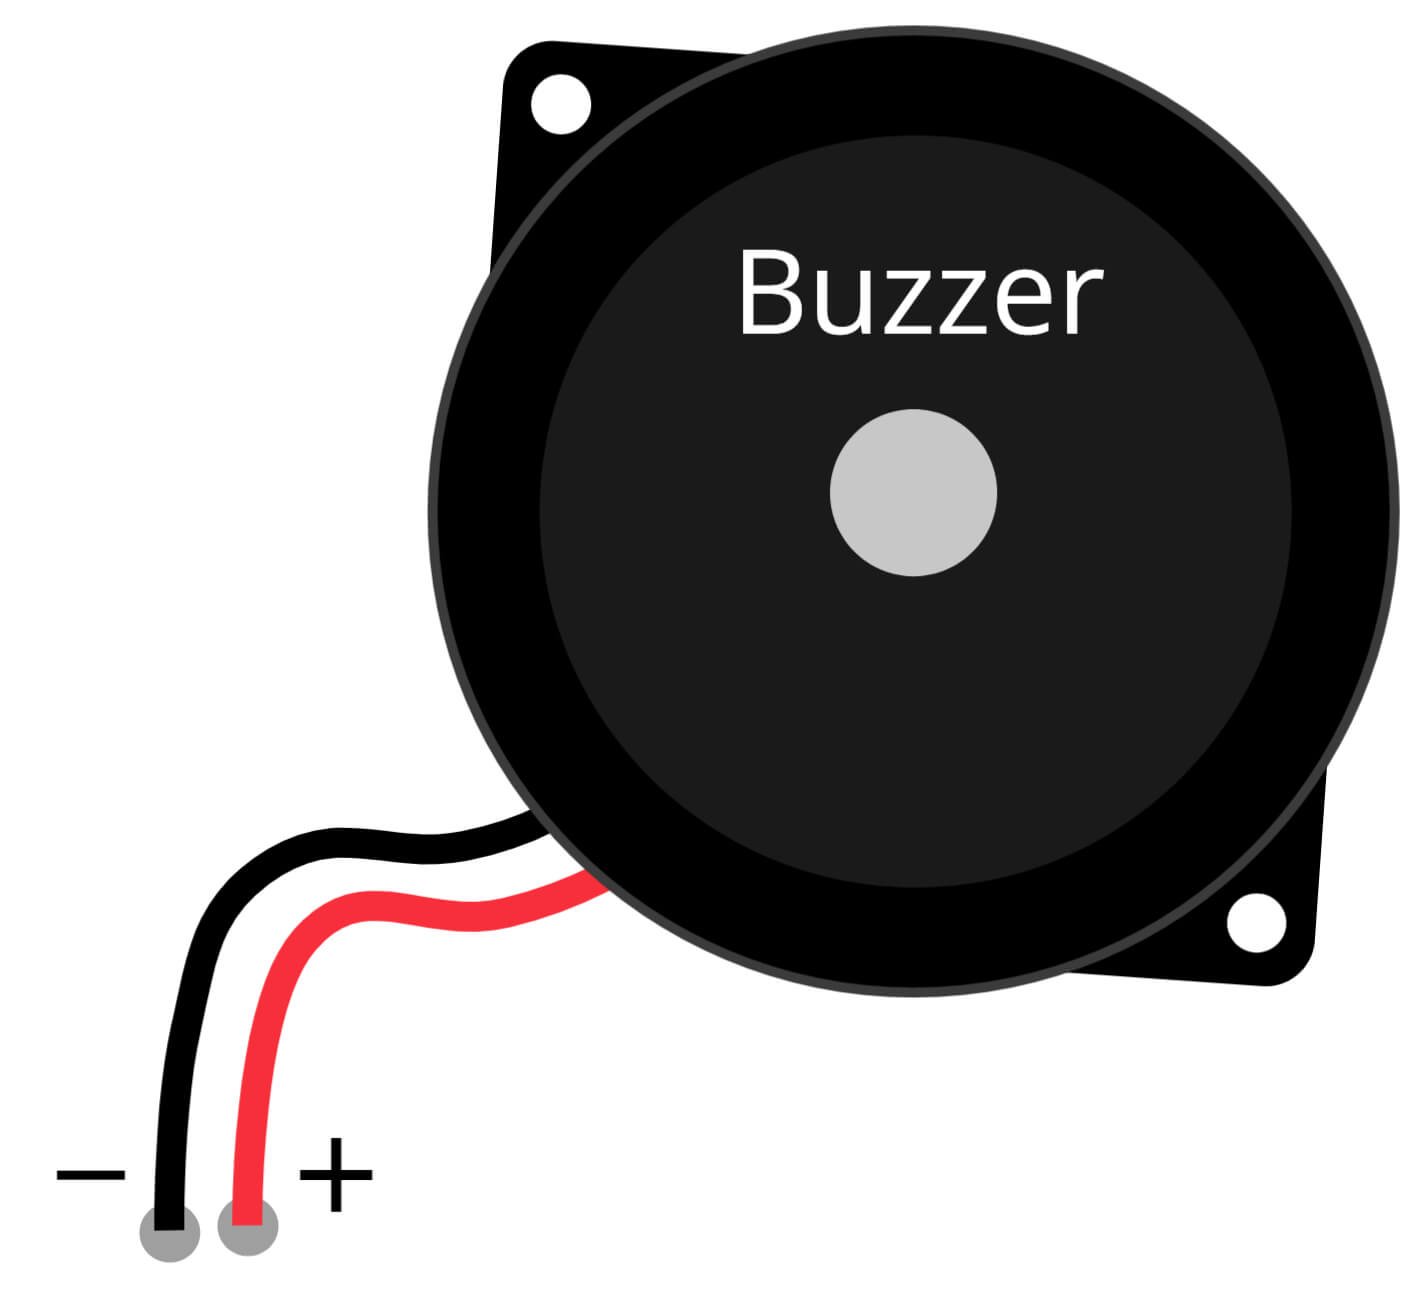
| 3. | Buzzer | ||
| 4. | Red LED |
What is Arduino UNO?
Arduino UNO is an open-source microcontroller board based on the ATmega328P. It is widely used in DIY electronics projects and is known for its ease of use, low cost and a large community of users. The UNO board is equipped with 14 digital input/output pins, 6 analog inputs, a 16 MHz quartz crystal, a USB connection, and a power jack. It runs on the Arduino Integrated Development Environment (IDE) software, which makes it easy for users to write, upload and run code on the board.
Arduino UNO is compatible with a wide range of sensors, actuators, and other devices, which makes it a popular choice for Internet of Things (IoT) projects. Its simple programming language and user-friendly environment make it a great tool for beginners and professionals alike. The UNO is also highly customizable, with a wide range of add-on shields available, including Wi-Fi, Bluetooth, and GSM connectivity.
What is HC-SR501 PIR Motion Sensor?
The HC-SR501 PIR Motion Sensor is a highly versatile and widely used device in the world of electronics and home automation. It is a passive infrared sensor that is designed to detect motion by measuring changes in infrared (heat) radiation levels within its field of view. When a person or object moves within its range, the sensor will trigger an output signal, which can be used to control various devices and systems.
The HC-SR501 is simple to use and requires only a few wires to connect to a microcontroller, such as an Arduino or Raspberry Pi. It is also highly adjustable, with potentiometers that allow users to adjust its sensitivity, trigger time, and LED indication. This makes it a great choice for a wide range of projects, including security systems, light automation, and robotics.
Its compact size and low power consumption make it a great choice for battery-powered projects, and its high sensitivity and fast response time make it a reliable choice for security and surveillance applications.

What is Red LED?
Red LEDs, or Light Emitting Diodes, are a type of semiconductor device that emit light in the red spectrum when a voltage is applied. They are widely used in a variety of applications, including displays, indicators, and lighting. Compared to traditional incandescent lights, red LEDs are more energy efficient, longer-lasting, and generate less heat.
One of the most common uses of red LEDs is in displays and indicators. They are often used in combination with other colored LEDs to create multi-color displays, and are also used to indicate status or warnings in electronic devices. In lighting applications, red LEDs are often used to create specialized lighting effects, such as mood lighting or automotive brake lights.
Red LEDs are widely used in combination with other electronics components, such as microcontrollers and sensors, to create a variety of projects and applications. For example, red LEDs can be used to indicate the status of a system, such as whether it is on or off, or to indicate an alarm condition. They can also be used to control lighting, such as by turning on or off in response to an external signal.
What is Buzzer?
A buzzer, also known as a beeper, is a type of electronic sound-generating device commonly used in a wide range of applications, including alarms, timers, and signaling systems. Buzzers typically produce a loud, continuous beep or a series of beeps of varying lengths and frequencies. They come in different forms, including piezoelectric, magnetic, and electromagnetic, each with its own set of advantages and disadvantages.
Piezoelectric buzzers are the most commonly used type, and are known for their high reliability and low power consumption. They work by generating a mechanical vibration in response to an applied electrical signal, which creates a sound. Magnetic buzzers use a magnetic coil and a vibrating reed to produce sound, while electromagnetic buzzers use an electromagnet to create vibrations in a metal diaphragm.
Buzzers are widely used in a variety of applications, including alarm systems, industrial equipment, automotive systems, and consumer electronics. They are often used in combination with other devices, such as microcontrollers, to provide an audible indication of an event or condition. For example, a buzzer can be used to indicate that a timer has reached its end, or to alert users to an alarm condition.
Arduino with PIR Motion Sensor and LED Interfacing:

Program Code:
const int pirPin = 13;   // define the pin connected to the PIR sensor
const int ledPin = 10;  // define the pin connected to the LED

void setup() {
  pinMode(pirPin, INPUT);   // set the PIR pin as an input
  pinMode(ledPin, OUTPUT);  // set the LED pin as an output
}

void loop() {
  int motion = digitalRead(pirPin);  // read the value from the PIR sensor
  if (motion == HIGH) {
    digitalWrite(ledPin, HIGH);     // turn the LED on
  } else {
    digitalWrite(ledPin, LOW);      // turn the LED off
  }
  delay(100);  // wait for 100 milliseconds
}
That’s it! Upload the code to your Arduino board and you should be able to detect motion with the PIR sensor and turn on the LED. Just make weird signs in front of the PIR Motion sensor and LED will glow.
Arduino with PIR Motion Sensor and Buzzer Interfacing:

Program Code:
const int pirPin = 13;   // define the pin connected to the PIR sensor
const int buzzerPin = 10;  // define the pin connected to the buzzer

void setup() {
  pinMode(pirPin, INPUT);   // set the PIR pin as an input
  pinMode(buzzerPin, OUTPUT);  // set the buzzer pin as an output
}

void loop() {
  int motion = digitalRead(pirPin);  // read the value from the PIR sensor
  if (motion == HIGH) {
    digitalWrite(buzzerPin, HIGH);     // turn the buzzer on
    delay(100);                        // wait for 100 milliseconds
    digitalWrite(buzzerPin, LOW);      // turn the buzzer off
  }
  delay(100);  // wait for 100 milliseconds
}
Upload the code to your Arduino board and you should be able to detect motion with the PIR sensor and turn on the Buzzer. Now again do weird signs in front of the PIR Motion Sensor and the Buzzer will make sound.
Arduino with PIR Motion Sensor, LED and Buzzer:
So for this we have already made project on this one.
You can check the project from this link: Motion Detector using Arduino, HC-SR501 PIR Motion Sensor, LED and Buzzer ⇗
Note: In the above project mentioned, we have used Arduino Nano but you can still use the same connections and code for Arduino UNO as well.
Projects related to PIR Motion Sensor and Arduino:
Simple Motion Detector using PIR Motion Sensor and LED ⇗
Motion Detector using Arduino, HC-SR501 PIR Motion Sensor, LED and Buzzer ⇗