Description:
In this project, we control Servo Motor using Arduino and Flex sensor for no reason.
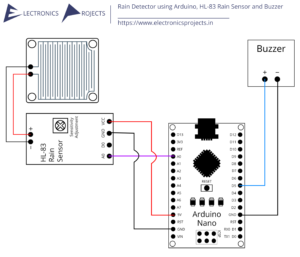
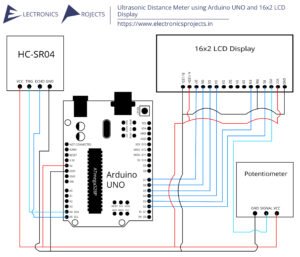
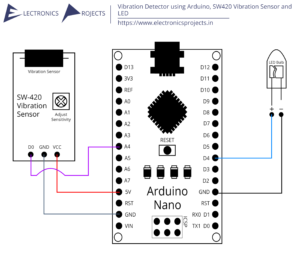
Circuit Diagram:

Components:
| SR. NO. | COMPONENT | PINOUT DIAGRAM | BUY |
|---|---|---|---|
| 1 | Arduino Nano (Other Arduinos can be used too) | ||
| 2 | SG90 Servo Motor | ||
| 3 | Flex Sensor |
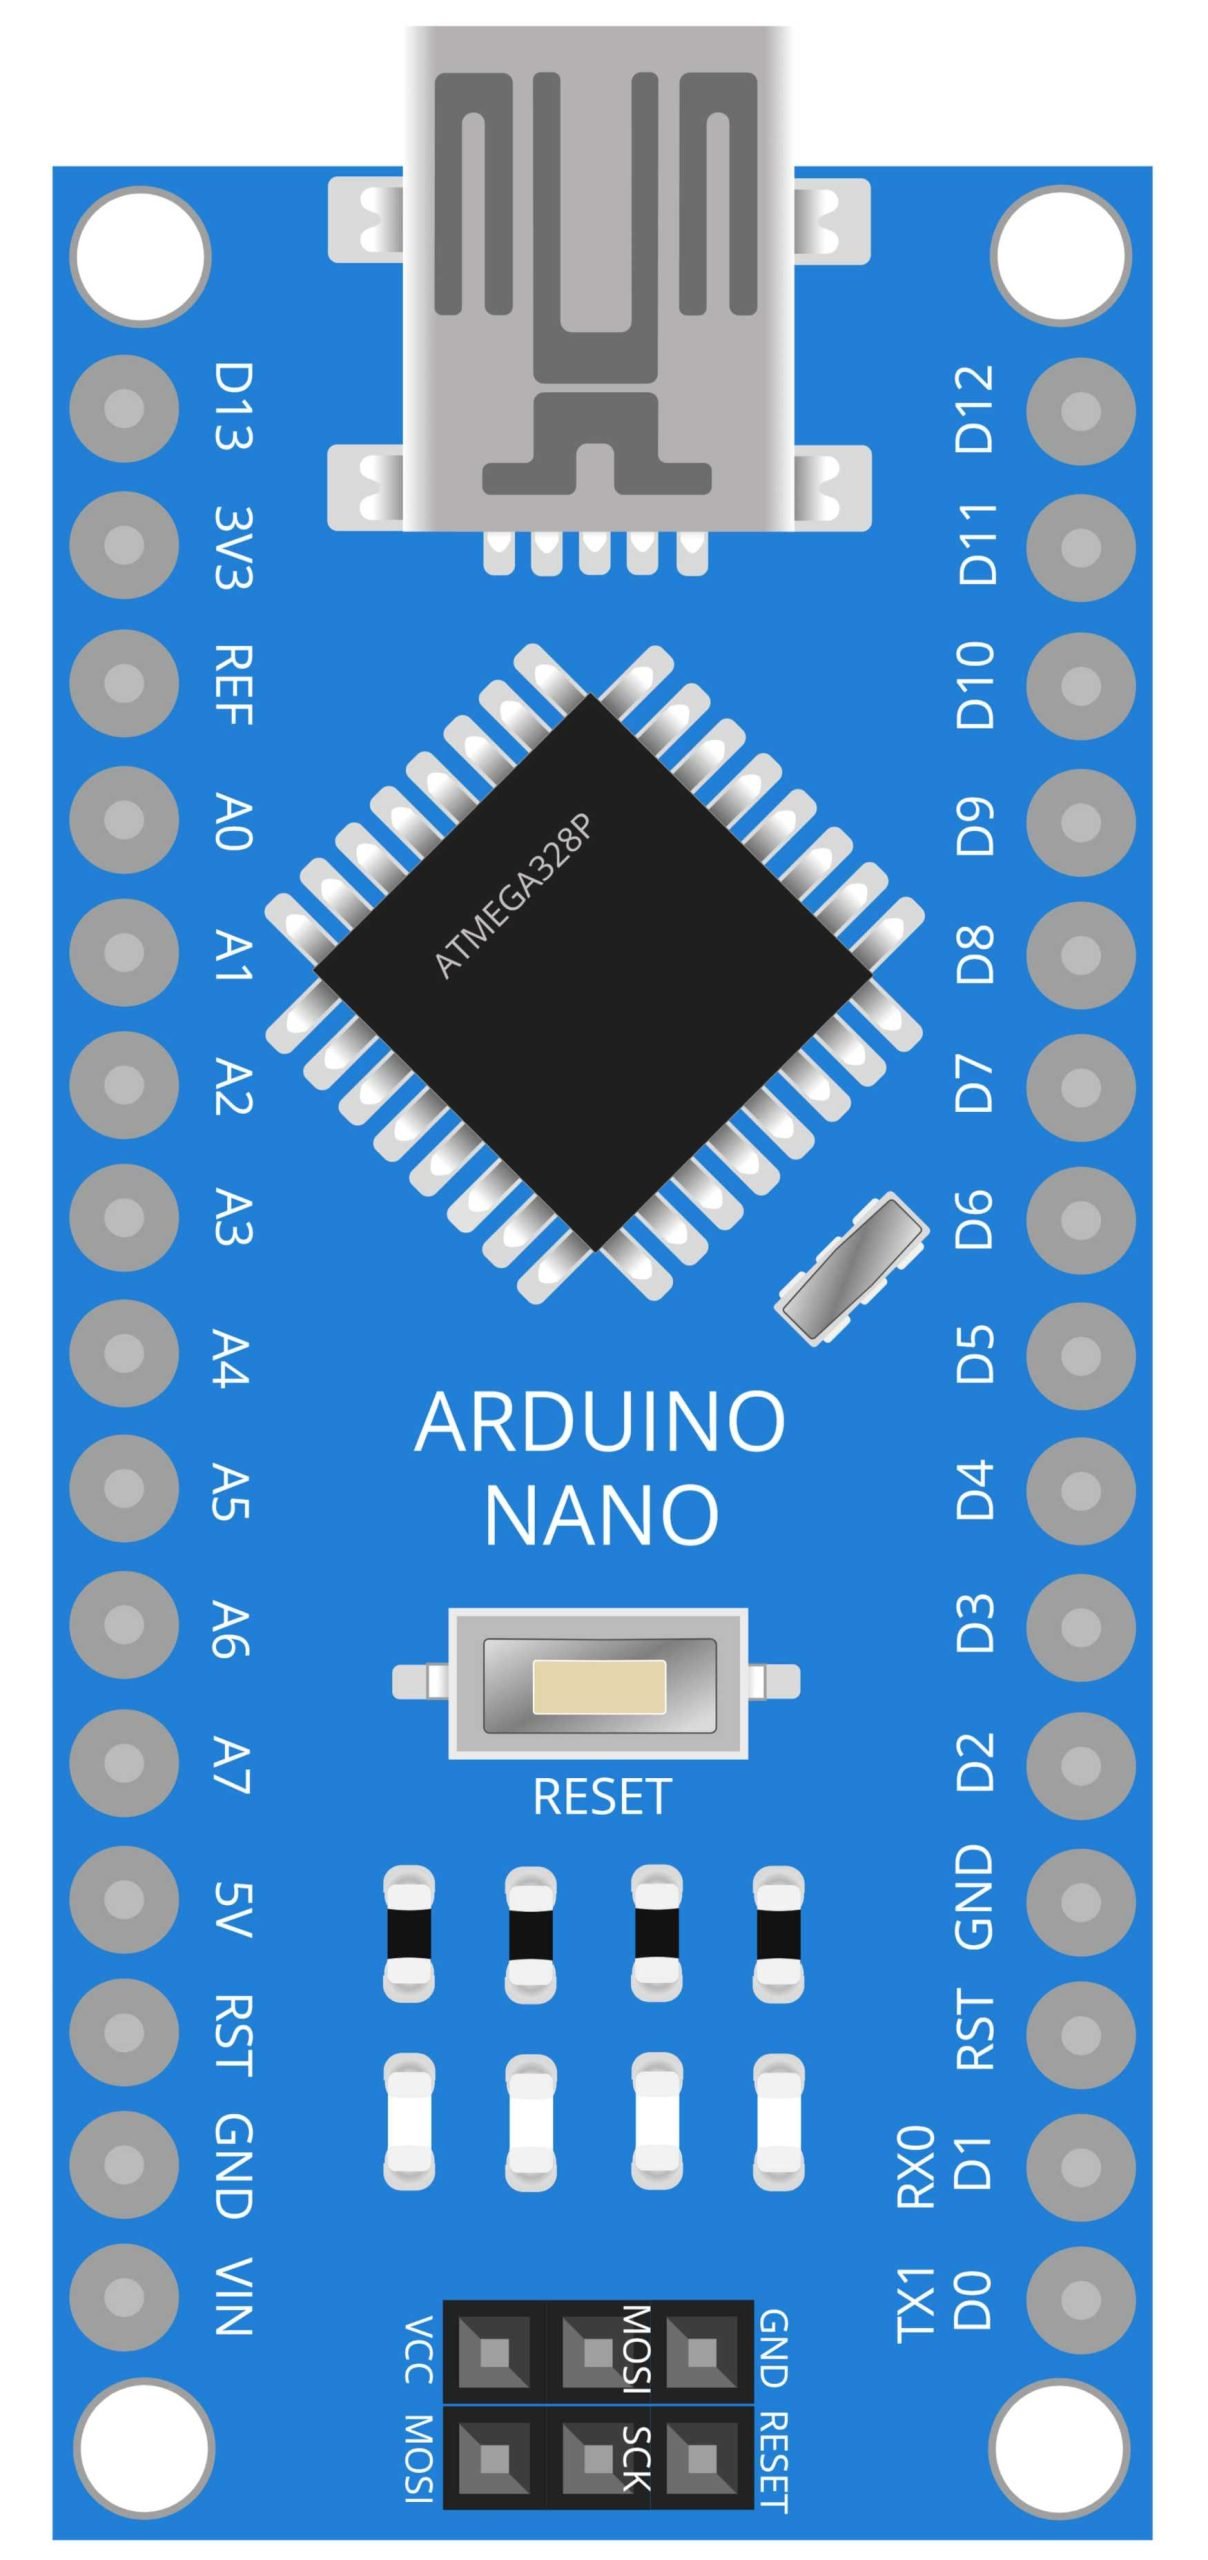
Arduino Nano
The Arduino Nano is a compact, breadboard-friendly version of the popular Arduino microcontroller platform. It is based on the ATmega328P microcontroller and has a similar set of features to the Arduino Uno, including 14 digital input/output pins, 6 analog inputs, a 16 MHz quartz crystal, and a USB connection for programming and power. The Nano can be powered via the USB connection or an external power supply. It is also compatible with a wide range of shields and sensors, making it a versatile choice for a variety of projects. In this project, the Arduino Nano is used to read the flex sensor’s input and control the position of the servo motor based on that input. This allows for the creation of a flexible, interactive system that can respond to changes in its environment.
Steps and Info:
1. Get correct components as given. You can buy online or offline. I buy electronics components mostly from Amazon.
2. Start connecting the components. If you are new to connecting components in an electronic circuit, then use a Breadboard or you can straight up make connections using Jumper wires but it will create problem when there will be two or more connections needed at one pin (for example two or more different sensors 5V connection to Arduino’s 5V pin). But before soldering components on a PCB or printing a PCB for your circuit, better try using breadboard so that any errors and mistakes can be observed on breadboard and not after soldering. Or do connections in your way.
3. Now after building the circuit, download the Arduino IDE from https://www.arduino.cc/ website.
4. If you are new to Arduino IDE software, then watch this video we made specially for beginners about Arduino IDE.
5. If you know Arduino IDE then straight up copy the code we given and paste it into the Arduino IDE sketch.
6. Connect the Arduino to your Computer/device. Select a proper port, proper Arduino type and whatever other settings are. Here it is Arduino UNO. (If you don’t know what this all is then watch our video: ).
7. Compile the code and Upload it.
8. If any error occurs then try to troubleshoot it by finding/copy-pasting it into our Solve Errors page https://electronicsprojects.in/solve-errors/, or you can straight up paste the error on Internet and you know the rest. Also check if there are no spelling/syntax errors in the code. Compile the code again once to check if errors are fixed. I have given proper connections and code but still nothing is perfect.
9. Once code compiles and uploads smoothly, you can start testing the working of your circuit/project.
10. For this project, just take your flex sensor and start bending it. As it bends, the servo motor will move its shaft. The more sharp and fast you bend the flex sensor, the motor will move accordingly.
11. If thing doesn’t work as intended then check connections and code. Also you can talk with me and the community through discord. All the links to social is given at the right side of this page.
Program Code:
/* https://www.electronicsprojects.in Control Servo Motor using Arduino and Flex Sensor */

#include <Servo.h>
Servo servo1;
const int flex = 0;
void setup()
{
Serial.begin(9600);
servo1.attach(5);
}
void loop()
{
int flexsensor;
int servomotor;
flexsensor = analogRead(flex);
servomotor = map(flexsensor, 600, 900, 0, 180);
servomotor = constrain(servomotor, 0, 180);
servo1.write(servomotor);
Serial.print("Flex Sensor: ");
Serial.print(flexsensor);
Serial.print("Servo Motor: ");
Serial.println(servomotor);
delay(20);
}